Modulation
Massive X puts a strong focus on modulation with its flexible architecture and sophisticated modulation sources.
Note
Editing modulation is not available in Massive X Player.
Modulation adds movement to your sound by changing controls over time. This movement defines the character and expression of a sound as you play it, from the contour of its amplitude, or volume level, to its timbral qualities. In technical terms, modulation is composed of slowly changing signals that cannot be heard directly. When you apply modulation to controls in your patch, the controls change their value according to the shape of the modulation signal.
Massive X puts a strong focus on the concept of modulation by combining sophisticated modulation sources with an intuitive system for modulation assignment: modulation sources can be applied to any number of parameters using drag and drop, and the modulation assignments are visualized directly in the user interface. Color-coded rings or lines next to controls show not only which type of source is used, but also the amount of modulation applied to the parameter.
Modulation overview
The following key elements and controls are used for modulation in Massive X:
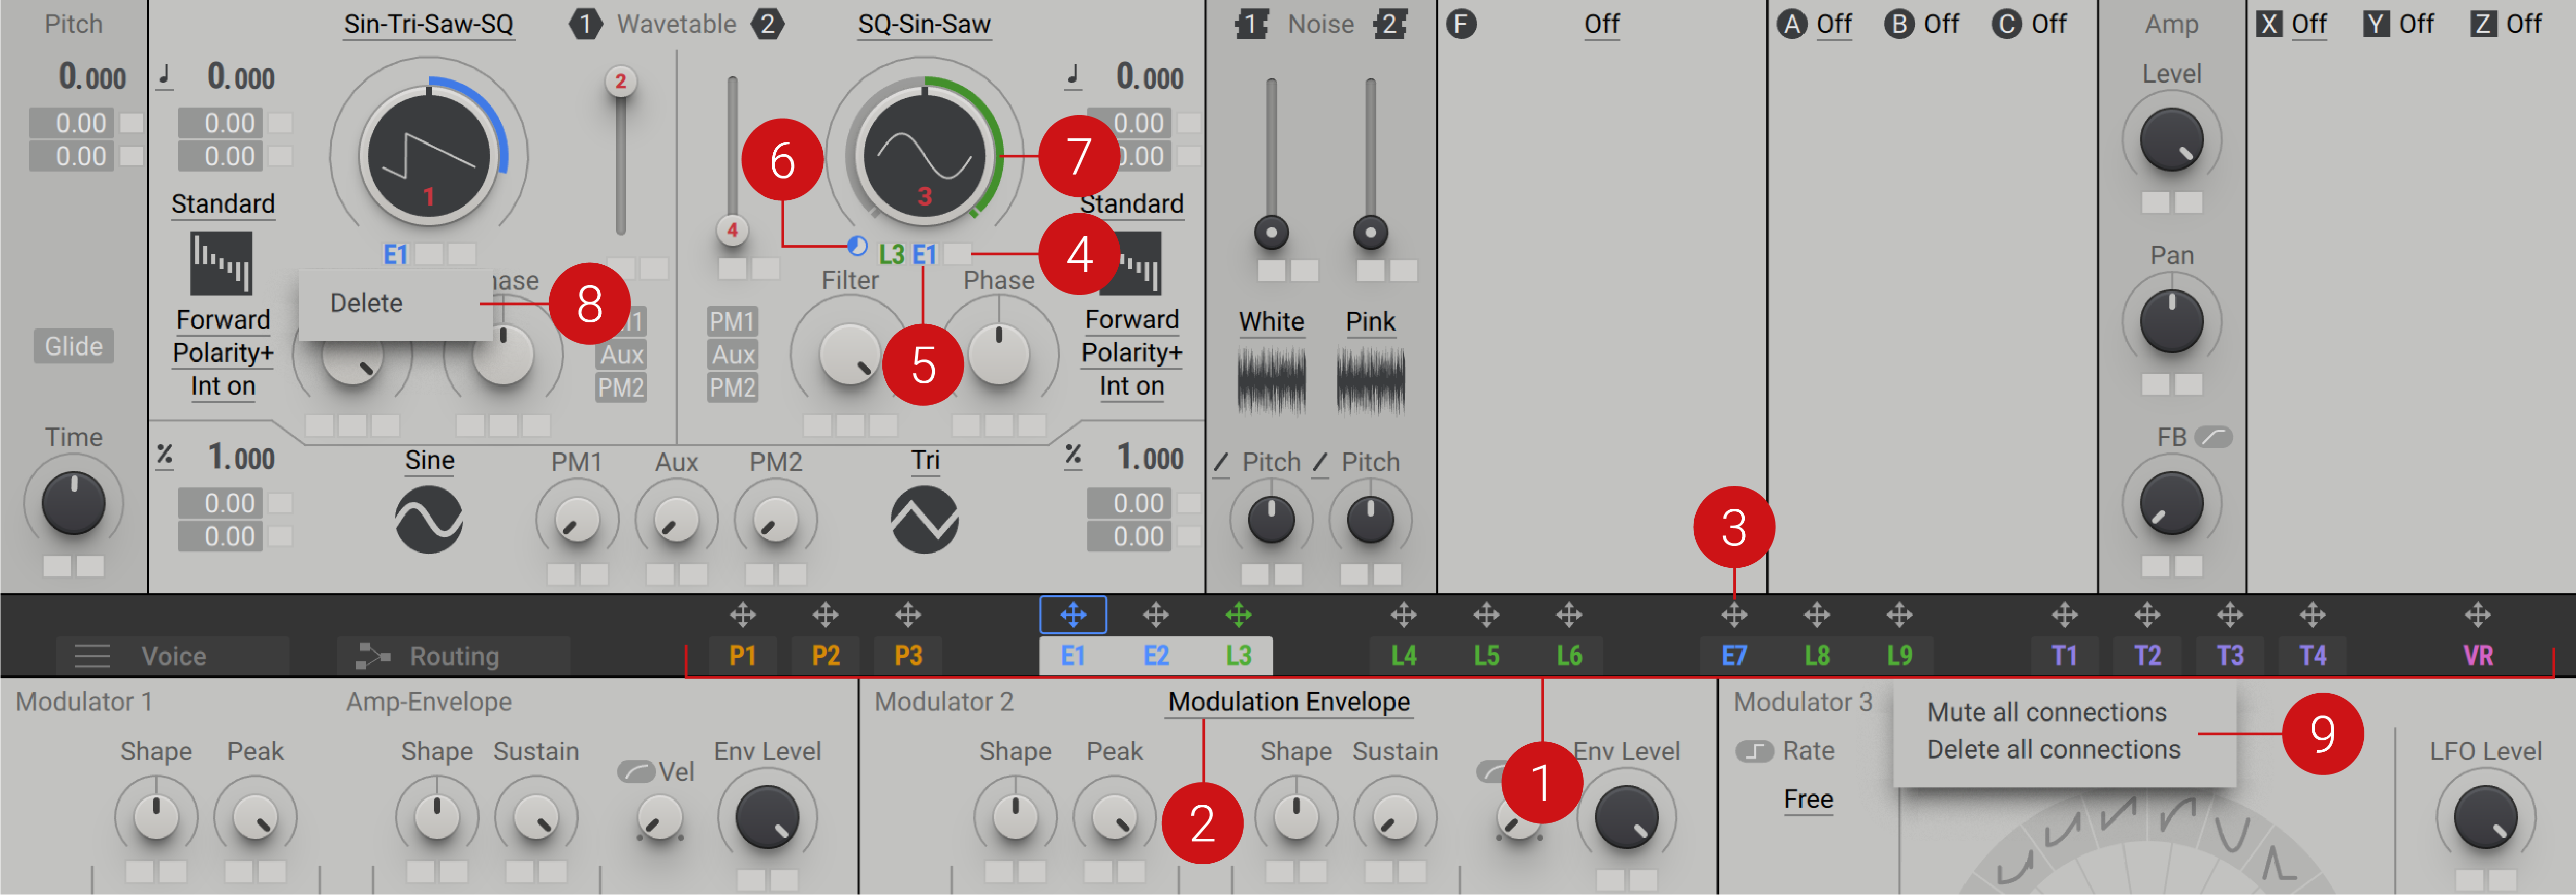
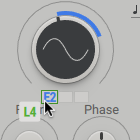
Modulation Sources: Access all available modulation sources from the navigation bar. You can display them in the Editor in groups of three by clicking on their labels (e.g. P1, E2, L8, T3). For more information, refer to Modulation sources.
Modulator Menu: Select from four available Modulators (Modulation Envelope, Excited Envelope, Switcher LFO, Random LFO). You can load one Modulator for each of the blue and green modulation sources in the navigation bar. For more information, refer to Modulators.
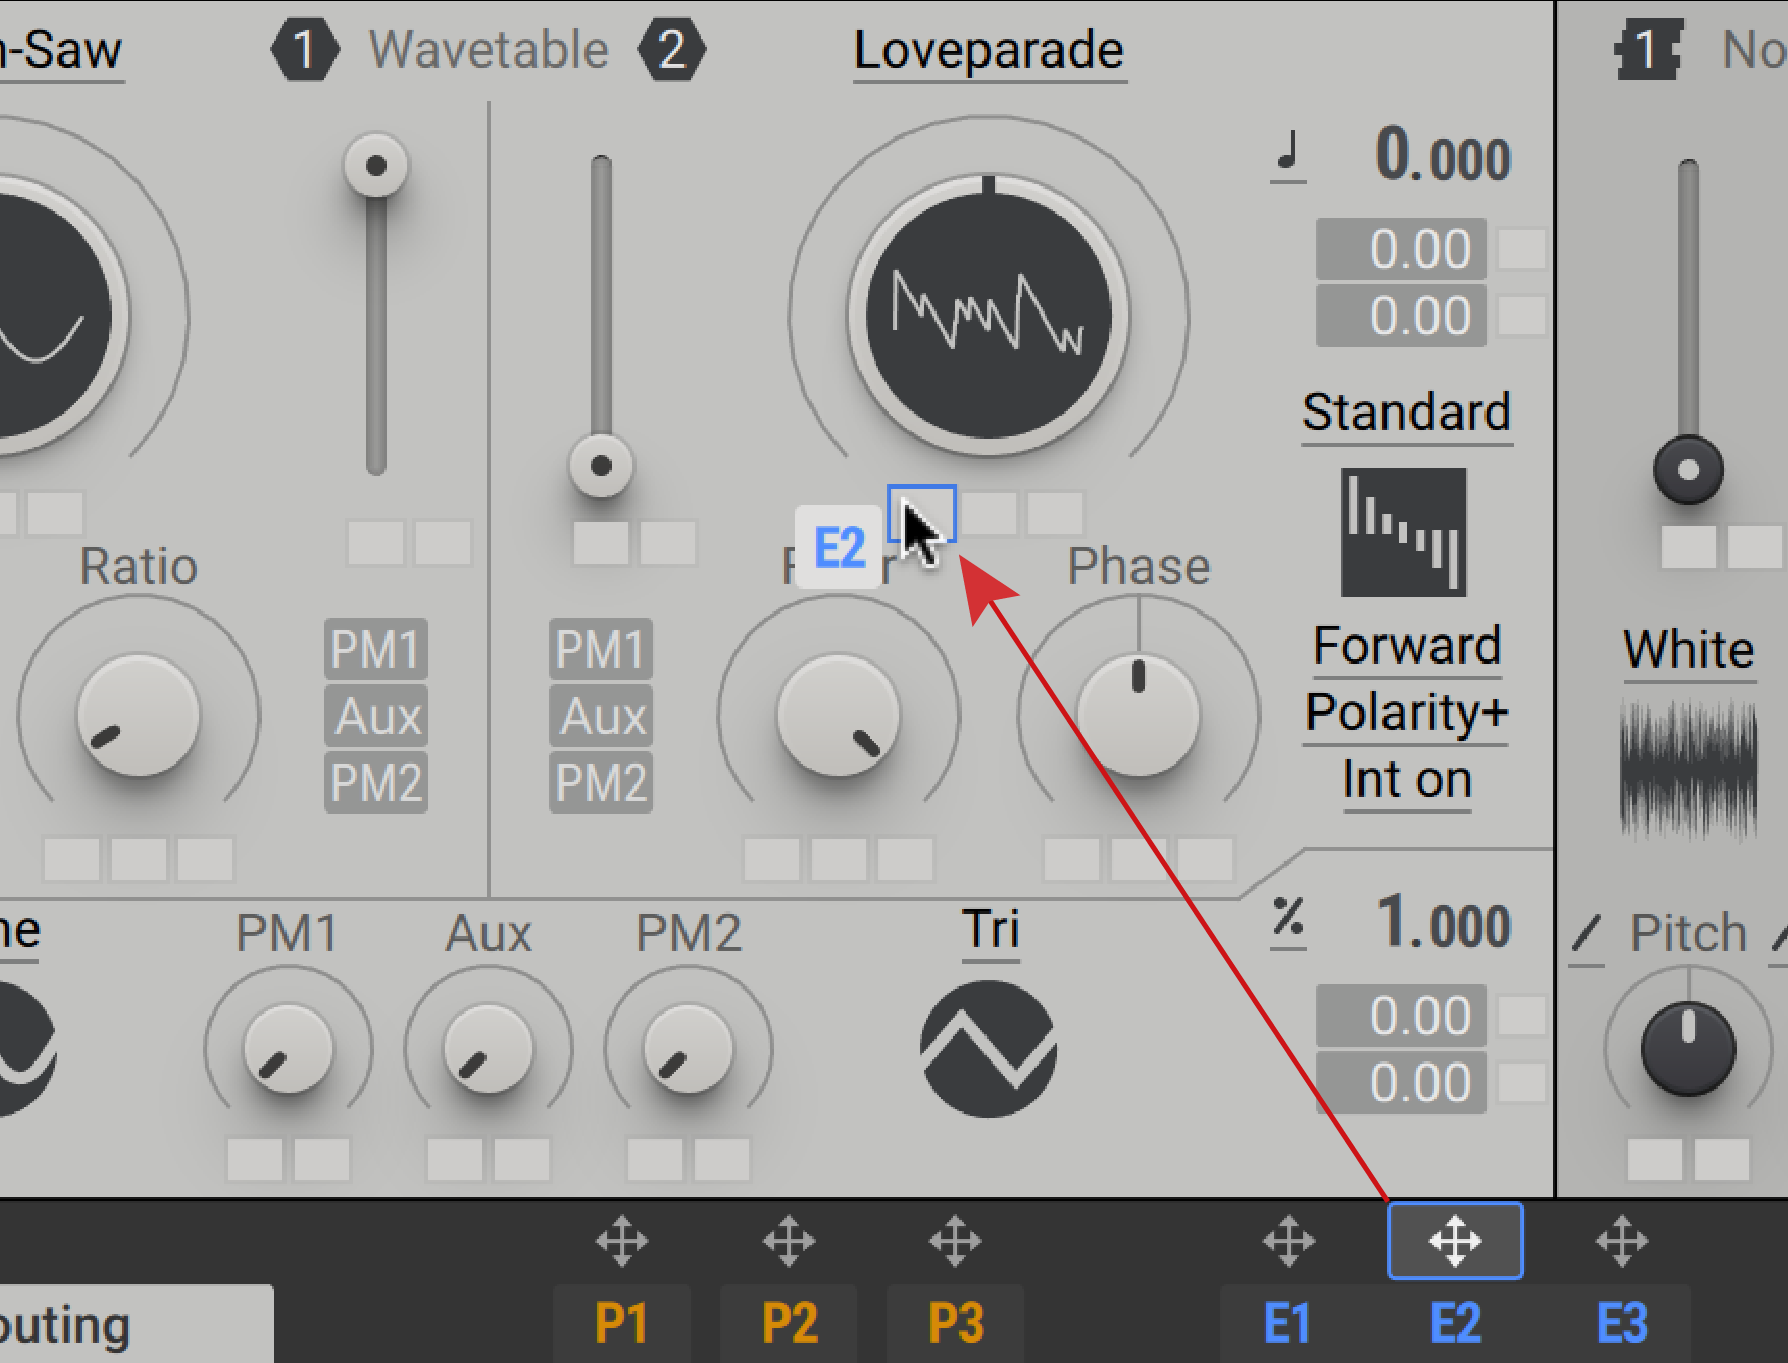
Modulation Assign (arrow cross icon): Assign modulation sources to parameters in Massive X. Drag and drop the assign icon onto a modulation slot, or click the assign icon and then select the modulation slot to assign a modulation source. For more information, refer to Assigning modulation.
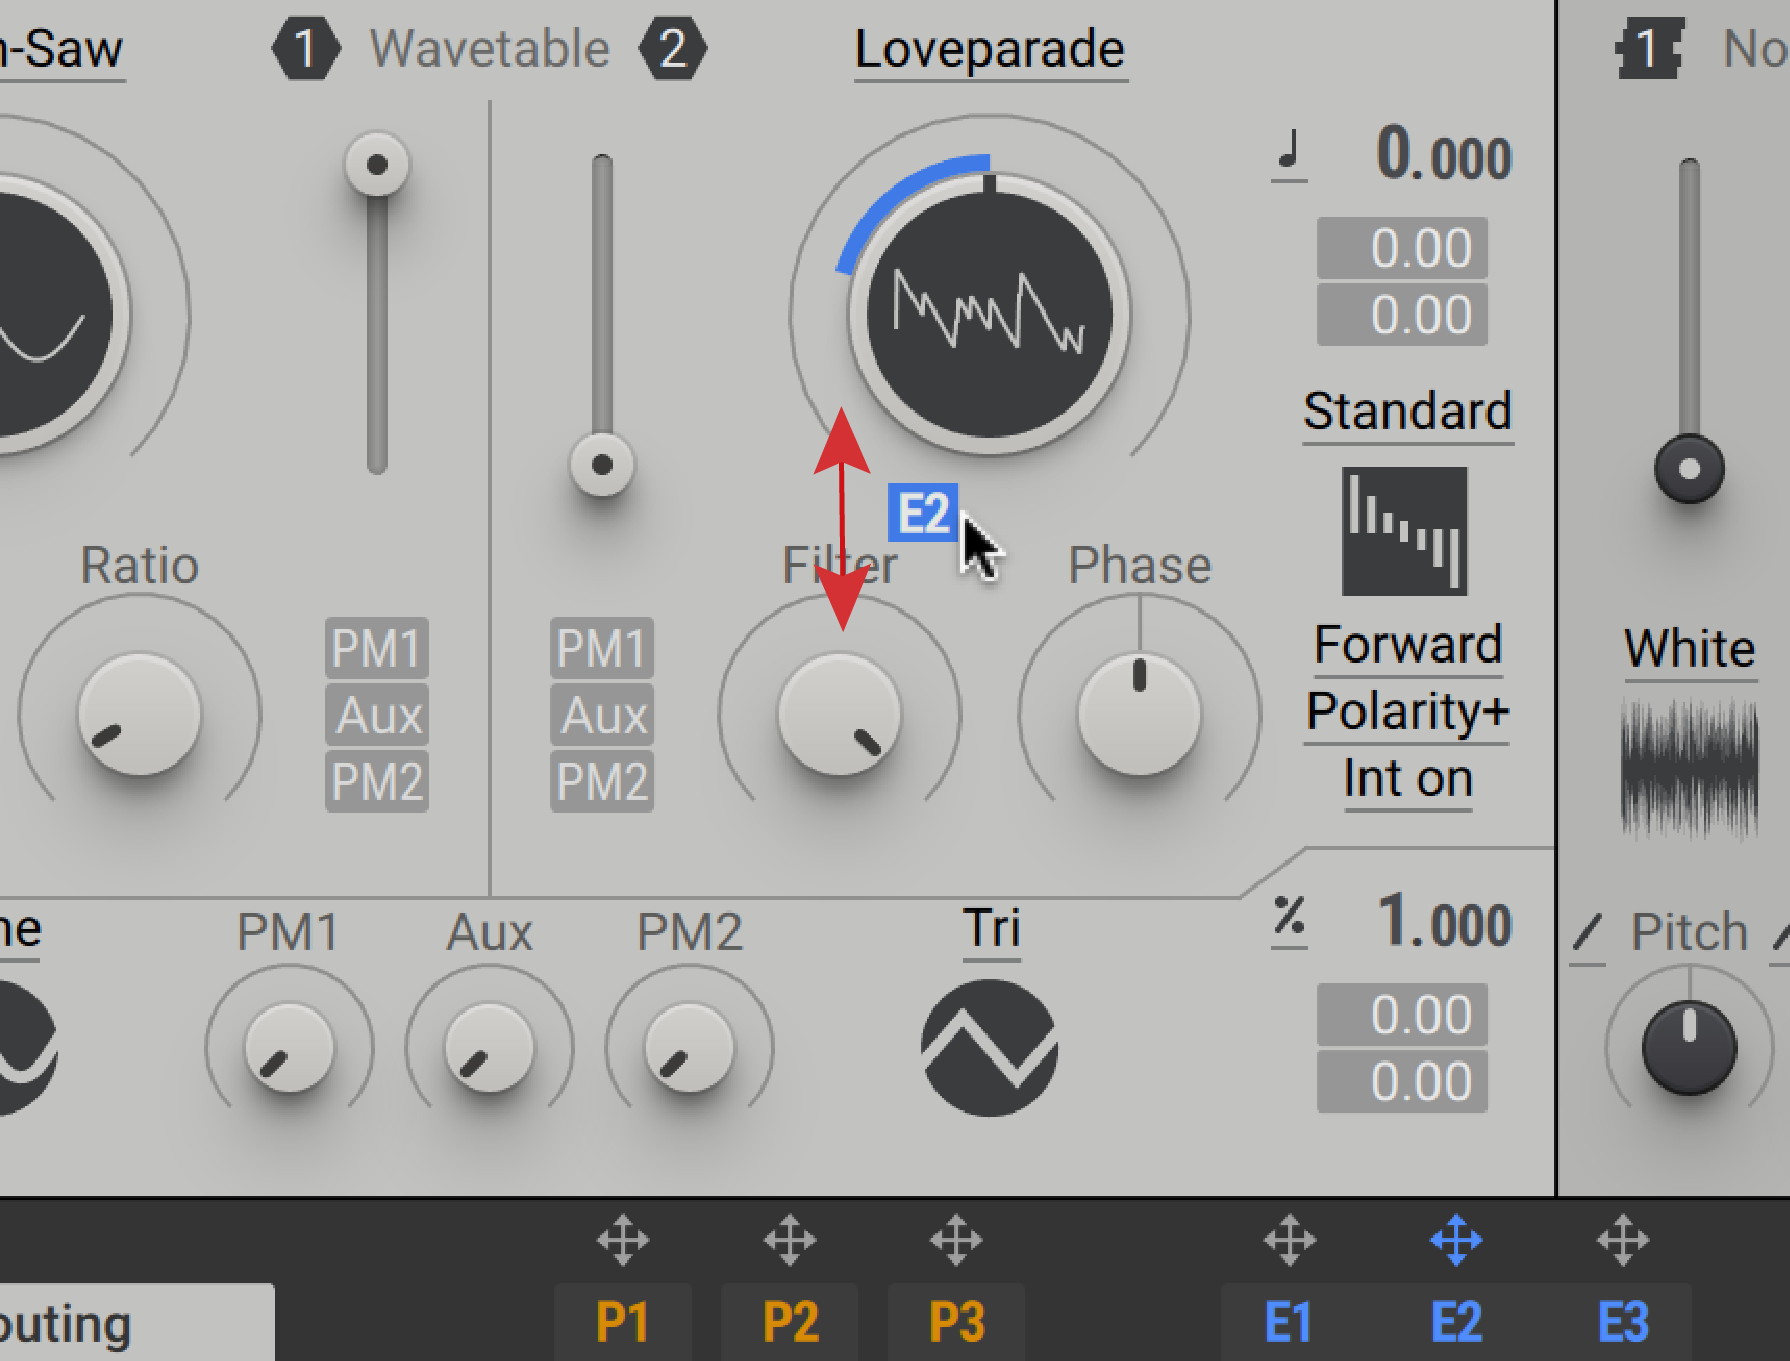
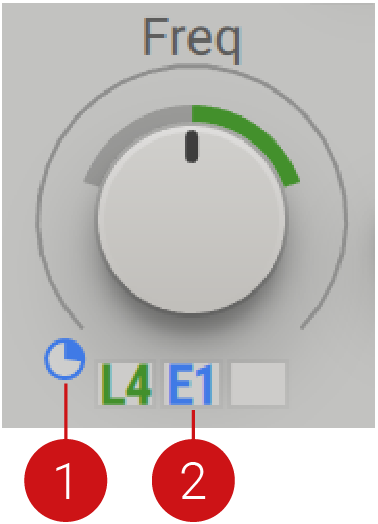
Modulation Slot: Displays and controls the modulation assignment for the corresponding parameter. Two modulation slots are available for each parameter (left and right slot beneath a control). When a modulation source is assigned, clicking and dragging the modulation slot up and down adjusts the modulation amount as displayed by the color-coded ring or line next to the control. For more information, refer to Assigning modulation.
Sidechain Modulation Slot: Assign a modulation source for sidechain modulation. Sidechain modulation controls the amount of modulation applied to the slots left and right. The sidechain modulation slot can also be used like a regular modulation slot. For more information, refer to Sidechain modulation.
Sidechain Modulation Amount: Adjust the amount of sidechain modulation applied to the corresponding modulation slot from the sidechain modulation slot. For more information, refer to Sidechain modulation.
Modulation Amount: Adjust the amount of modulation applied to the parameter from the modulation source. The modulation amount is represented by a color-coded ring or line next to the control. For more information, refer to Assigning modulation.
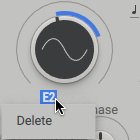
Modulation Slot Menu: Open this context menu by right-clicking a modulation slot. Use it to delete the modulation assignment for this modulation slot.
Modulation Source Menu: Open this context menu by right-clicking a modulation source in the navigation bar. Use it to mute or delete all modulation assignments for the selected modulation source.
Modulation sources
Massive X provides a comprehensive set of modulation sources that can be used to add movement to your sound. All modulation sources can be assigned and accessed from the navigation bar:

Performers: The three Performers are specialized sequencers for modulation. They provide a flexible way to apply complex, rhythmical movement to a range of parameters in Massive X. For more information, refer to Performers.
Modulators: The four Modulators include a Modulation Envelope, an Exciter Envelope for physical modeling, a Switcher LFO for periodic modulation, and a Random LFO for randomized effects. Modulators can be loaded to any of the eight available slots, with E1 hard-wired to control the Amplifier level. For more information, refer to Modulators.
Trackers: The four Trackers provide deep functionality for advanced keyboard tracking. They map incoming MIDI control data to modulation that you can apply to any parameter. This enables you to define exactly how your sound responds to MIDI input. For more information, refer to Trackers.
Voice Randomization: The Voice Randomization feature allows you to add pseudo-random variation to your sound, with results ranging from subtle differences in tuning to dramatic voicing effects. For more information, refer to Voice Randomization.
Assigning modulation
Before the effect of the envelope or LFO can be heard, it must first be assigned to a parameter's modulation slot. Modulation sources can be assigned to multiple parameters at once, and the process for assigning each is the same. For information on removing and replacing Modulation assignments, refer to Removing and replacing modulation.
To assign a modulation source to a parameter:
Drag and drop the arrow cross icon of a modulation source to a modulation slot. Alternatively, click the arrow cross icon and then select the modulation slot to make the assignment.
Alternatively, click the arrow cross icon and then select the modulation slot to make the assignment.
Click and drag the modulation slot upwards or downwards to increase the modulation amount applied to the parameter. Dragging the slot upwards applies positive (non-inverted) modulation, and dragging the slot downwards applies negative (inverted) modulation.
The modulation source is assigned and applied to the selected parameter.
Tip
You can double-click the modulation slot to set the maximum modulation amount or reset the amount to zero.
Removing and replacing modulation
You can remove or replace the modulation assignment of any modulation slot while retaining the modulation amount that has been set. When assigning a new modulation source, the original modulation amount is taken over.
To remove a modulation assignment:
Right-click the modulation slot.
Select Delete.
To replace a modulation assignment with another:
Drag and drop the new modulation source onto the already assigned modulation slot.
Note
Alternatively, you can first click the arrow icon and then the modulation slot to make an assignment.
Sidechain modulation
Sidechain modulation allows you to add movement to the modulation amount, or strength, of other modulation assignments. Instead of modulating the parameter itself, it changes the intensity of how another modulation source is applied to the parameter.
Sidechain modulation is facilitated by the following two key elements:
 |
Sidechain Modulation Slot: Used to assign a modulation source for sidechain modulation, which can be applied to the modulation slots to the left and to the right. It is located in the middle of the three modulation slots. It can also be used for direct modulation of the parameter like a regular modulation slot.
Sidechain Modulation Amount: Used to adjust the amount of sidechain modulation applied to the corresponding modulation slot from the sidechain modulation slot.
Tip
In technical terms, the signal produced by the modulation source assigned to a modulation slot is multiplied by the signal produced by the modulation source assigned to the corresponding sidechain modulation slot, by a factor set with the sidechain modulation amount control.