Performers
Massive X's three Performers are specialized sequencers for modulation. They provide a flexible way to apply complex, rhythmical movements to parameters.
The three Performers are specialized sequencers for modulation. They provide a flexible way to apply complex, rhythmical movements to parameters that usually are achieved by automation created in a host sequencer. Therefore they are key to make intricate modulations part of a Massive X sound.
They are accessed and assigned via the Navigation Bar using the tabs labeled P1, P2, and P3. For information about assigning the Performers to parameters, refer to Assigning the Performers.
Basic and Custom editor options that enable you to quickly paint complex modulation shapes onto the Performer grid in order to form up to 12 patterns. The default Basic editor offers flexibility, while the Custom editor allows you to create a complex rhythmic grid for tailored and precise results.
The Performers can be controlled using the Remote Octave, which allows you to switch between patterns remotely using MIDI notes as key switches, or by selecting one of the 12 patterns using the mouse in the footer of Massive X. For more information about the Remote Octave, refer to Remote Octave.
Performers overview
The Performers contains the following key elements and controls:
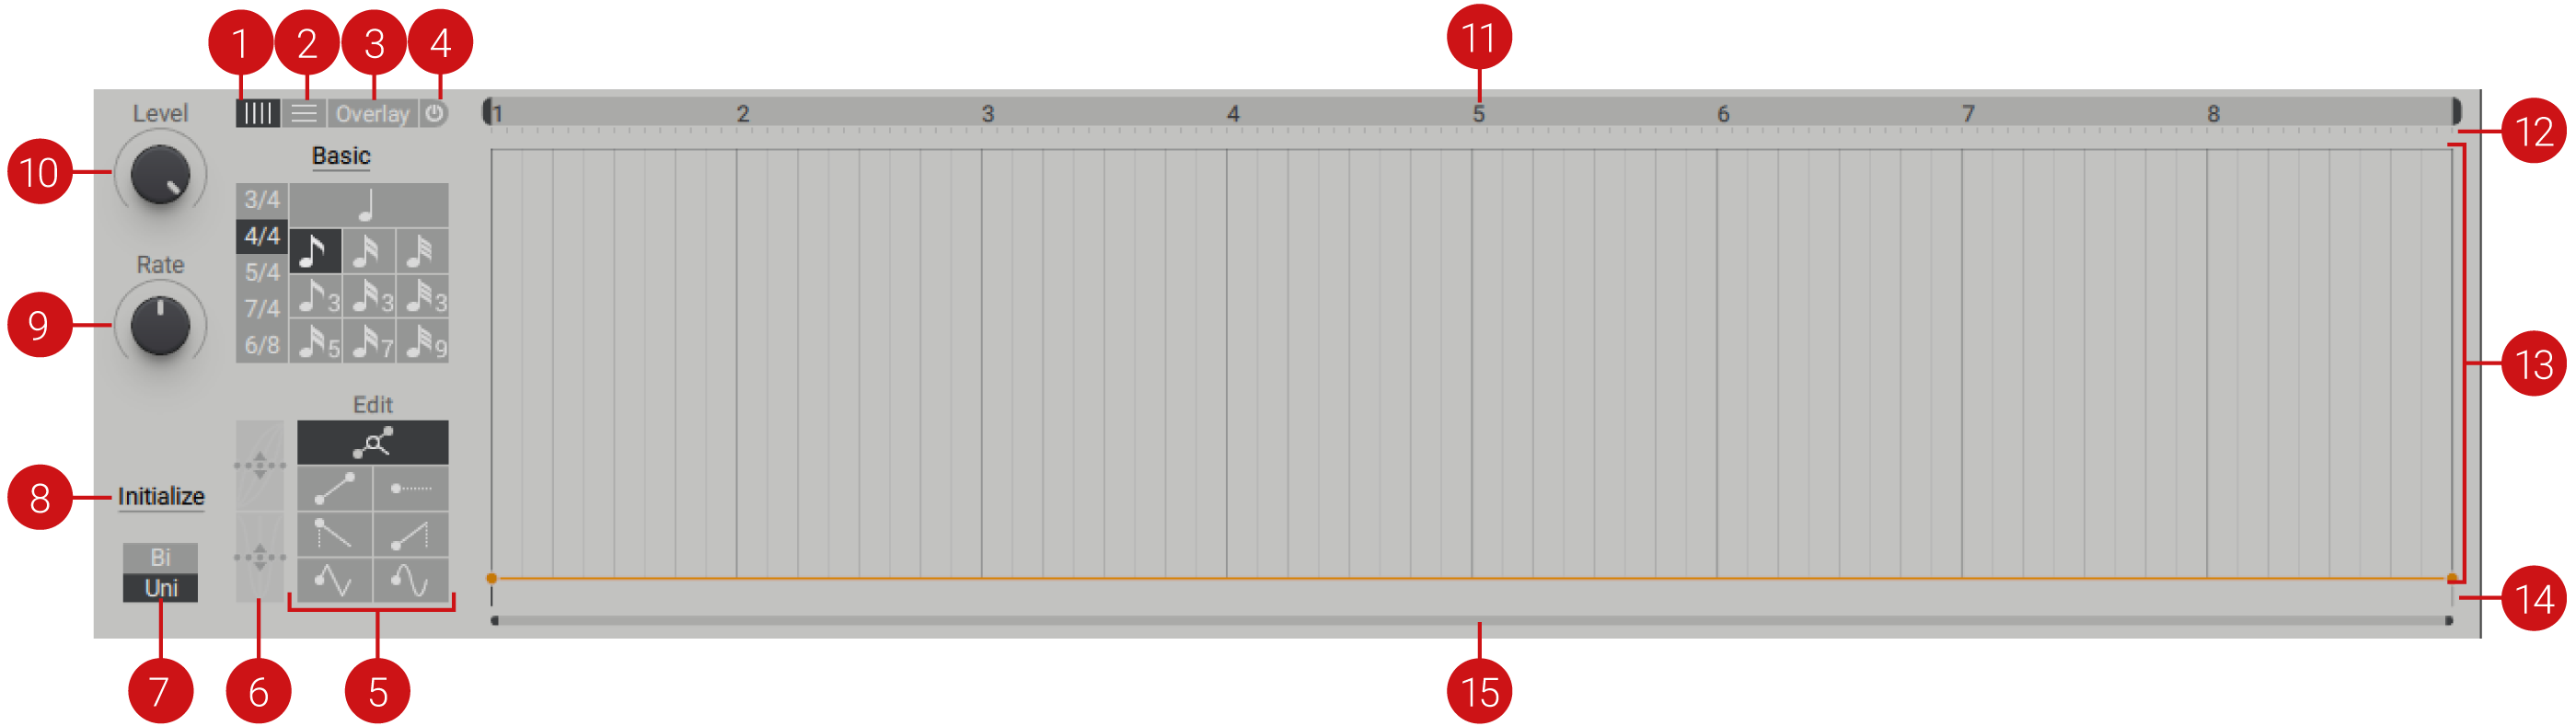
Vertical grid tab (X-Axis): Enables you to set the rhythmic timing for painting shapes on the grid, and contains two sets of tools: Basic and Custom. You can switch between these tools by clicking the underlined Basic / Custom label
Basic Tools: The default option to define the rhythmic grid for adding modulation shapes to the Performer grid using the painting tools. Use Basic mode to define the time signature and rhythmic resolution of the grid from quarter notes down to 32nd note divisions.
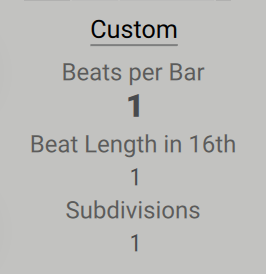
Custom Tools : Used to create custom time signatures with up to eight different sections. Use the Custom Grid to create your own complex time signatures. When using Custom mode, set the number of beats per bar, a beat length, and subdivisions.
Tip
You can safely switch between the Basic and Custom grid without losing your modulation pattern. Switching between them only changes the underlying grid, not the pattern.
Horizontal grid tab (Y-Axis): Provides options to set the number of steps for parameter values (quantization) in the Performers' Horizontal grid. By default, the number of steps is set to 24 (bipolar -24 to +24, unipolar 0 - +24). The Snap to Grid option ensures the grid value is adhered to even when making fine adjustments by holding the right mouse button and dragging.
Tip
An important thing to bear in mind when using the grids is that they are not separate, they simply work together to provide flexibility when adding modulation.
Overlay grid tab: When the overlay is switched on, the overlay placement and width can be adjusted using the three handles that appear in the Select zone. The number of divisions is set by dragging up or down over the Overlay Divisions value. To the left, the overlay also features stretch controls that can be used like the ones found next to the painting tools. The difference is that the grid itself is stretched (not the position of the modulation points of a multi-selection). This makes it easy to use the overlay as a guide for creating modulation sections that speed up or slow down. The overlay can also be used to create wider grid values than quarters or odd divisions over any irregular timing.
Overlay On/Off switch: Displays or hides the grid overlay.
Painting tools: The selected brush defines the modulation shape that is painted on the grid. The length of a shape is determined by the length of the grid division. For more information on the painting tools, inserting and editing modulation, refer to Editing Modulation, and Painting Modulation Painting Tools.
Stretch tools: Select multiple points in the Select zone and use these tools to stretch or compress the modulation curves in the pattern by dragging upwards or downwards. The upper tool stretches or compresses points to the left or right. The lower tool stretches or compresses points inwards or outwards.
Range switch: Sets the range of the Performer to bipolar or unipolar.
Initialize: Click to clear all modulation data and reset the grid to bipolar or unipolar.
Rate: Set the speed of the Performer based on the tempo of your host; at the center position, the speed is the same as your host. At the far-left position, the rate is at an eighth of the host, and at the far-right, it is eight times that of the host.
Level: Sets the output level of Performer modulation. When turned to the left position, the output is at zero, when turned to the right position, it's at 100%.
Start/End markers: You can drag the marker handles to define the start and endpoints of the section of the modulation you want to play. The marked section will play according to the playback mode selected in the Performer Grid Overview. For more information on selecting playback modes in the Performer Grid Overview, refer to Remote Octave overview.
Tip
Double click the Start/End marker bar to adjust the playback area to the visible section in the editor, as set by the Zoom bar.
Select zone: Click and drag in this area to select multiple modulation points. For more information on editing modulation, refer to Editing modulation.
Grid: The area where modulation is painted onto the flexible grid using the painting tools.
Segment Edit zone : Use this area to edit single or multi-selected segments. Right-click and drag to fine-tune segments on the grid without them snapping to the quantize value. Double-click on a segment or multi-selection to delete it.
Zoom bar: Click and drag the handles to zoom in and out of the Performer timeline. Double-click the Zoom bar to zoom into the first bar of the grid.
Assigning the Performers
Before the effect of the Performer's modulation pattern can be heard, it must first be assigned to a parameter. The process for assigning each Performer is the same, and a Performer can be assigned to multiple parameters at once.
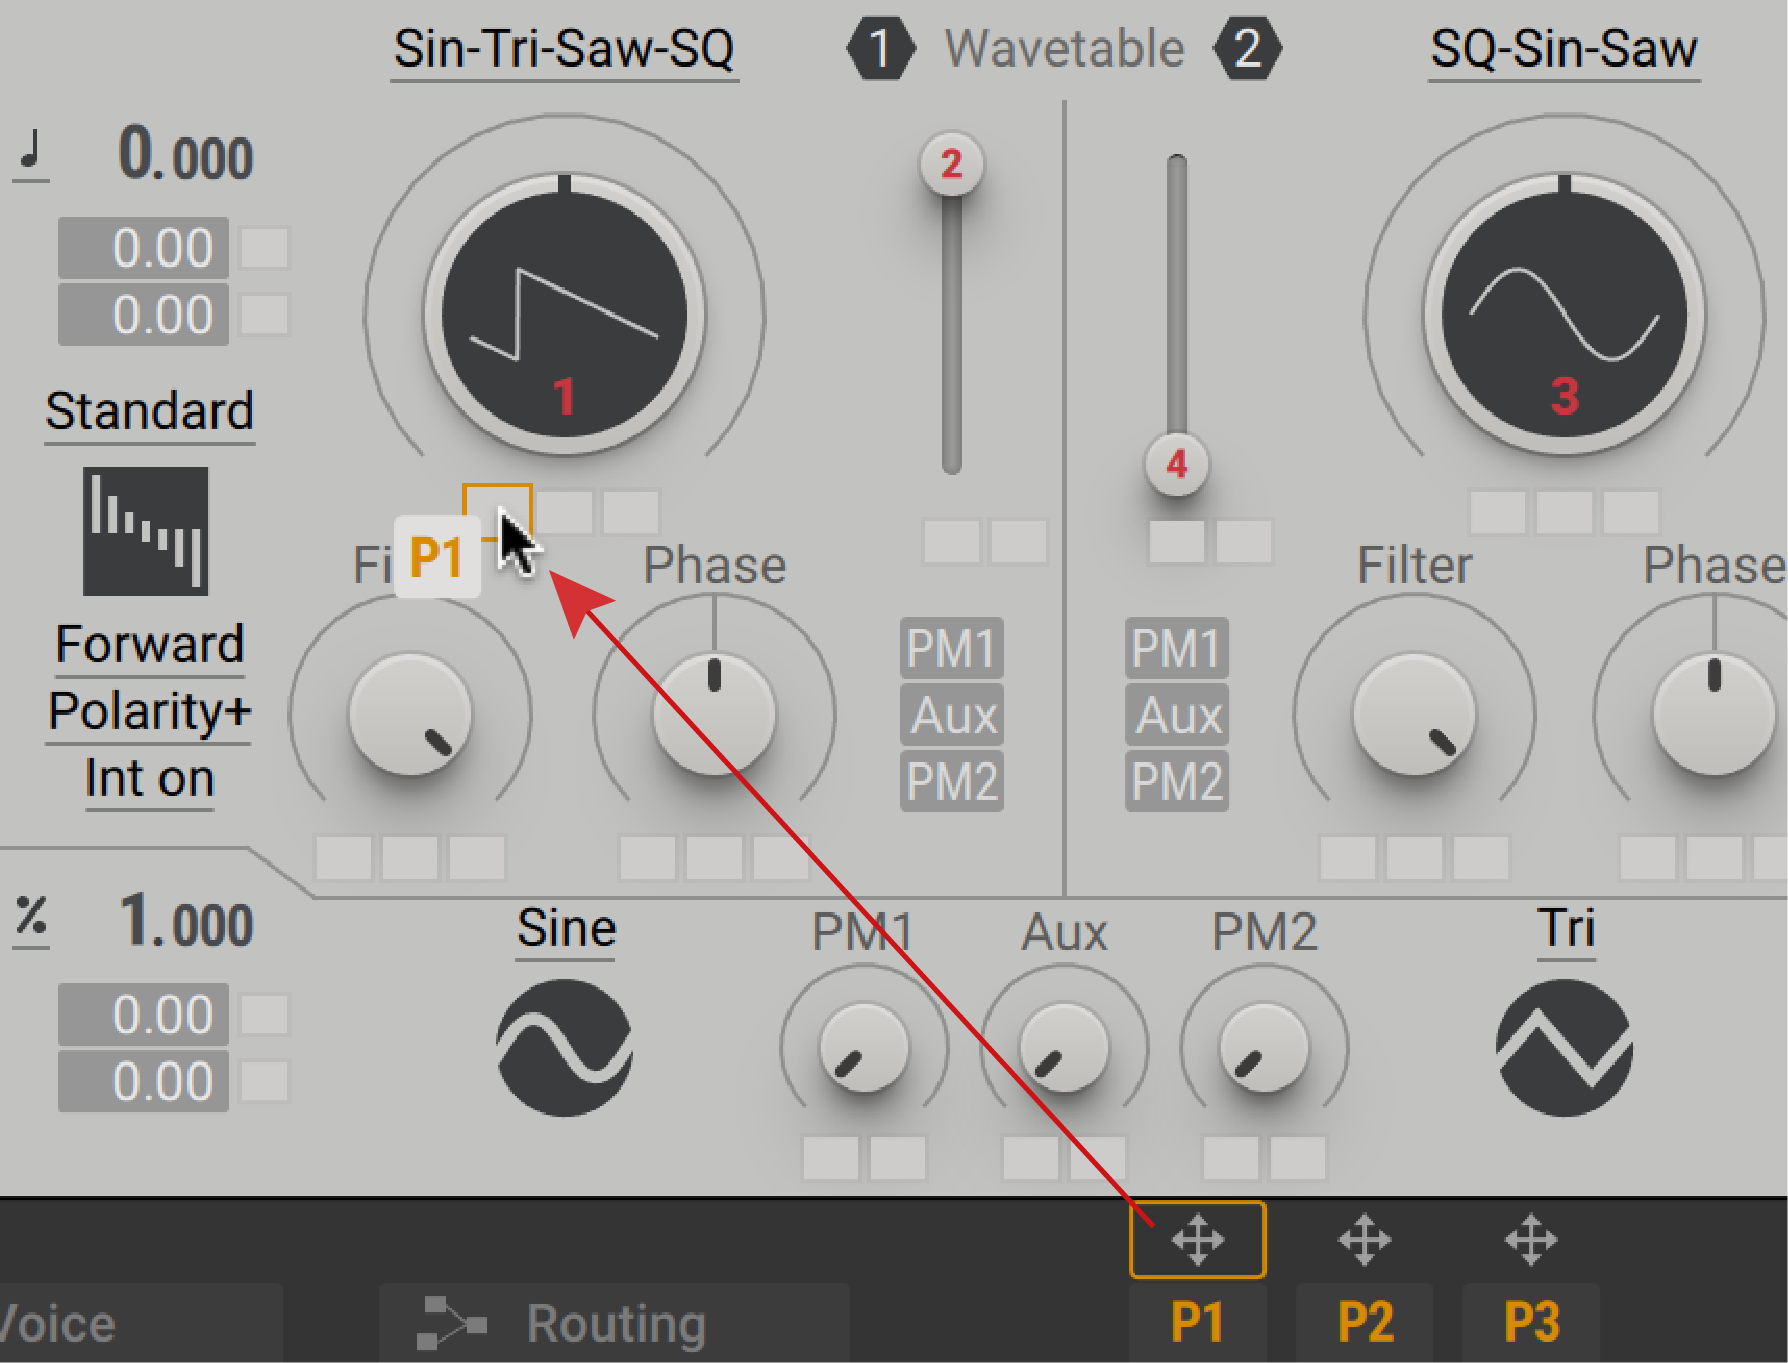
To assign a Performer to a parameter:
Drag the arrow icon of Performer 1 (P1) to, for example, the first modulation slot of the Wavetable Position. When the outline of the modulation destination is highlighted, release the mouse button.
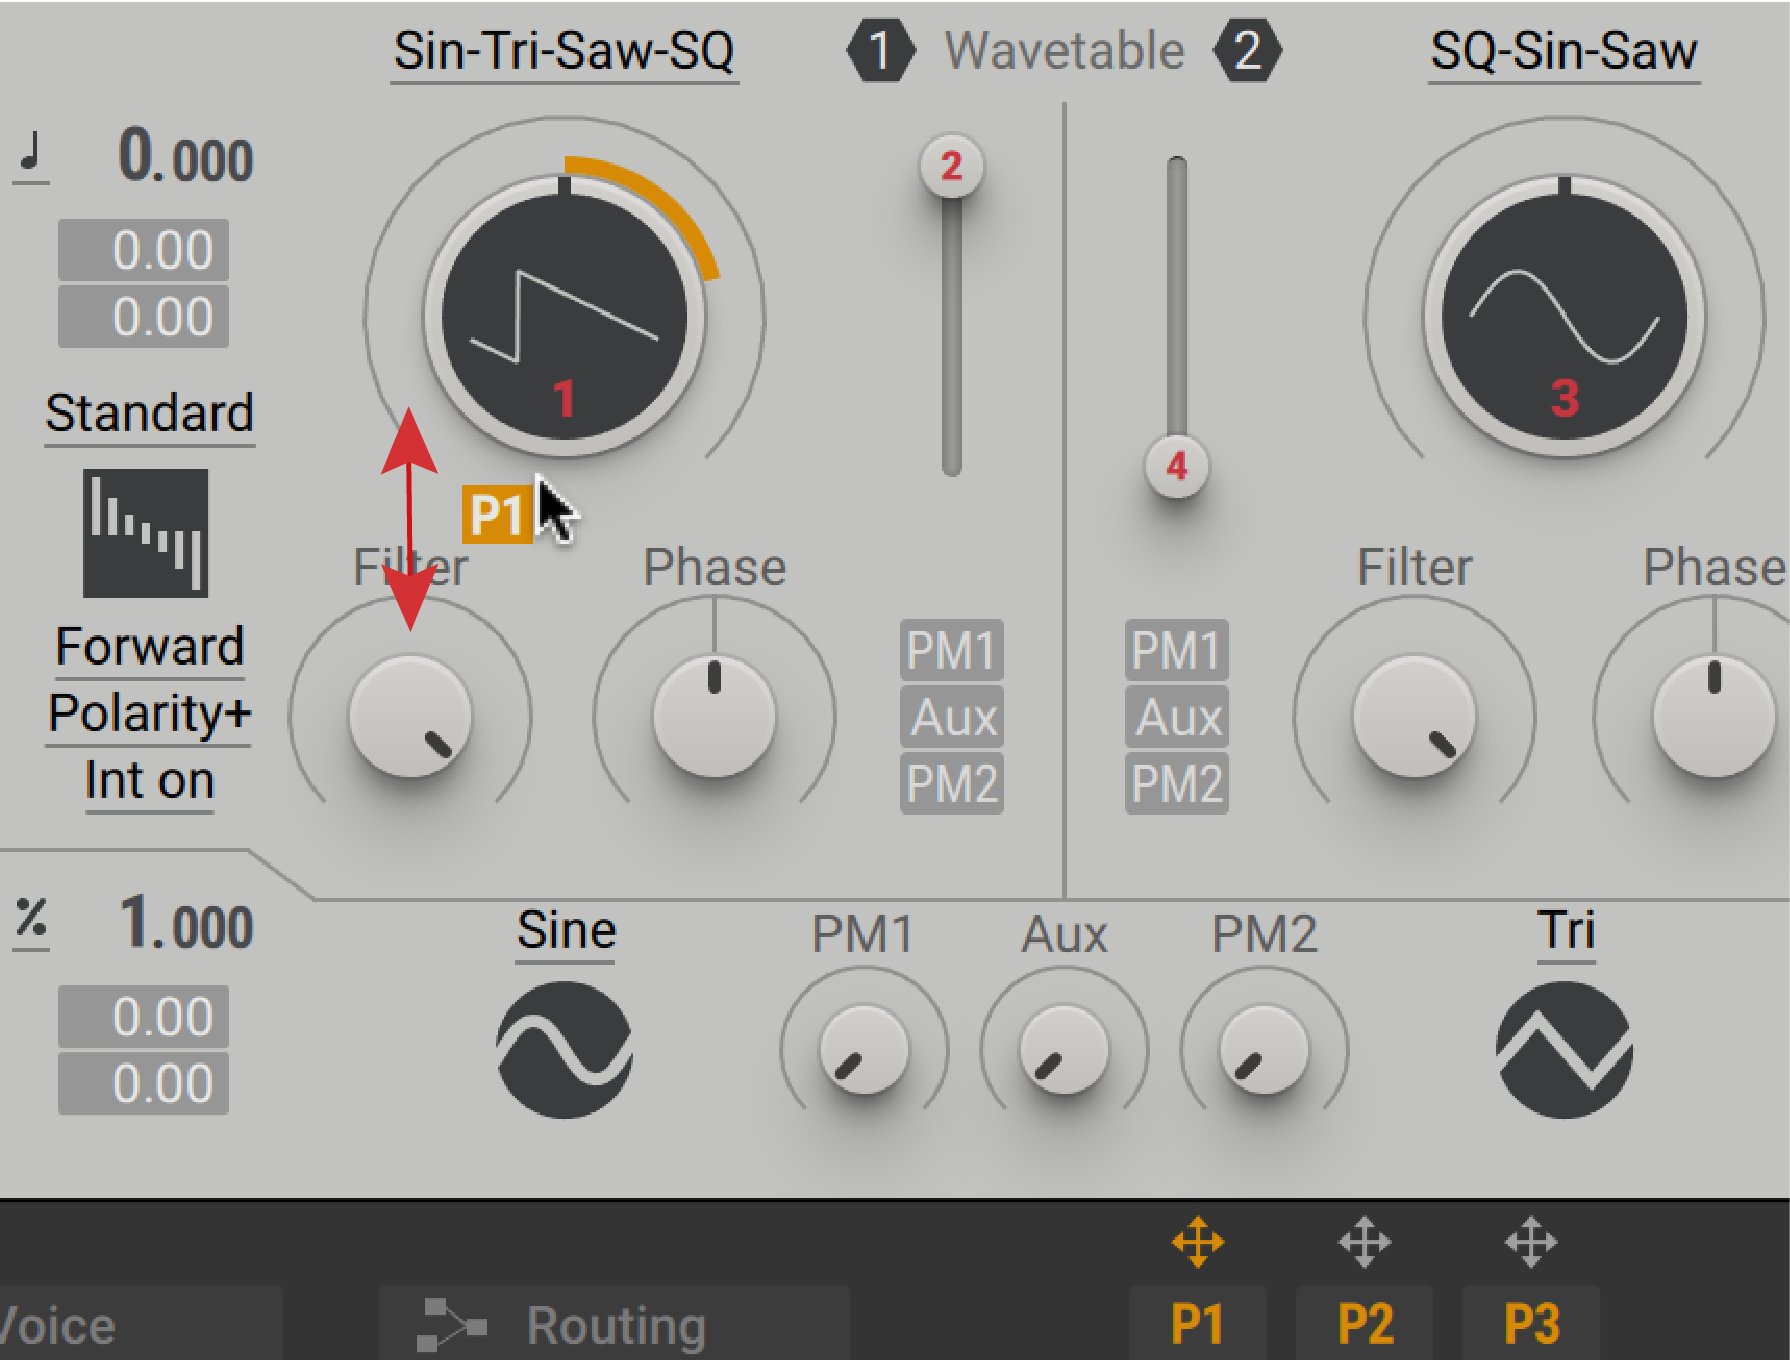
Click and drag the modulation slot upwards to increase the modulation amount applied to the Wavetable Position from the Performer.
Repeat this process to assign the Performer to more parameters or to assign Performers (P2 and P3) to parameters.
Tip
You can double-click the modulation slot to set the maximum modulation amount or reset it to zero.
Vertical grid
The Vertical grid (X-Axis) provides the time division and note value options to set the rhythmic timing for painting shapes on the grid. It also contains two sets of tools for painting on the grid. These are named Basic and Custom:
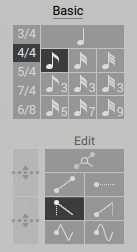
Basic tools
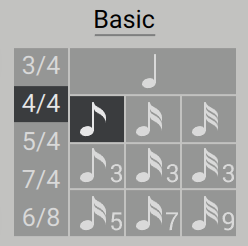
The Basic tools are the default option for painting modulation shapes with the shape brushes onto the Performer grid. Use Basic mode to define the time signature and rhythmic resolution of the grid from quarter notes down to 32nd note divisions.
 |
Painting tools: The selected brush defines the modulation shape that is painted on the grid. The length of a shape is determined by the length of the grid division. For more information on the painting tools, inserting and editing modulation, refer to Painting Tools, Painting Modulation, and Editing Modulation.
Stretch tools: Select multiple points in the Select zone and use these tools to stretch or compress the modulation curves in the pattern by dragging upwards or downwards. The upper tool stretches or compresses points to the left or right. The lower tool stretches or compresses points inwards or outwards.
Custom tools
The Custom tools are used to create custom time signatures with up to eight different sections. Use the Custom Grid to create your own complex time signatures. When using Custom mode, you can set the number of beats per bar, a beat length, and subdivision.
 |
Note
You can safely switch between the Basic and Custom tools without losing your modulation pattern. Switching between them only changes the underlying grid, not the pattern.
Painting tools
The painting tools enable you to paint modulation shapes onto the rhythmic grid.
Here is an overview of the painting tools:
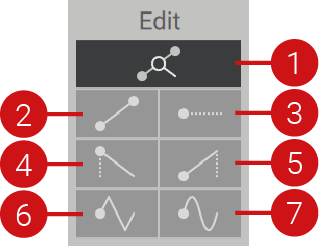 |
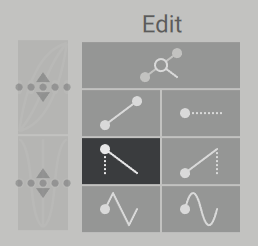
Edit: Use to add modulation points to the Performer grid. The points are connected as straight lines to neighboring points.
Line: Creates lines from the start to the endpoint of a grid segment.
Step: Creates static values that extend to the end of a grid segment.
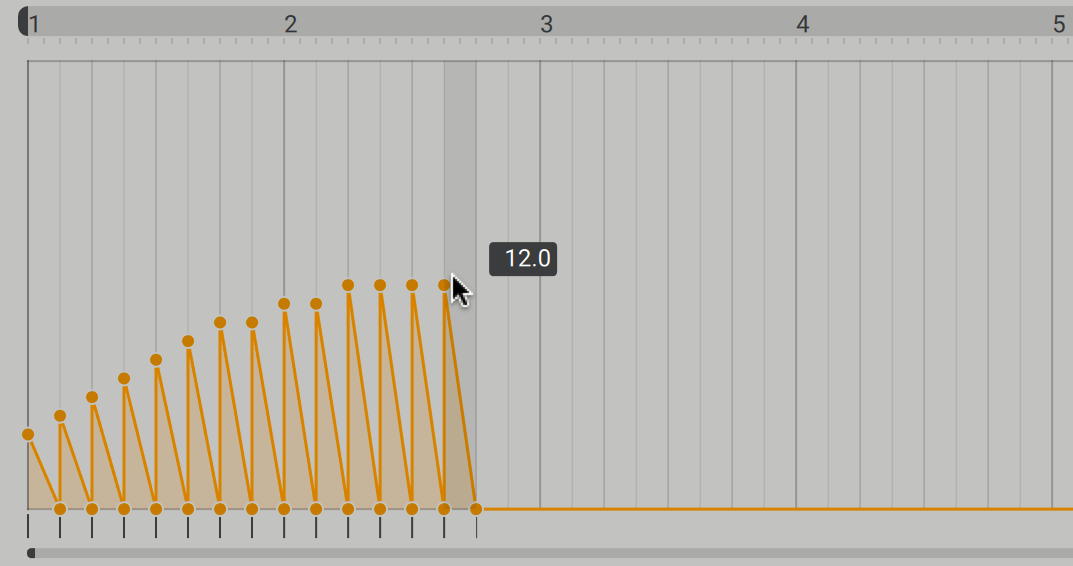
Ramp A: This tool creates descending ramps.
Ramp B: This tool creates ascending ramps.
Triangle: Creates triangle shapes.
Sine: Creates sine shapes.
Painting modulation
Select one of the shape brushes to start painting modulation on the grid. As you use the brushes to create shapes, they will snap to the selected time signature division and note value. For more information on selecting time signatures and note values, refer to Performers overview.
To draw modulation onto the grid:
Select a time signature and grid note value.
Select a paint tool.
Click and drag the mouse across the grid to paint modulation.
Move the mouse up and down while painting to change the MIDI data amount.
Note
The Performer only starts playing when it is assigned to a parameter of an active module. For more information on assigning Performers to parameters, refer to Assigning the Performers.
Editing modulation
This section provides an overview of the features available for editing modulation in the Performer grid.
Selecting modulation
To select modulation points:
In the Selection Zone, drag across any selection of modulation points to highlight them.
For more information on the Selection Zone, refer to Performers overview.
Deleting modulation
You can delete individual or multiple modulation points.
To delete a single modulation point:
Double-click the modulation point.
To delete multiple modulation points:
In the Select zone, select the points that you want to delete, then double-click in the Segment Edit zone.
Tip
Alternatively, you can select a modulation point and drag left or right. Any existing points from the selected modulation point to the target location are deleted as the mouse is moved.
To delete all modulation within a Performer:
Click the Initialize button and select Bipolar or Unipolar or double-click the pattern in the Remote Octave overview to reset the grid.
To delete all three modulation patterns for all three Performers:
Double-click in the lower grid area of the Remote Octave overview.
For more information on the Remote Octave, refer to Performers overview.
Moving modulation
You can move modulation points in values quantized or unquantized to the grid value.
To move a selection of modulation points in steps quantized to the grid:
In the Select zone, select the points that you want to move, then in the Segment Edit zone, drag them horizontally.
To fine-tune a selection of modulation points unquantized to the grid:
In the Select zone, select the points that you want to move, then in the Edit zone, drag horizontally holding the right mouse button.
For more information on the Select zone and Segment Edit zone, refer to Performers overview.
Bending a modulation curve
Place the mouse over an existing modulation curve on the grid, then click and drag upwards or downwards.