Macros
Massive X lets you customize how to interact with your sound through MIDI control and/or host automation for Pitch Bend, Mod Wheel, and Aftertouch as well as 16 Macro knobs.
Massive X includes a number of global control sources called Macros that you can use to interact with your sound. Depending on their assignments in the loaded preset, the Modulation wheel, Pitch Bend wheel, Aftertouch control, and the 16 Macro knobs let you quickly access specific parameters or control multiple parameters from a single Macro. In the full version of Massive X, you can change their assignments.
You can control the Modulation wheel, Pitch Bend wheel, Aftertouch control, and the 16 Macro knobs from a MIDI keyboard/controller or using host automation in your DAW. This allows you to automate any Massive X parameter that is assigned to a Macro.
Note
You can also control the Morpher cursor from a MIDI keyboard or using host automation.
In Massive X Player, all the Macros are visible in the Macro bar at the top of the Browse view. You cannot change the Macro assignments nor labels.
In the full version of Massive X, all the Macros are visible in the Macro bar at the top of the Browse view and Edit view. You can modify the Macro assignments in the Edit view and change their labels in the Edit and Browse views.
Note
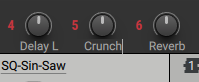
The first eight Macros 1–8 are also available in the Play view.
The Macro bar contains the following elements:

PB (Pitch Bend): A standard MIDI control found on any keyboard controller, often in the form of a spring-loaded wheel.
M (Modulation): A standard MIDI control found on most keyboard controllers, often in the form of a freely adjustable wheel.
AT (Aftertouch): A special MIDI expression found on many keyboard controllers, transmitting the amount of pressure applied to the pressed keys.
Animator on/off switch: Activates or deactivates the Animator in the Play view. This mirrors the Animator on/off switch available in the Play view.
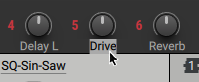
1–16 (Macro knobs): Continuous controls that can be used as shortcuts for parameters.
Except for the Animator on/off switch, all the controls of the Macro bar are red when they are assigned, and white otherwise.
Assigning Macros to single parameters
The Macros can take over the full range of a single parameter, which is called a 1:1 mapping.
For example, you can use the modulation wheel to control the Wavetable Position.
Drag and drop the modulation wheel icon (M) from the Header onto the Wavetable Position knob.
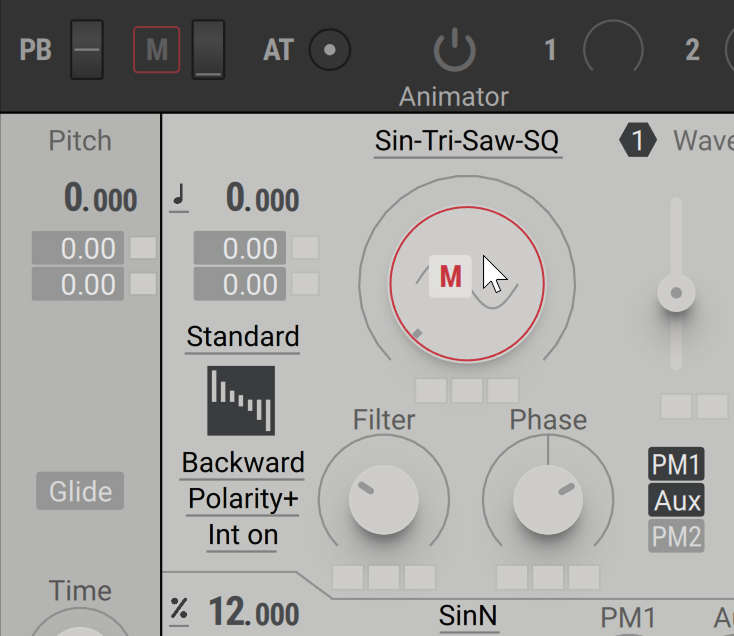
The Wavetable Position is now controlled by moving the modulation wheel on your keyboard controller.
Tip
For information about removing Macro assignments, refer to Removing and muting Macros.
Assigning Macros to multiple parameters
The Macros can adjust multiple parameters at the same time, and to a varying degree.
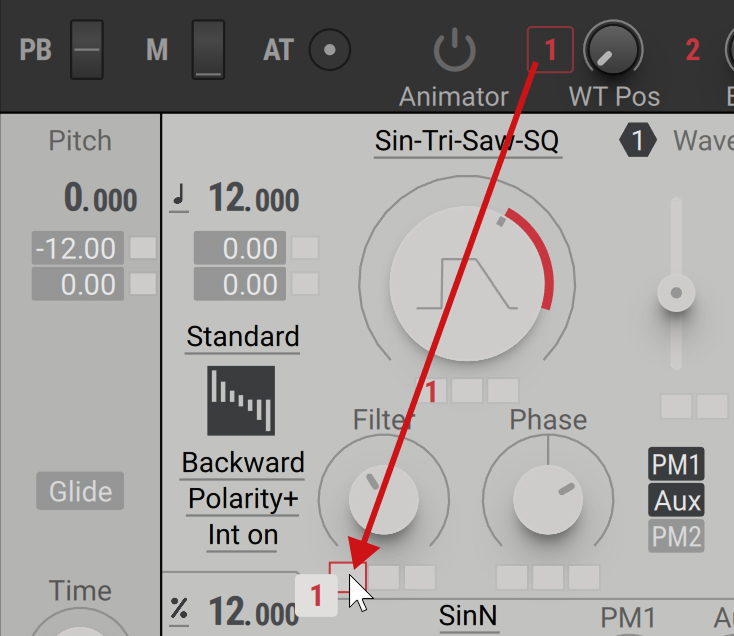
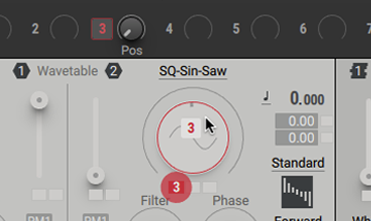
For example, you can use Macro 1 to control both the Wavetable Position and the Wavetable’s Filter parameters:
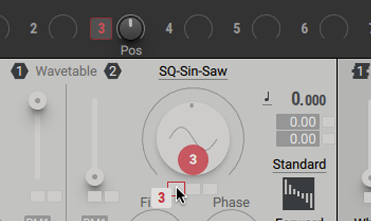
Drag and drop the Macro icon (1) from the Header onto the first modulation slot of the Wavetable Position control.
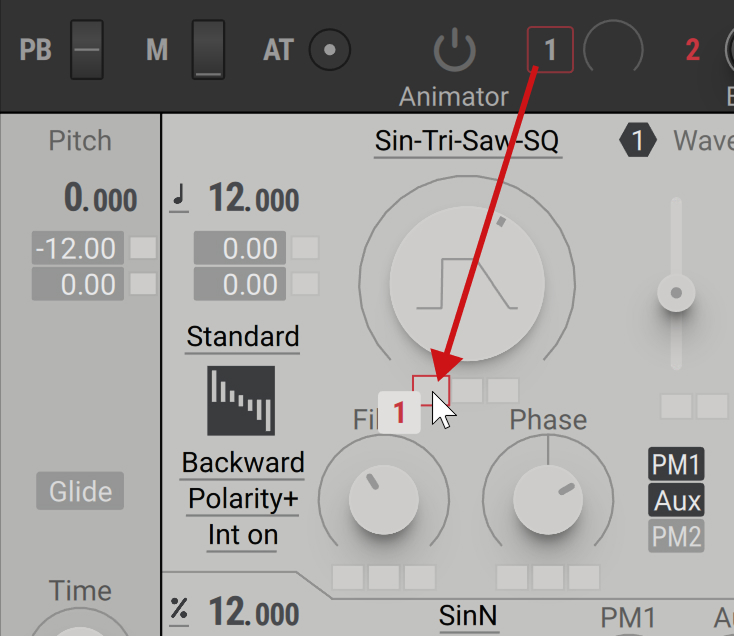
The Macro label 1 appears in the first modulation slot to indicate the assignment.
Click and drag this modulation slot vertically to adjust the modulation amount.
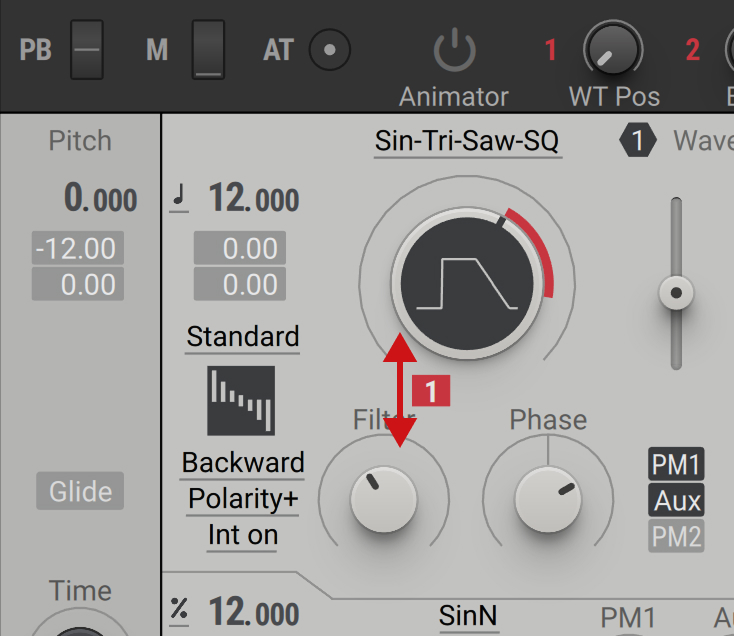
On the Wavetable Position knob, a colored segment around the current knob position indicates the modulation amount.
Drag and drop the Macro icon (1) from the Header onto the first modulation slot of the Wavetable’s Filter control.
The Macro label 1 appears in the first modulation slot to indicate the assignment.
Click and drag this modulation slot vertically to adjust the modulation amount.
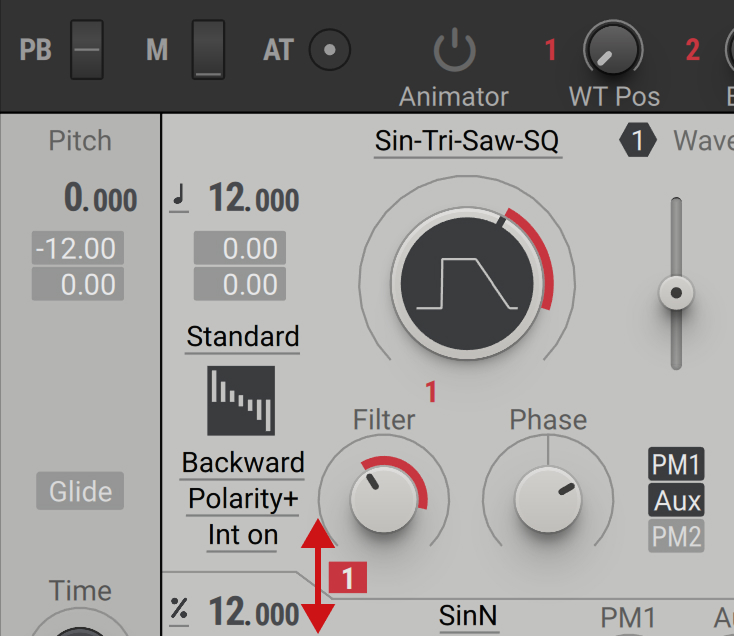
By playing a note and turning Macro 1 you can now control the two parameters of the Wavetable oscillator at the same time.
Tip
For information about removing or muting Macro assignments, refer to Removing and muting Macros.
Replacing Macros
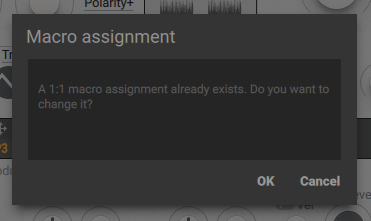
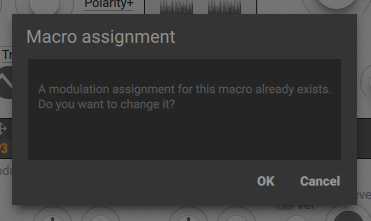
In some scenarios, you might want to remove a 1:1 Macro assignment and instead assign the Macro to a modulation slot of the same parameter, or vice versa.
To replace a 1:1 Macro assignment for a parameter with a modulation slot assignment:
Drag and drop the Macro icon from the Header onto the modulation slot.
A dialog box appears, asking you to confirm the change. Click OK to remove the 1:1 Macro assignment, and replace it with a modulation slot assignment.
To replace a modulation slot assignment for a parameter with with a 1:1 Macro assignment:
Drag and drop the Macro icon from the Header onto the parameter's control.
A dialog box appears, asking you to confirm the change. Click OK to remove the Macro's modulation slot assignment, and replace it with a 1:1 Macro assignment.
Removing and muting Macros
You can remove or mute Macro assignments using the context menu for each Macro by right-clicking the Macro number.
Removing single assignment
To remove a Macro assignment from a single parameter:
Right-click the Macro number left of the Macro knob.
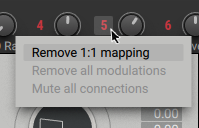
Select Remove 1:1 mapping.
The assignment is removed and the Macro control is blank.
Removing or muting multiple assignments
When a Macro is assigned to multiple parameters, you can remove all assignments at once as follows:
Right-click the Macro number left of the Macro knob.
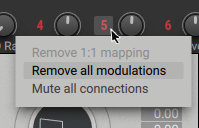
Select Remove all modulations.
The assignments are removed and the Macro control is blank.
When a Macro is assigned to multiple parameters, you can temporarily mute its assignments without removing them. For example, this is useful to make a quick A/B comparison for your modulation assignments.
To mute the Macro assignments:
Right-click the Macro number left of the Macro knob.
Select Mute all connections.
The assignments are now muted.
You can unmute the Macro assignments by using the same procedure.
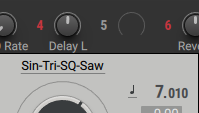
Renaming Macros
The Macros are automatically named when they are assigned to a parameter. In some instances, for example, when multiple parameters are assigned to the same Macro, you may want to rename the Macro to represent the full functionality of the control.
To rename a Macro control:
Double-click the label under the Macro control to highlight it.
The label text is selected and can be edited.
Type the new Macro name in the text field and press [Enter] to confirm.