Using the Rack
The Rack in Guitar Rig facilitates the creation of multi-effects by providing workflows for adding, removing, replacing, and moving Components.
In the Rack you can combine and tweak the individual effects, called Components, to create any multi-effect imaginable. The Rack facilitates this by providing workflows for adding, removing, replacing, and moving Components. The following sections explain these basic workflows.
Note
The same workflows also apply for the lists of Components in the Master FX Rack Tool and the Container Component.
Adding Components to the Rack
You can add Components to the Rack by using drag and drop.
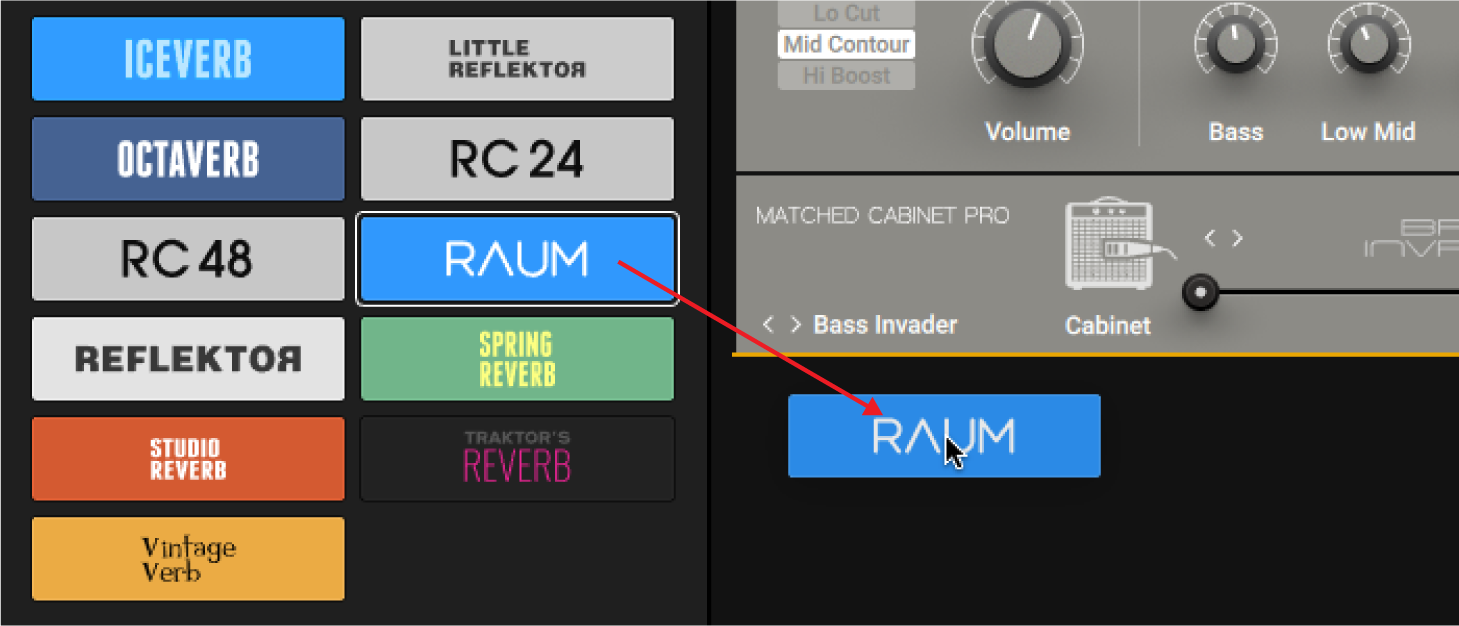
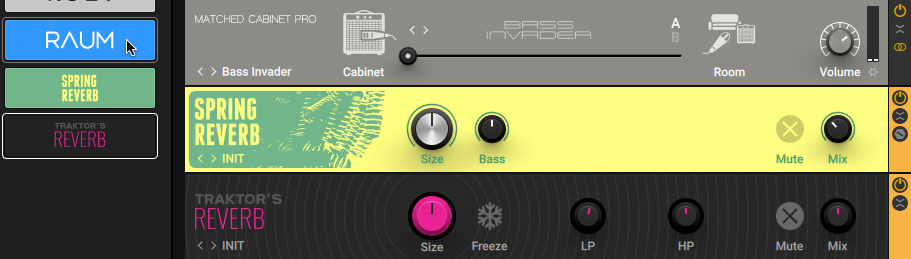
To add a Component, drag and drop the respective Component Tile from the Browser into the Rack. The expected position in the Rack is indicated by a yellow line.
Tip
Alternatively, you can add Components by double-clicking the respective Component Tile in the Browser. The Component will be added at the bottom of the Rack.
You can also use the context menu in the Rack to add Components. If no Component is selected, the new Component is added at the bottom of the Rack. If a Component is selected, the new Component is added underneath the selected Component. Opening the context menu automatically selects the Component at the mouse position.
Note
You can select a Component by clicking on it. Holding [SHIFT] on the keyboard allows for selection of multiple Components.
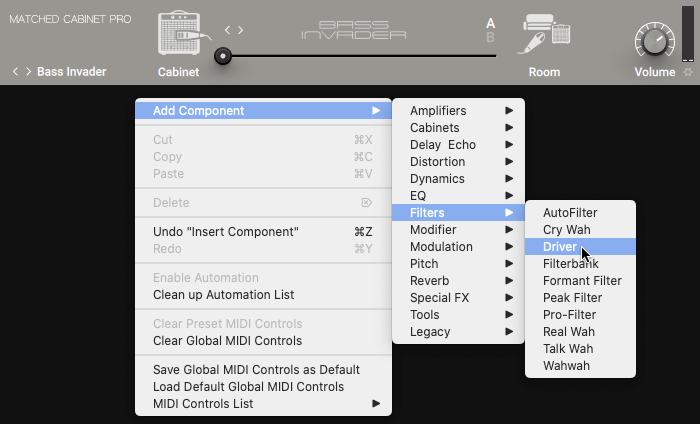
To add a Component, right-click in the Rack to open the context menu and select the Component from the Add Component menu.
Deleting Components from the Rack
You can delete Components from the Rack by using drag and drop.
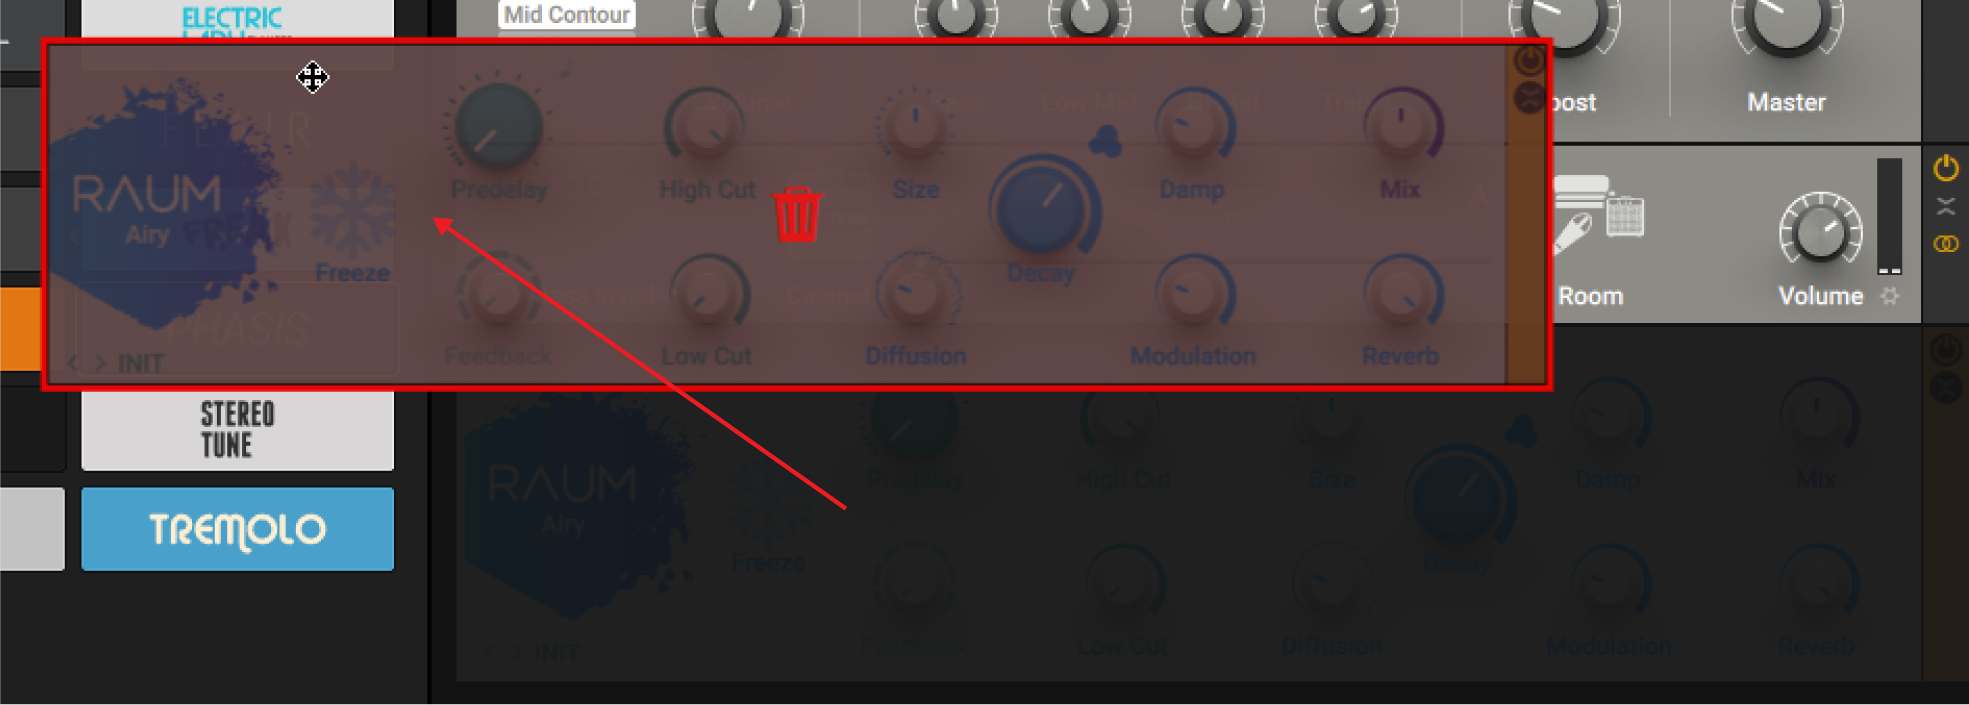
To delete a Component, drag and drop the Component to the outside of the Rack. If multiple Components are selected, they are deleted together.
You can also use the context menu to delete Components. If no Component is selected, the command in the context menu is not available. If one or more Components are selected, they will be deleted. Opening the context menu automatically selects the Component at the mouse position.
Note
You can select a Component by clicking on it. Holding [SHIFT] on the keyboard allows for selection of multiple Components.
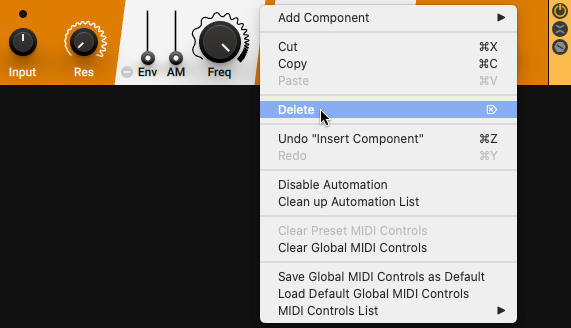
To delete all selected Components, right-click in the Rack to open the context menu and select Delete.
Tip
Alternatively, you can press [delete] (macOS) or [Del] (Windows) on the keyboard, or use the command from the Main menu. For more information, refer to Editing the Rack.
Replacing Components in the Rack
You can replace Components in the Rack by using drag and drop.
To replace a Component, drag and drop the respective Component Tile from the Browser onto the Component you want to replace. The Component that is expected to be replaced is highlighted in yellow.
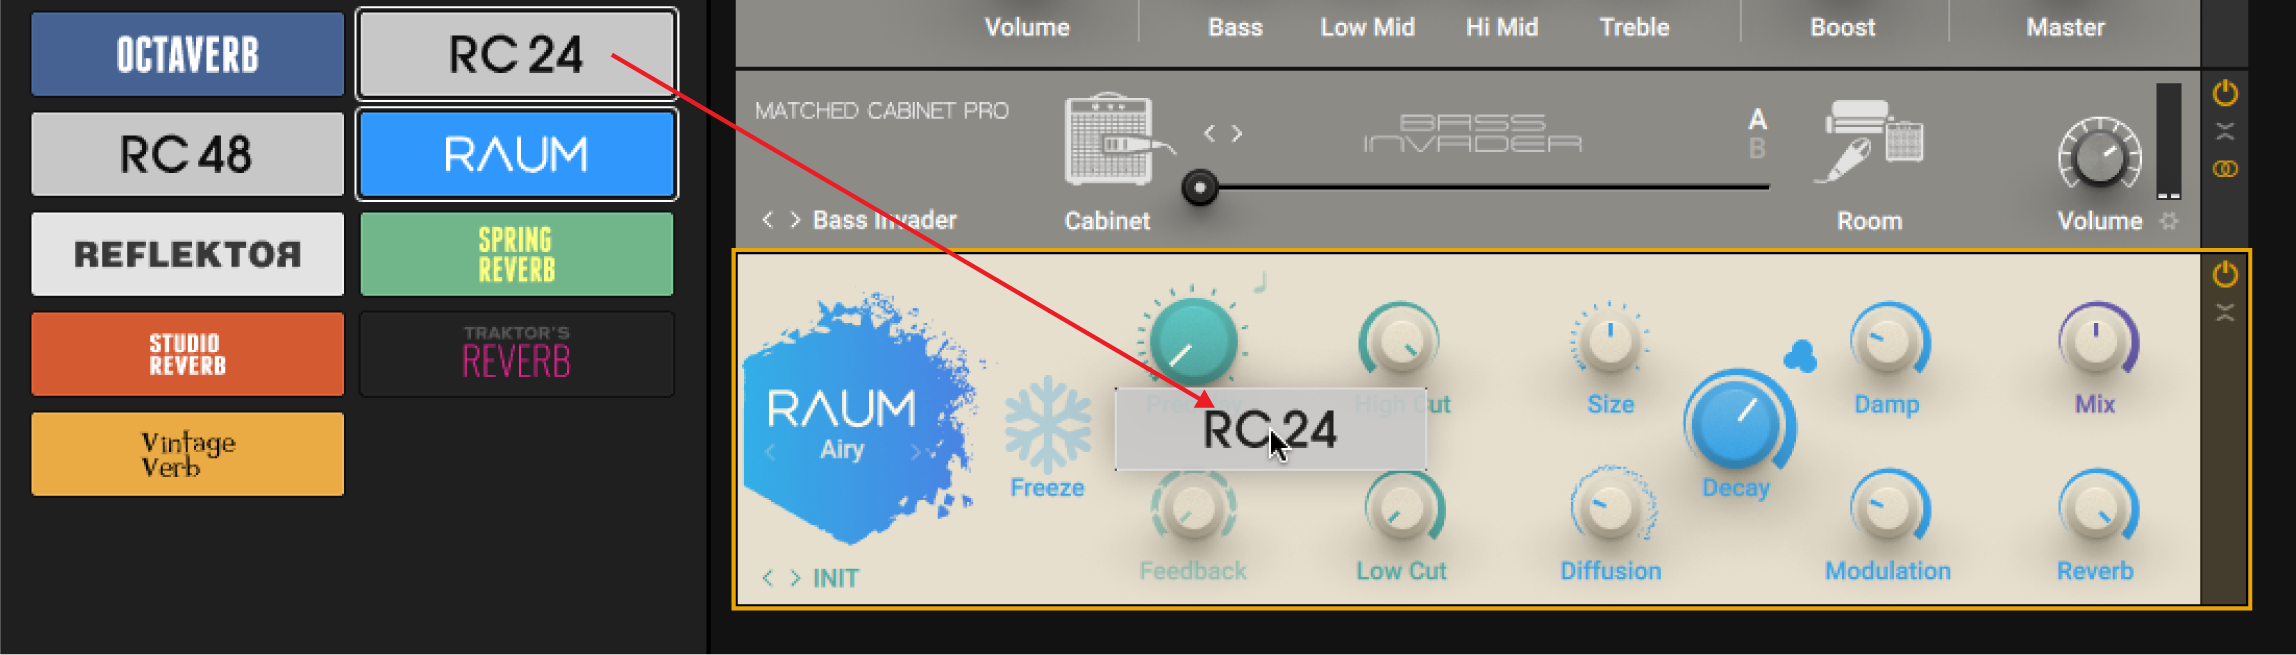
You can also replace Components by double-clicking Component Tiles. All Components selected in the Rack will be replaced.
Note
You can select a Component by clicking on it. Holding [SHIFT] on the keyboard allows for selection of multiple Components.
To replace all selected Components, double-click a Component Tile in the Browser.
Moving Components in the Rack
You can move Components in the Rack by using drag and drop.
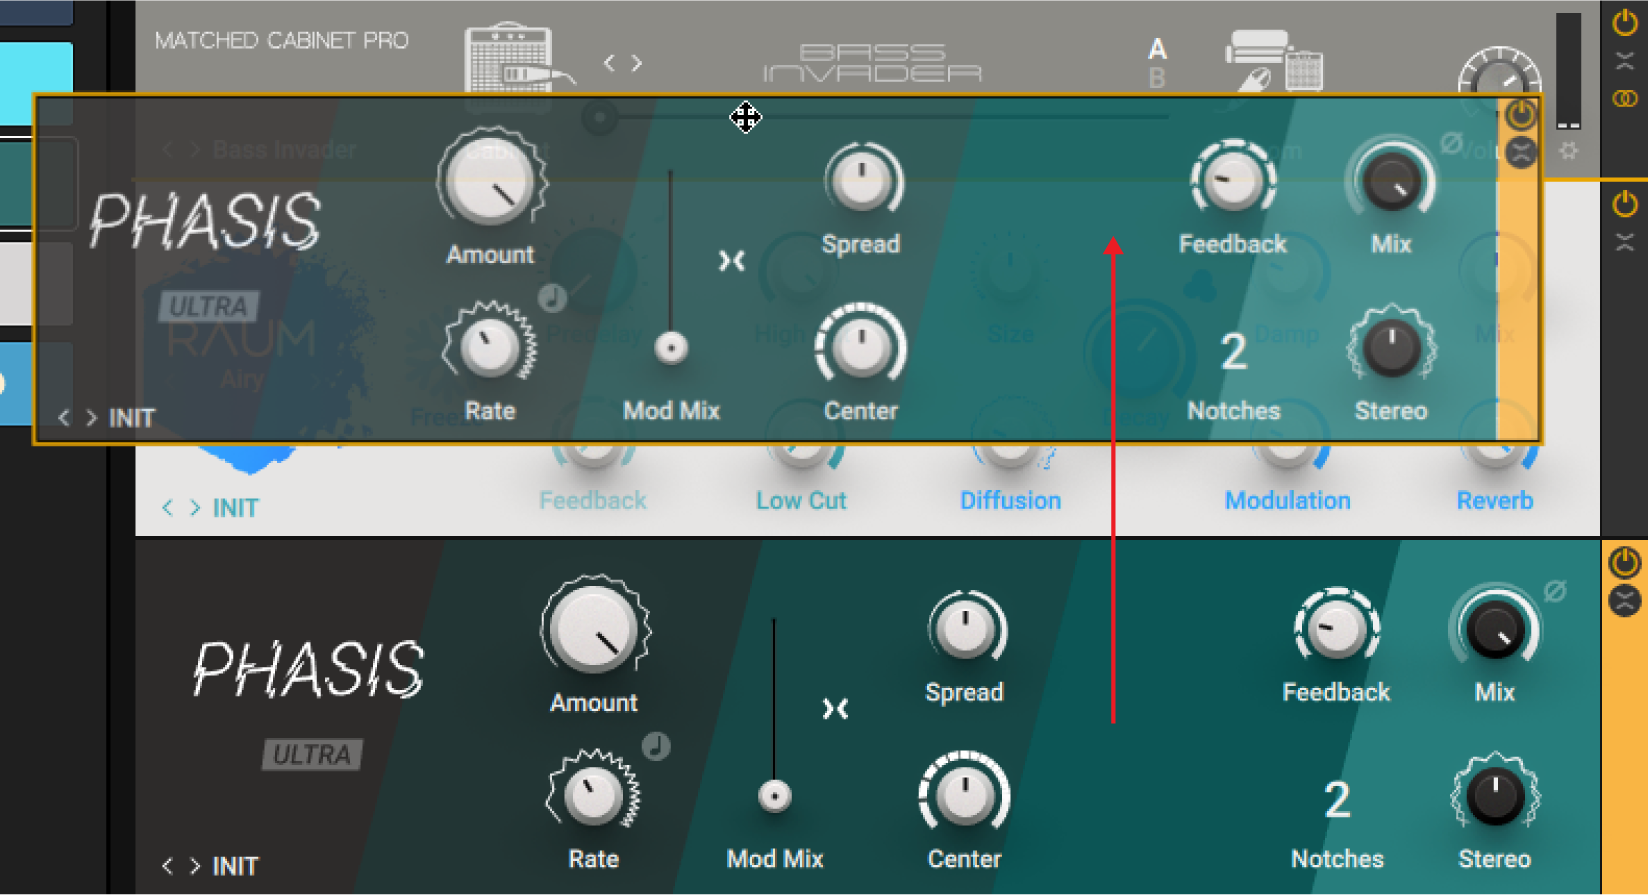
To move a Component, drag and drop the Component to a new position in the Rack. The expected position in the Rack is indicated by a yellow line. If multiple Components are selected, they are moved together.
Note
You can select a Component by clicking on it. Holding [SHIFT] on the keyboard allows for selection of multiple Components.
Tip
Alternatively, you can move Components in the Signal Flow. For more information, refer to Sidebar.
Editing the Rack
You can edit the Rack by using common editing commands, including undo and redo as well as cut, copy, and paste. The commands can be accessed in the Edit sub-menu of the Main menu. Additionally, most of the commands are also available in the Rack's context menu.
Editing the Rack Using the Main Menu
You can use the Main menu in the Header to edit the Rack. The available commands can be accessed in the Edit sub-menu.
To open the Main menu, click the Main menu button (three vertical dots) in the Header.
The following overview shows you the available commands:
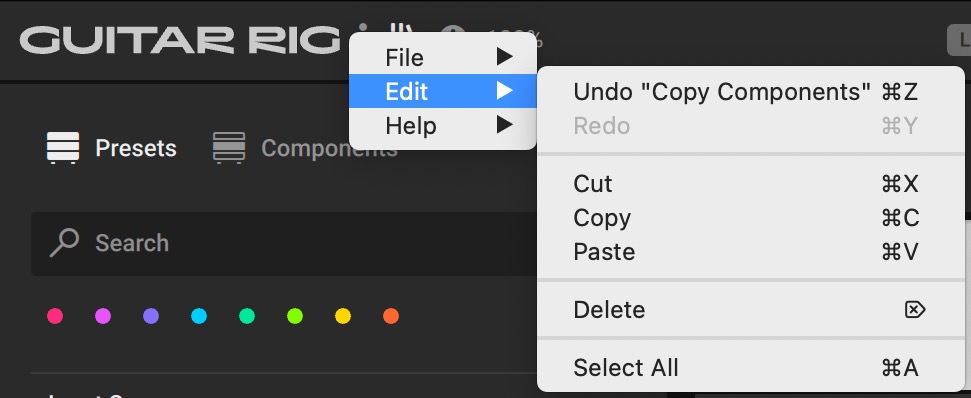 |
Undo: Reverts the last change made to the Rack.
Redo: Repeats the last change from the undo history.
Cut: Cuts all selected Components and copies them to the clipboard.
Copy: Copies all selected Components to the clipboard.
Paste: Pastes the Components from the clipboard.
Delete: Deletes all selected Components. For more information, refer to Deleting Components from the Rack.
Select All: Selects all Components in the Rack.
Note
You can select a Component by clicking on it. Holding [SHIFT] on the keyboard allows for selection of multiple Components.
Tip
Keyboard shortcuts are available for all commands contained in the Edit sub-menu. For more information, refer to Keyboard Shortcuts.
Editing the Rack Using the Context Menu
You can use the context menu to edit the Rack.
To open the context menu, right-click on the background of a Component or the Rack.
The following overview shows you the available commands:
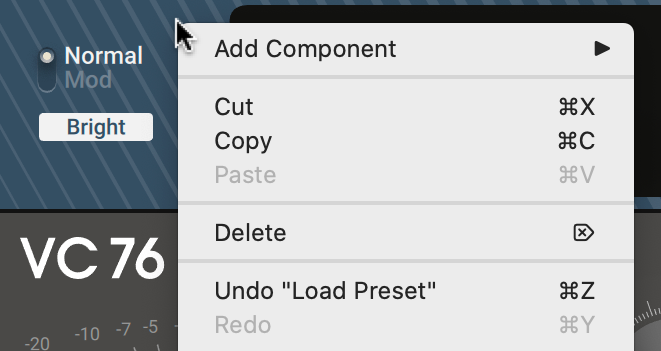 |
Add Component: Opens sub-menus showing all available Components, and allows to add Components to the Rack by selecting them. For more information, refer to Adding Components to the Rack.
Cut: Cuts all selected Components and copies them to the clipboard.
Copy: Copies all selected Components to the clipboard.
Paste: Pastes the Components from the clipboard.
Delete: Deletes all selected Components. For more information, refer to Deleting Components from the Rack.
Undo: Reverts the last change made to the Rack.
Redo: Repeats the last change from the undo history.
Note
You can select a Component by clicking on it. Holding [SHIFT] on the keyboard allows for selection of multiple Components.
Tip
Keyboard shortcuts are available for all editing commands contained in context menu of the Rack. For more information, refer to Keyboard Shortcuts.