Using Presets
A preset in Guitar Rig recalls a previously saved Rack including its Components, all individual parameter settings, and the options set in the Toolbar.
A preset recalls a previously saved Rack including its Components, all individual parameter settings, and the options set in the Toolbar. In addition to the presets included in Guitar Rig's extensive library, you can save, load, and import User presets. Furthermore Component presets enable you to save settings of individual Components. The following sections explain the basic workflows involved in using presets.
Loading Presets
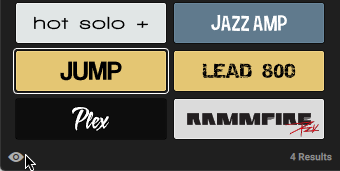
You can load presets directly from the Browser's Results list.
To load a preset, double-click on the corresponding entry in the Results list.

Tip
Alternatively, you can select the entry in the Results list using the mouse or the arrow keys on the keyboard and press [enter] to load a preset. For more information, refer to Keyboard Shortcuts.
You can also use the Rack's Toolbar to load presets. The following overview shows you the available controls:
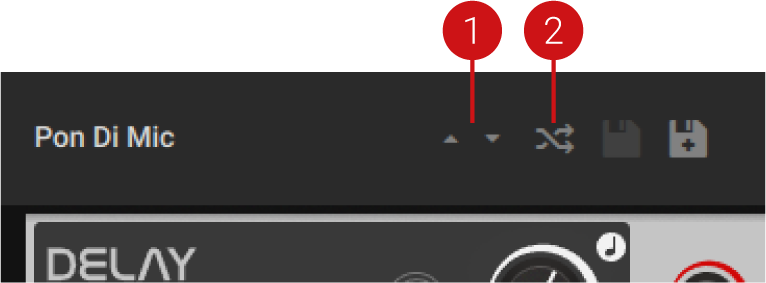 |
Previous preset / Next preset: Switches between presets in the Browser's Results list. Clicking on the upwards arrow loads the previous preset. Clicking on the downwards arrow loads the next preset.
Preset Shuffle: Loads a random preset from the Browser's Results list.
Note
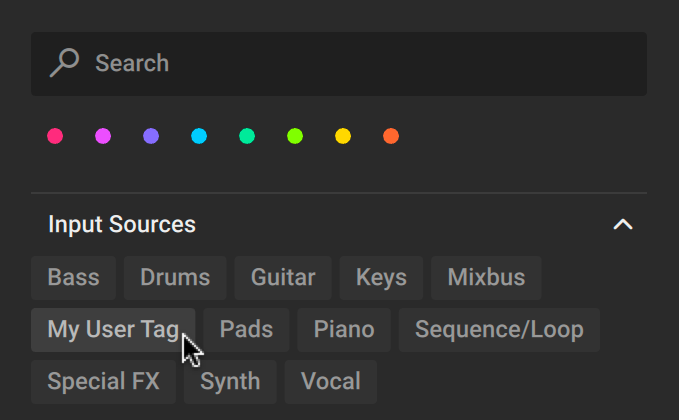
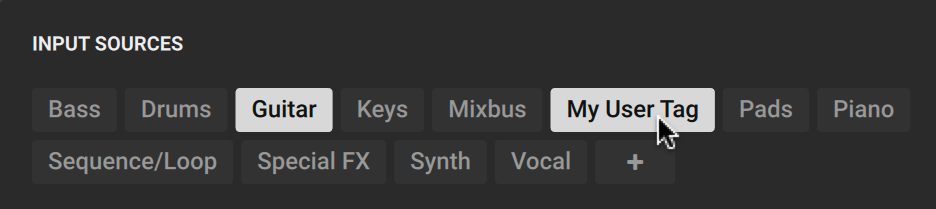
The Search field, Favorites, and Filters in the Browser enable you to narrow down the presets in the Results list. For more information, refer to Using the Browser.
Saving User Presets
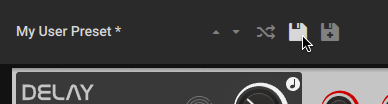
You can save User presets directly in the Rack's Toolbar.
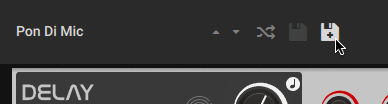
Saving a New User Preset
To save a new User preset:
Click the Save new preset button in the Toolbar.
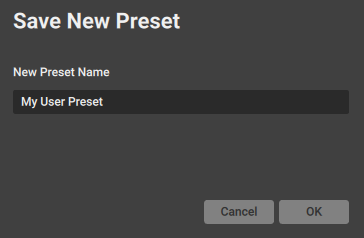
Type in a name for your User preset and confirm by clicking OK.
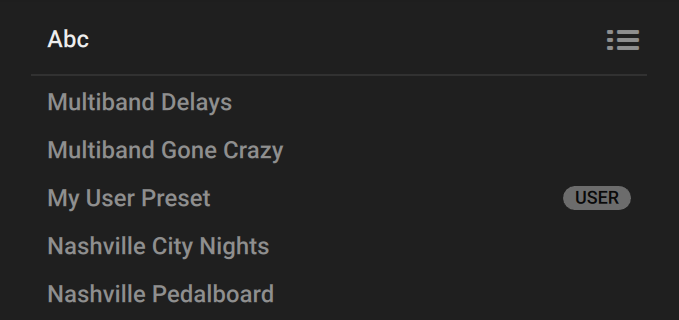
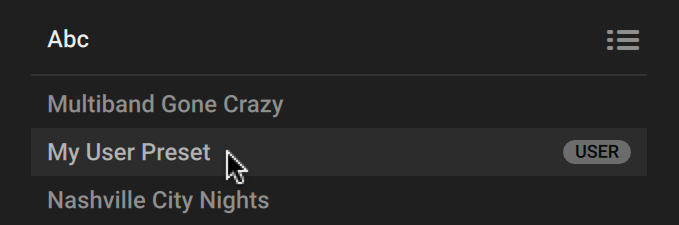
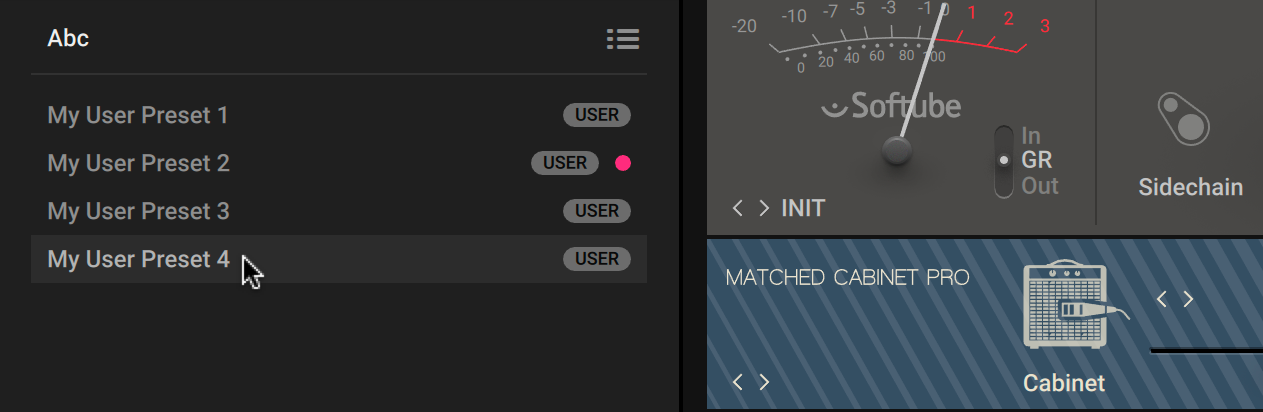
The User preset is saved and a new entry is added to the Results list, highlighted by the USER label.
Tip
Alternatively, you can press [command] + [shift] + [S] (macOS) or [Ctrl] + [Shift] + [S] (Windows) on the keyboard, or use the command from the Main menu. For more information, refer to Managing Presets Using the Main Menu.
Tip
To quickly find your User presets, you can filter the Browser's Results list by User presets. For more information, Overview of the Browser.
Saving Changes in a User Preset
To save changes made in a User preset:
Click the Save preset button in the Toolbar.
Tip
Alternatively, you can press [command] + [S] (macOS) or [Ctrl] + [S] (Windows) on the keyboard, or use the command from the Main menu. For more information, refer to Managing Presets Using the Main Menu.
Importing User Presets
You can import User presets from the hard drive. User presets are saved in the following folder:
macOS: Macintosh HD/Users/<user name>/Documents/Native Instruments/User Content/Guitar Rig <version number>/Rack Presets
Windows: C:\Users\<user name>\Documents\Native Instruments\User Content\Guitar Rig <version number>\Rack Presets\
To import a User preset:
Open the Main menu in the Header and select Import... in the File sub-menu.
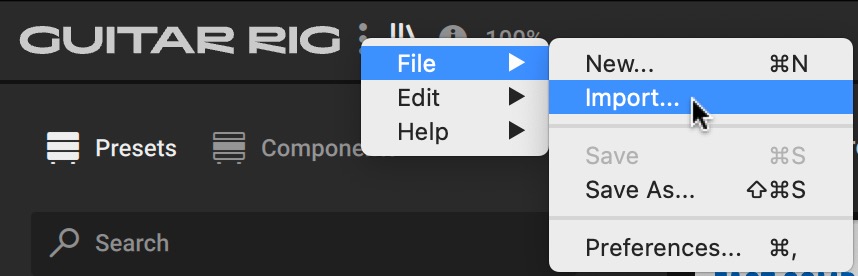
Navigate to the preset file you want to import, select it, and confirm by clicking Open.
The User preset is imported and can be accessed in the Browser.
Note
You can also import all User presets from an existing Guitar Rig installation at the same time using the option in the Preferences. For more information, refer to Library.
Editing User Presets in the Info Pane
You can use the Browser's Info pane to edit the Filter tags and properties for User presets.
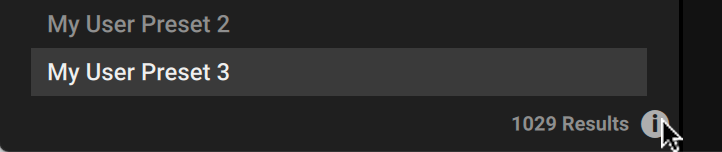
To open the Info pane for a User preset, select the User preset and click the Info Pane button in the Browser.
The following overview shows the Filter tags and properties you can edit in the Info pane:
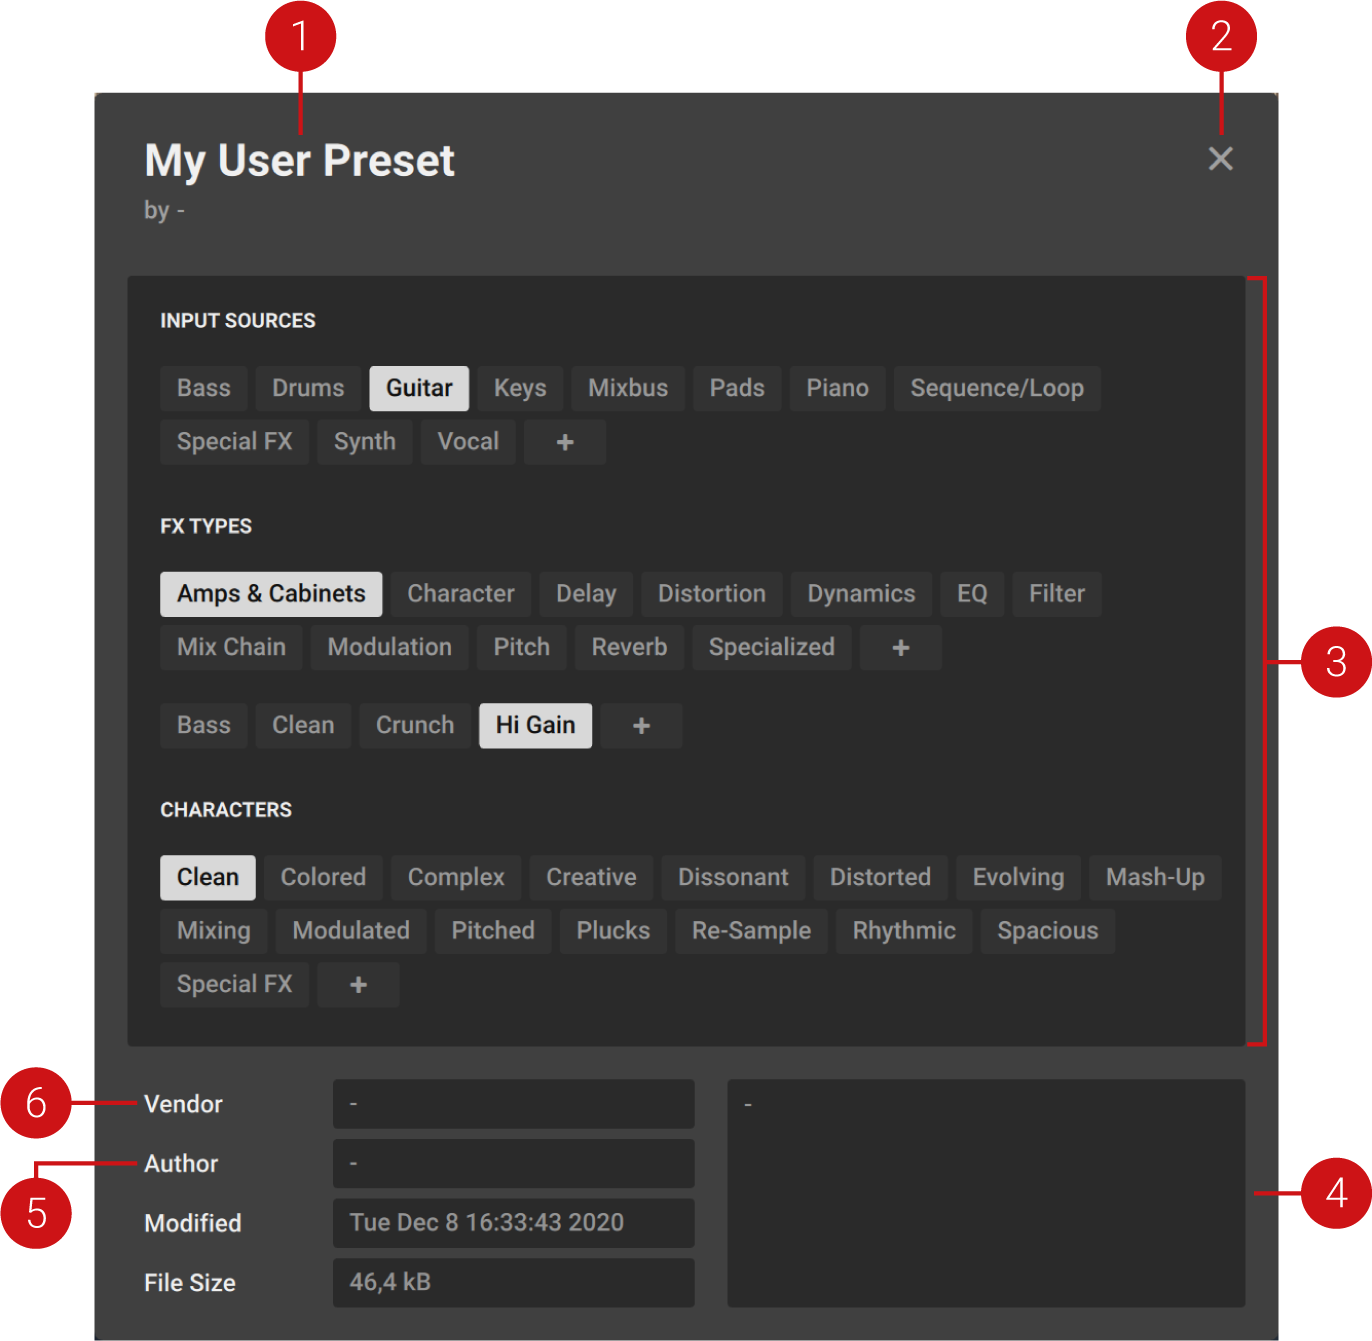 |
Preset name: Displays the name of the User preset. When placing the mouse over the name, a pen icon appears next to it that you can click to change the name. Alternatively, you can double-click the name to change it.
Close Info pane: Closes the Info pane.
Filter tags: Displays all available Filter tags. You can assign Filter tags to your User preset by selecting them. Furthermore, you can add and assign your own User Filter tags. For more information, refer to Managing User Filter Tags.
Comment: Displays the comment associated with the User preset. You can click in the field to change the comment.
Author: Displays the name of the author associated with the User preset. You can click in the field to change the name.
Vendor: Displays the name of the vendor associated with the User preset. You can click in the field to change the name.
Managing User Filter Tags
You can add your own User Filter tags and assign them to a User preset in the Info Pane of the Browser.
Adding a User Filter Tag
To add a User Filter tag:
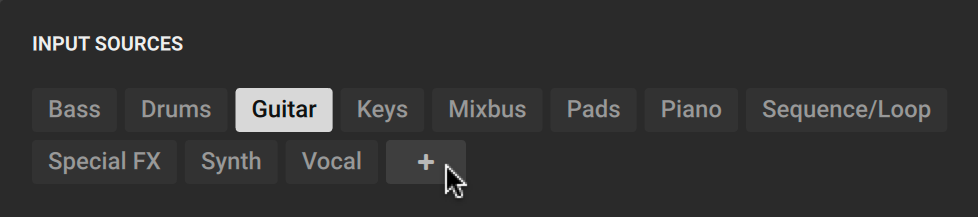
Select the User preset you want to assign your own User Filter tag to in the Results list by clicking on the corresponding entry.
Click the Info Pane button in the bottom right corner of the Results list to open the Info pane.

Click on the + icon under the Filter type you want to add your User Filter tag to.
Type in a name for your User Filter tag.
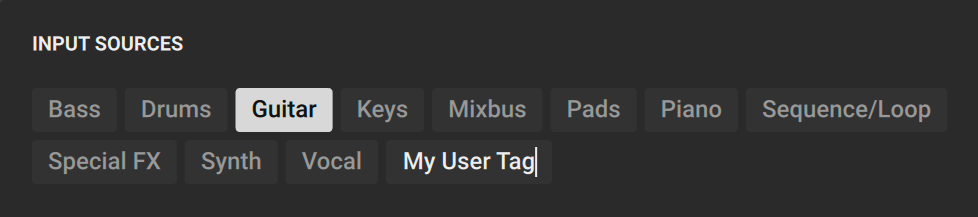
Press [Enter] or click anywhere in the Info pane to confirm the name and save your User Filter tag.
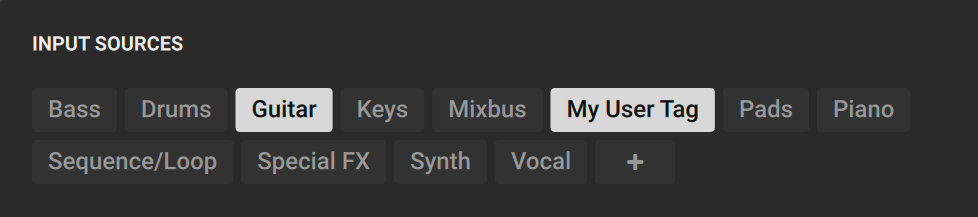
Your new User Filter tag is added and assigned to the User preset.
Note
Once added, your User Filter tag shows up in the Browser and can be used to filter the presets in the Results list. For more information, refer to Using Filters.
Deleting a User Filter Tag
To delete a User Filter tag from the Browser:
Filter the presets in the Results list by clicking on the User Filter tag you want to delete.
Select a User preset in the Results list by clicking on the corresponding entry.
Click the Info Pane button in the bottom right corner of the Results list to open the Info pane.
In the Info pane, click on the User Filter tag you want to delete in order to remove it from the selected User preset.
Repeat steps 2 and 4 for all User presets the User Filter tag is assigned to.
The User Filter tag is deleted and does not show up in the Browser any more.
Deleting User Presets
You can delete User presets directly in the Browser. The entries will be removed from the Results list, and the corresponding files will be deleted from the User folder.
To delete User presets:
Right-click a User preset in the Results list to open the context menu. If multiple User presets are selected, the changes will apply to all of them.
Note
You can select a preset by clicking on it. Holding [SHIFT] on the keyboard allows for selection of multiple presets.
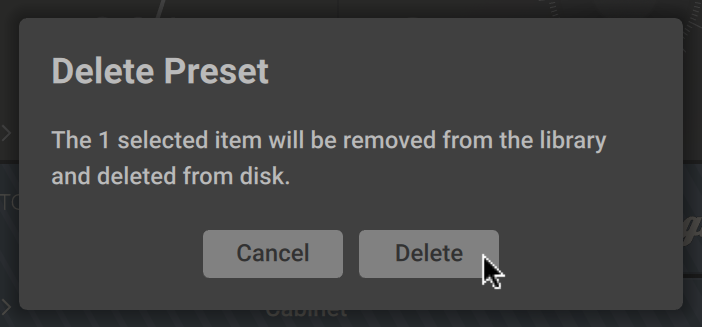
Select Delete Preset from the context menu.
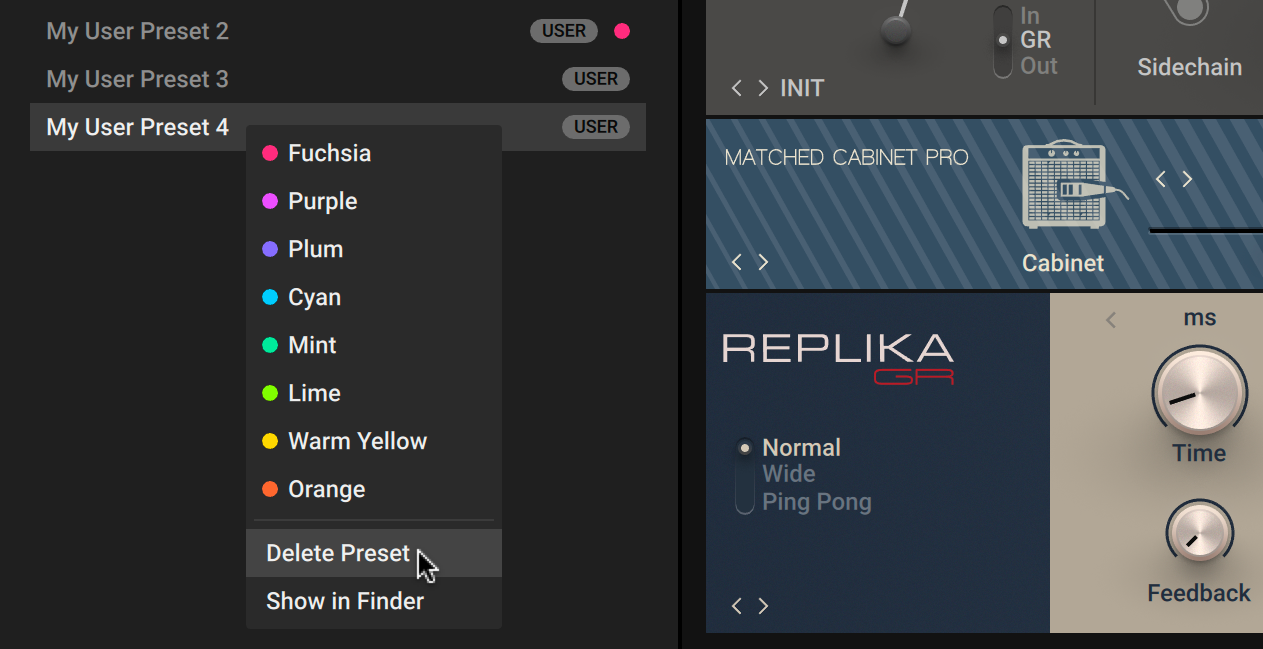
Confirm that you want to delete your User preset by clicking Delete in the dialog box.
The User preset is deleted from the hard drive and does not show up in the Results list any more.
Tip
For more information about the User folder, refer to Importing User Presets.
Managing Presets Using the Main Menu
You can use the Main menu in the Header to manage Presets. The available commands can be accessed in the File sub-menu.
To open the Main menu, click the Main menu button (three vertical dots) in the Header.
The following overview shows you the available commands:
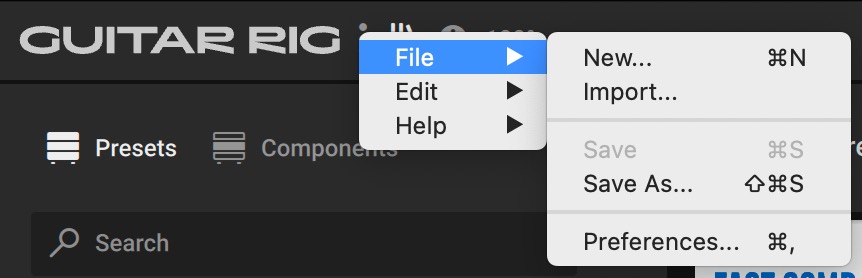 |
New...: Clears the Rack and creates a new User preset.
Import...: Imports User presets from the hard drive. For more information, refer to Importing User Presets.
Save: Saves the loaded User preset. When no User preset is loaded, the command is deactivated and grayed out.
Save As...: Saves the loaded preset as a new User preset.
Tip
Keyboard shortcuts are available for most of the commands contained in the File sub-menu. For more information, refer to Keyboard Shortcuts.
Using Component Presets
Component presets contain all settings of a Component, enabling you to save and recall the state of a Component independently of the Rack. You can load Component presets from the Guitar Rig library to quickly try new settings, or save your personal settings for later use. You can access Component presets in the Browser or in the Component itself.
Component Presets in the Browser
You can access Component presets in the Browser when the Component selector at the top is set to Components. Using the Results list, you can browse for and load Component presets. Additionally, you can delete User Component presets that you have previously saved using the Component's Preset menu.
To show the Component presets in the Results list, click the View Component Presets button in the bottom left corner of the Browser.
You can load a Component preset using drag and drop. The associated Component is added automatically.
Drag and drop the Component preset from the Results list into the Rack. The expected position of the added Component is indicated by a yellow line.

Note
You can also replace one or multiple Components by loading a Component preset in the same way Components can be replaced with a Component. For more information, refer to Replacing Components in the Rack.
You can delete User Component presets using the context menu in the Results list.
To delete User Component presets, right-click on the respective entry in the Results list and select Delete Preset.

Component Presets in the Component
You can access Component presets in the Component by using the Preset menu, which also enables you to save your own User Component presets.
To show the Preset menu in a Component, click on the preset name shown in the interface.
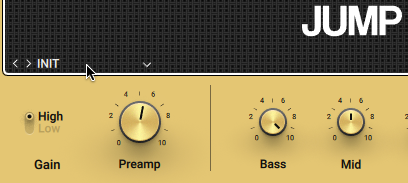
The following overview shows the available options in the Preset menu:
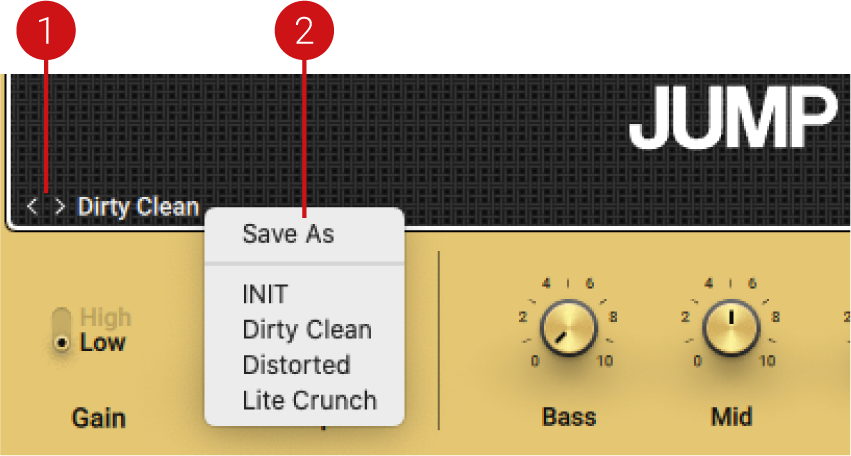 |
Previous preset / Next preset: Switches between Component presets of the respective Component. Clicking on the leftward arrow loads the previous preset. Clicking on the rightward arrow loads the next preset.
Drop-down menu: Provides the Save As option to save a new User Component preset, and shows a list of all available Component presets. Clicking on an entry in the list loads the corresponding Component preset.