Effect page
The Effect page of Absynth 6 lets you choose and configure the effect module used in the main channel of your patch.
The Effect page of Absynth 6 lets you choose and configure an effect that is applied to the sound coming from the three channels on the Patch page. Additionally, the Surround panner enables you to place sounds in the surround field when using a multichannel output configuration.
To open the Effect page, click the Effect button at the top of the Absynth 6 window:

The Effect page consists of the following elements and sections:
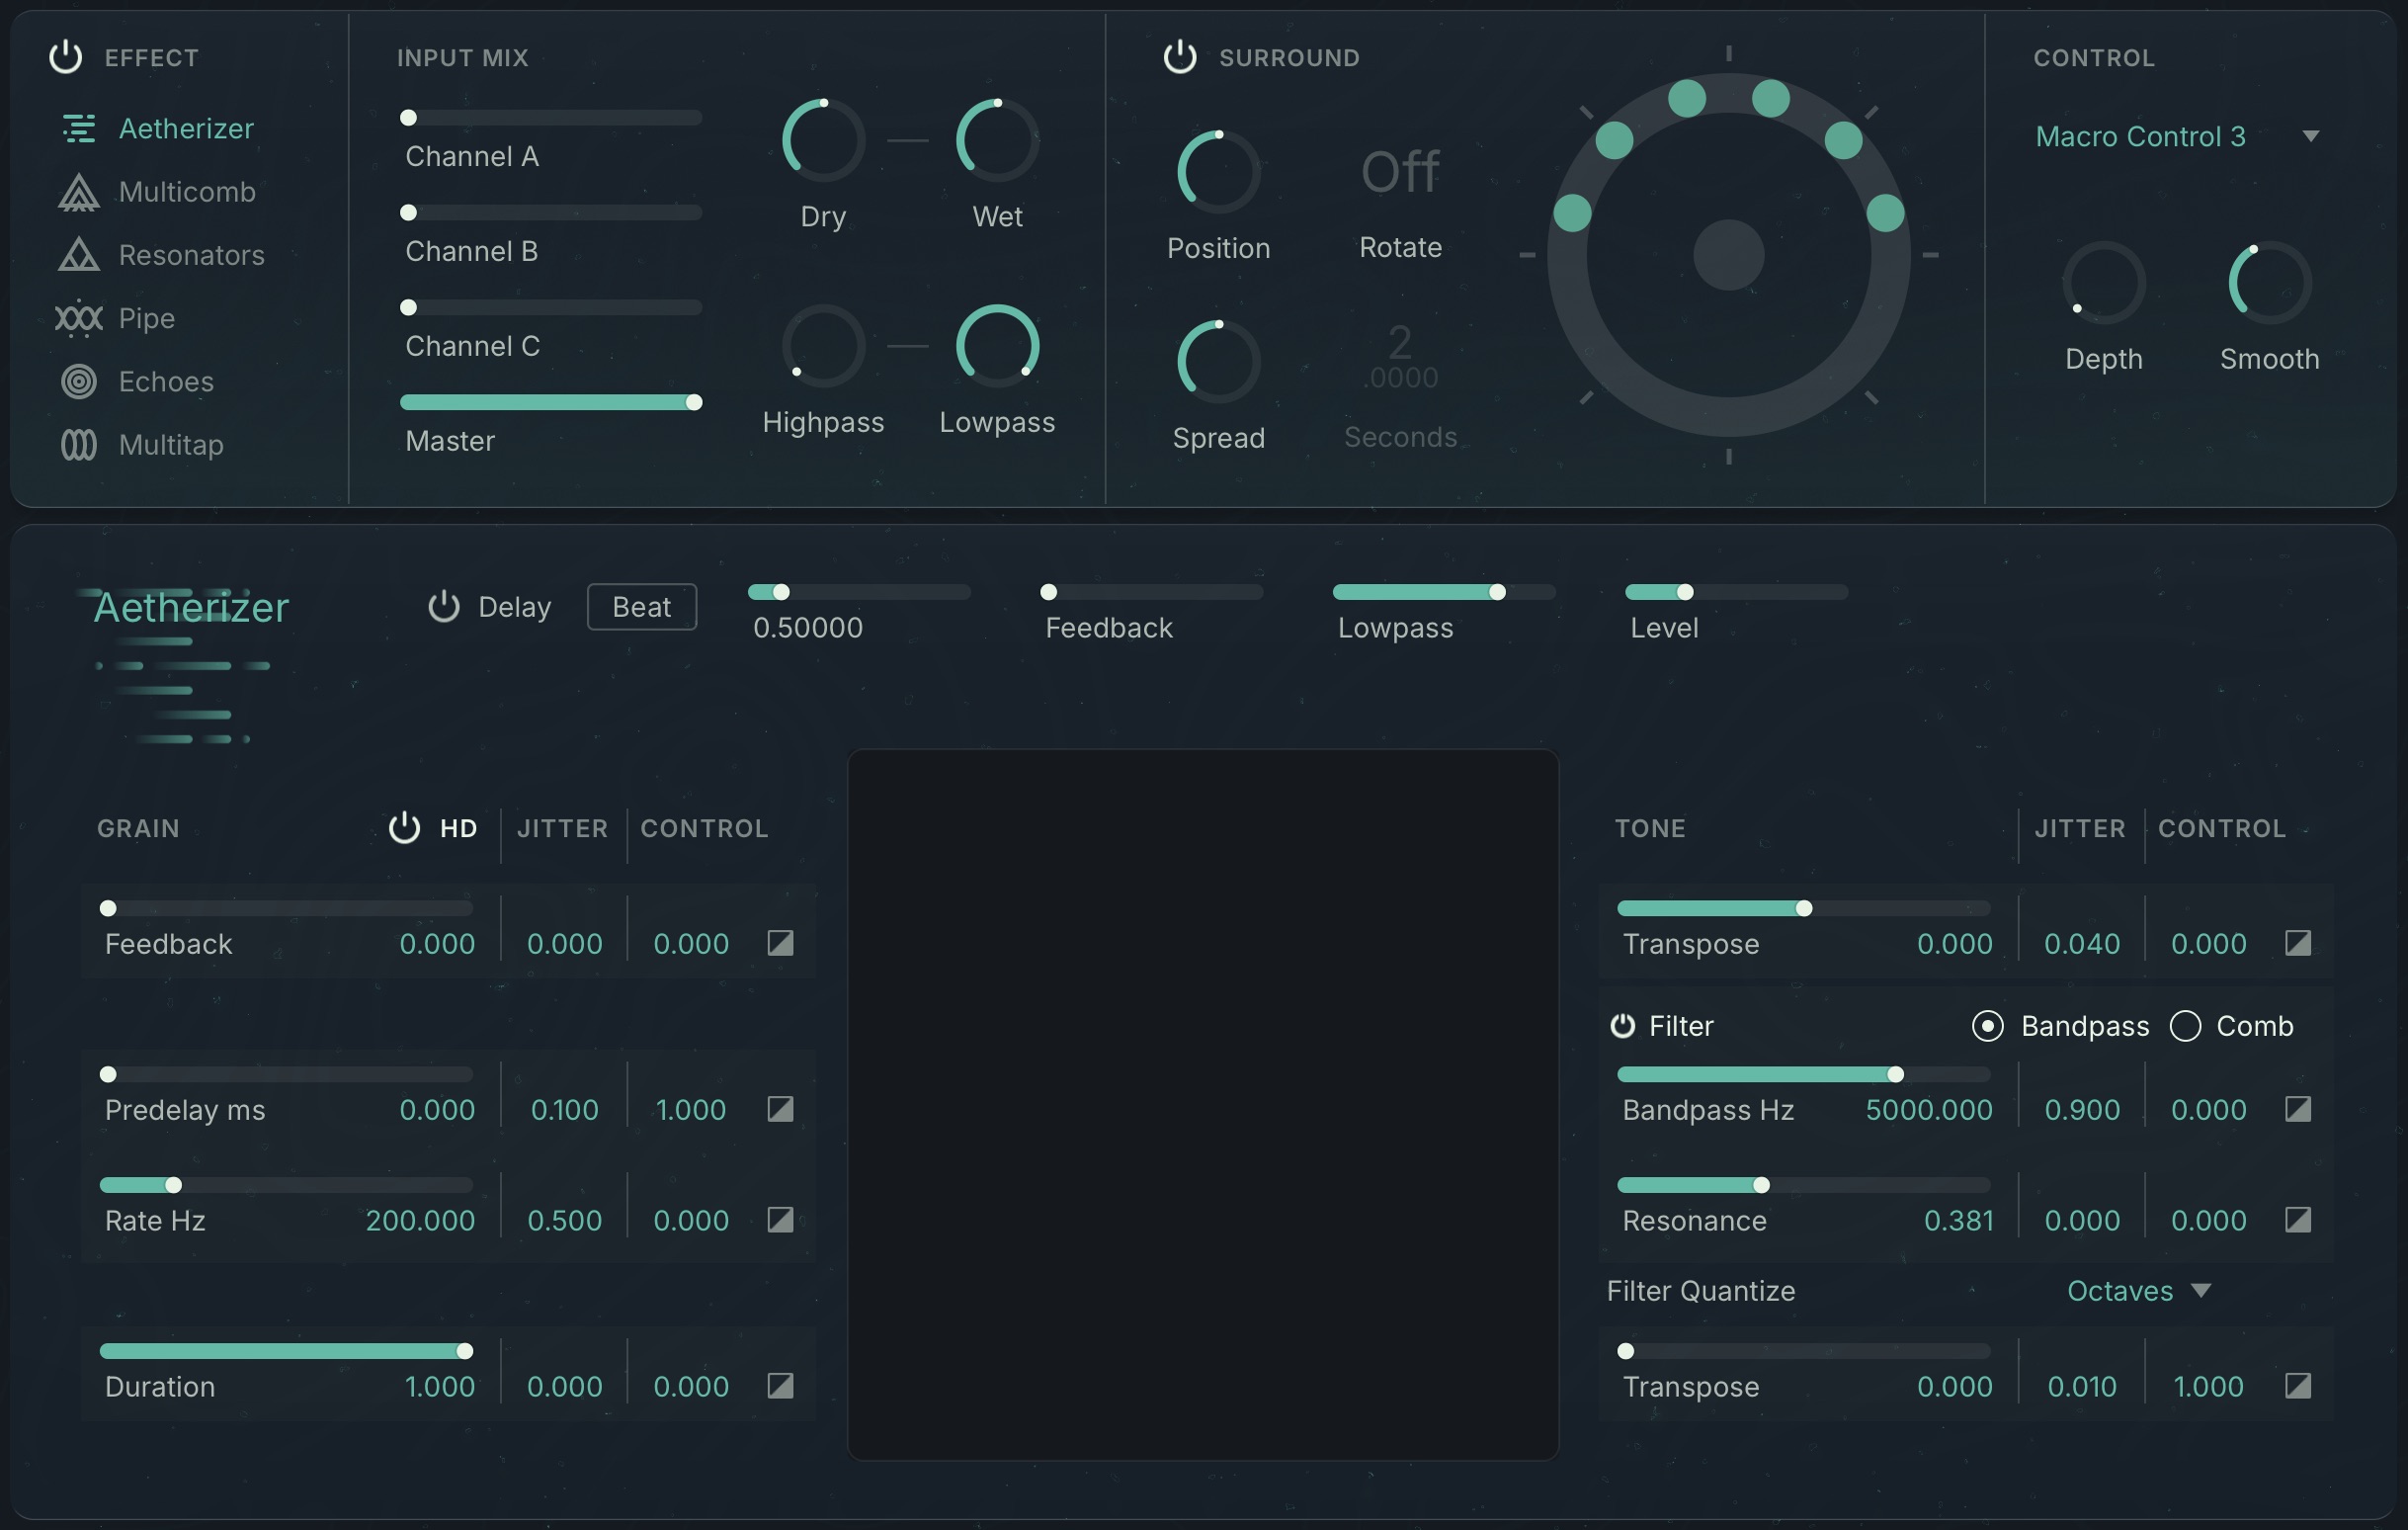
Effect On/Off: Bypasses the Effect page, routing the channels on the Patch page directly to the output. Bypassing the Effect page reduces the CPU load.
Effect: Selects one of the following effects that will be be applied to your sound. You can edit the selected effect in the lower area of the Effect page.
Input Mix: Lets you adjust the signal levels coming from the Patch page, global dry/wet controls, and apply input filtering. You can find more information in Input Mix section.
Surround: Lets you adjust the controls of the Surround Panner. You can find more information in Surround section.
Control: Lets you select Macro controls, and adjust their modulation depth and smoothing. You can find more information in Control section.
Input Mix section
The Input Mix section lets you adjust the signal levels coming from the Patch page before they are processed by the effect selected on the Effect page. Additionally, you can set the dry and wet effect levels, and apply input filtering to the signal.
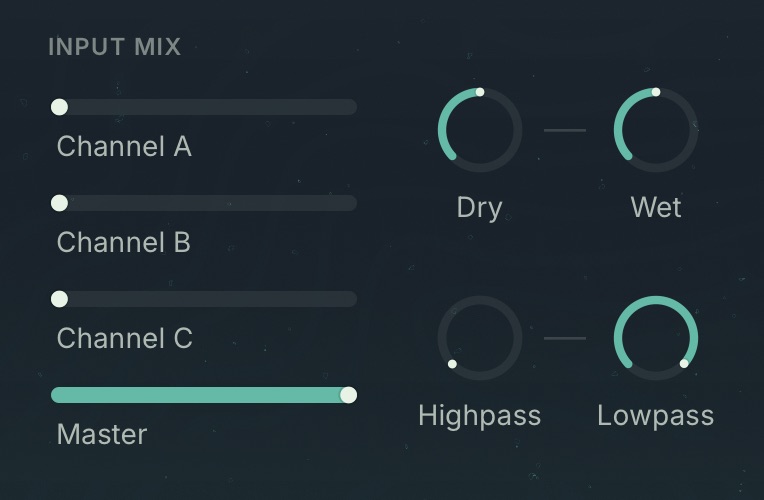 |
Channel A/B/C: Adjusts the levels of the individual channel signals coming from the Patch page.
Master: Adjusts the level of the main signal coming from the Patch page, which is composed according to each channel's Volume and Pan controls on the Patch page.
Dry: Adjusts the level of the dry signal coming from the Patch page at the output of the instrument.
Wet: Adjusts the level of the effect signal at the output of the instrument.
Highpass: Applies a high-pass filter to the input signal of the selected effect, removing low frequencies as you turn up the control.
Lowpass: Applies a low-pass filter to the input signal of the selected effect, removing high frequencies as you turn down the control.
Surround section
The Effect page integrates Absynth 6's Surround Panner. All of the available effects support multichannel applications, from multiple delay taps to independent resonators, which can be placed separately in the surround field.
Using the Surround Panner greatly expands the possibilities for spatial sound design. For example, you can make echoes come from behind your listening position, or you can make the Pipe effect circle around you.
Tip
The Surround Panner can also be used if a stereo configuration is selected in the Surround tab of the Settings dialog. In this case the surround signal will be mixed down to stereo.
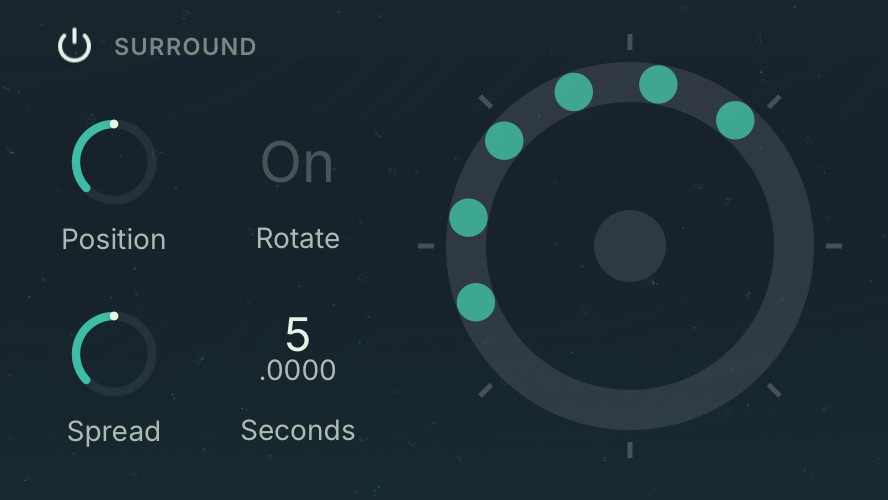 |
Surround On/Off: Switches the Surround Panner on or off.
Position: Moves the position of all effect signals around a circle in the surround field. The relative positions of the signals remain constant. At center position, the effect signals are oriented towards the front of the surround field. Turning the control to the left moves the signals in counter-clockwise direction, turning it to the right moves them in clockwise direction.
Spread: Distributes the effect signals across a circle in the surround field. When turned fully to the left, all signals are played back in the same position. Turning the control to the right increases the distances between them, relative to the individual Pan settings of the effect (if applicable).
Rotate: Routes an internal LFO to Position and creates a circular movement of all effect signals in the surround field.
Seconds: Adjusts the duration of the circular movement of the effect signals created by the Rotate function. Increasing the value slows the movement down.
Display: Shows the position of the individual effect signals in the surround field, each represented by a dot. Each effect is represented according to the number of individual effect signal it produces. The front of the surround field is at the top.
Control section
The Control section lets you define how the effect responds globally to modulation coming from the selected Macro control. Each effect has a different set of controls that can be modulated, with dedicated Control parameters to adjust the individual modulation amount. Adjusting Depth globally increases or decreases the relative modulation amount across all Control parameters.
Tip
The Dry and Wet controls in the Input Mix section can be independently assigned to Macro controls by right-cicking them and using the context menu.
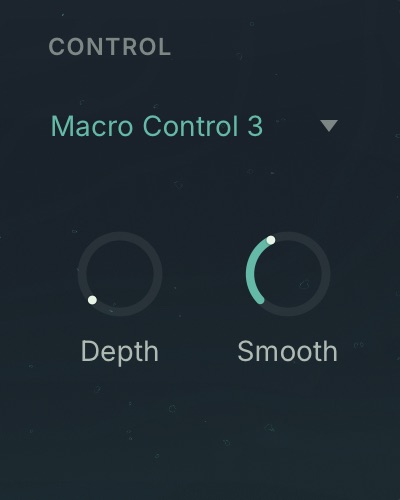 |
Control selector: Selects the Macro control used for modulating the effect.
Depth: Adjusts the global modulation amount applied from the selected Macro control. You can fine-tune the modulation amounts for individual effect controls using the respective Control parameters.
Smooth: Applies smoothing to the modulation, creating soft transitions between different values, even if the modulation contains sharp edges and fast transitions.
Aetherizer
Aetherizer is a granular processor that allows you to process the signal on the level of small fragments of sound, called grains. You can use transposition, a feedback loop, and a bandpass or comb filter, before sending the signal to a delay including its own feedback loop.
Each grain is played back at a random position in the stereo field. When using the Surround Panner, each single grain is reproduced at its own surround position. Similarly, all processing on the grain level can be randomized to produce evolving and unpredictable results. You can also control all parameters (including the randomization parameters) using envelope, LFOs, or Macro controls.
Delay section
The Delay section adds another dimension to the grain clouds by applying echo effects to the output of the granular processing.
The Delay section contains the following controls:

Beat/Sec: Switches the Delay Time control between time intervals (Sec) and musical beats in quarter notes (Beat).
Time: Defines the post-delay duration.
Feedback: Defines the proportion of the incoming signal that is sent to the post-delay's feedback loop (range: 0.00 to 99.99 %).
Lowpass: Adjusts the cutoff frequency (in Hertz) of a lowpass filter within the feedback loop.
Level: Adjusts the gain (in dB) of the delayed signal.
Grain section
The Grain section lets you adjust the Aetherizer’s granular processing, allowing you to control the shape of the grain cloud.
Note
The Jitter and Control parameters allow for randomization and modulation of the individual controls. You can find more information in Jitter and Control.
The Grain section contains the following controls:
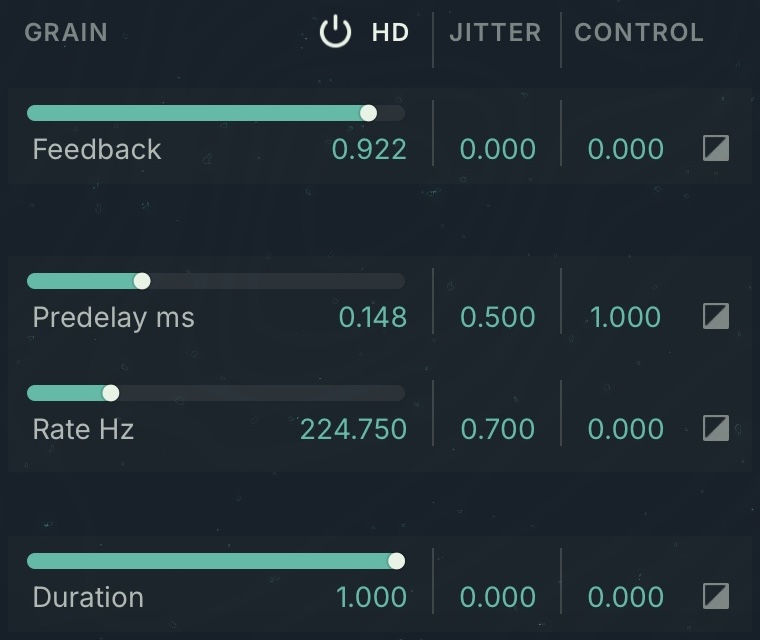 |
HD switch: Activates or deactivates the High Density mode. In High Density mode the grain cloud can reach higher densities, which results in a both fuller and more polished sound. The High Density mode can also generate higher CPU loads.
Feedback: Amount of grain-level feedback.
Predelay ms: Defines the position in the incoming signal at which the grains are taken. Increasing the Predelay value makes the grain start later in the input signal.
Rate Hz: Rate at which the input signal is chopped (in other words, it is the number of grains taken from the input signal during one second).
Duration: Adjusts the length of each grain. This parameter influences the density of the sound: less duration means less overlapping grains, thus making the sound thinner.
Note
The actual grain duration also depends on Rate Hz, the faster the rate, the shorter the grains.
Tone section
The Tone section lets you adjust the tonal quality of the grains, allowing your to control the pitch and filtering of each grain.
Note
The Jitter and Control parameters allow for randomization and modulation of the individual controls. You can find more information in Jitter and Control.
The Tone section contains the following controls:
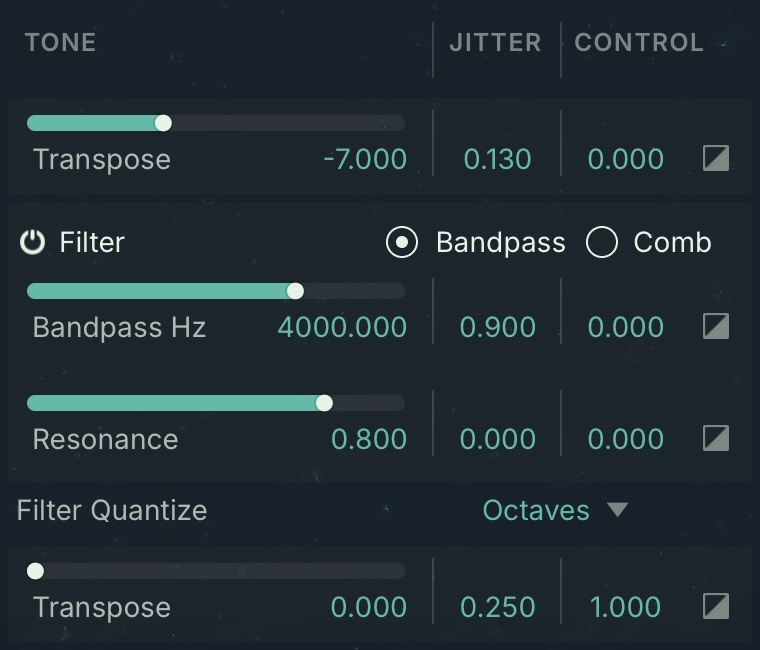 |
Transpose: Adjusts the transposition of the grains (in semitones).
Filter On/Off: Enables/disables the filter at the grain level.
Filter Mode: Selects between two filter modes, Bandpass and and Comb.
Bandpass/Comb Hz: Defines the cutoff frequency of the grain-level filter.
Resonancel: Defines the resonance of the grain-level filter.
Tip
When using Comb mode, turn the down Rate Hz in the Grain section to make low pitches more audible. For example, if Rate Hz is set to 200 Hz and Comb Hz to 50 Hz, the grain is too short for the pitch to build up in the comb filter.
Filter Quantize quantizes the filter frequencies of the grains according to musical scales or formants. The following controls are available:
Filter Quantize Mode: Selects the musical scale or Formant mode that will determine the filter frequencies of the individual grains.
Transpose: Transposes the selected scale in semitones. This control is not available when Vowel mode is selected.
Note
The quantization of the cutoff frequency can only happen if you allowed the cutoff frequency to “move” around the basic Frequency control value. You can achieve this by setting the Random Frequency control to its right at a non-zero value (see below for more details about the Random parameters).
Jitter and Control
In both the Grain and Tone sections each control can be randomized and modulated using the Macro control. By applying randomization and modulation, the grain cloud comes to live, creating interesting textures, layers, and movements.
The following parameters are available for each control:
Jitter: Adjusts the amount of randomization applied to the respective control. At a value of 0, the control is not randomized and all grains share this same value. By turning up Jitter, the control is increasingly randomized and each grain is played back according to different parameter values.
Control: Adjusts the amount of modulation applied from the Macro control selected in the Control section. You can find more information in Control section.
Display
The Aetherizer display shows you a visual representation of your grain cloud. The vertical axis is the pitch, the horizontal axis is the time. Each grain is represented by a small triangle followed by an horizontal trail (which represents the grain's length).
The visuals change according to the adjustments you make to the controls:
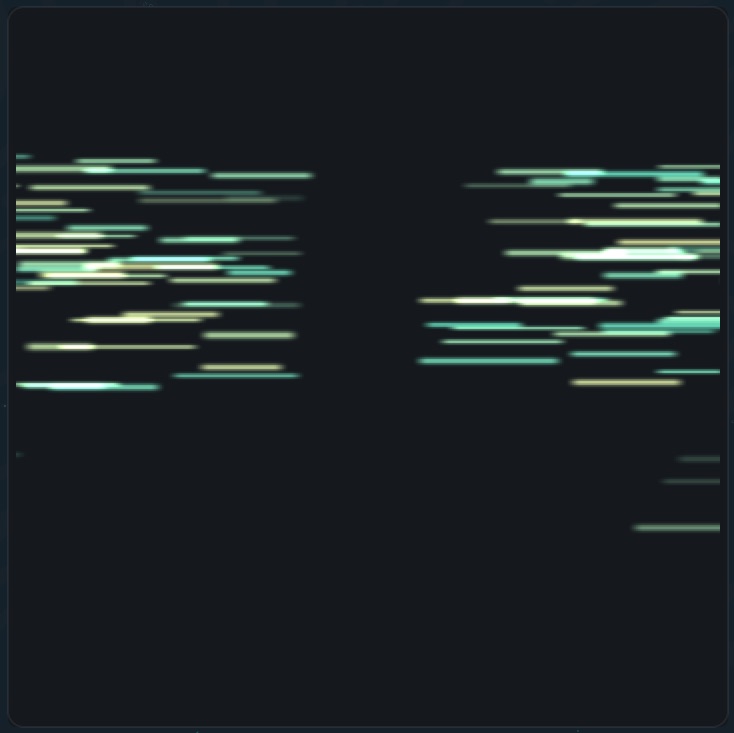 |
Duration changes the trails' lengths.
Rate changes the distance of the grains (and their length).
Transpose moves grains on the y-axis.
Transpose Jitter spreads grains across the y-axis.
Bandpass/Comb Hz changes the color of grains according to the filter frequency.
Resonance changes the intensity of the grains' color.
Multicomb
Multicomb specializes in modulation effects, offering up to six independent comb filters that use low-pass filters in the feedback loop. By applying modulation, you can easily achieve flanging and other effects based on phase shifts. For subtle to moderate phase modulations, choose medium values. High feedback rates produce tune-able resonance effects that sound like chords.
Multicomb contains the following controls:
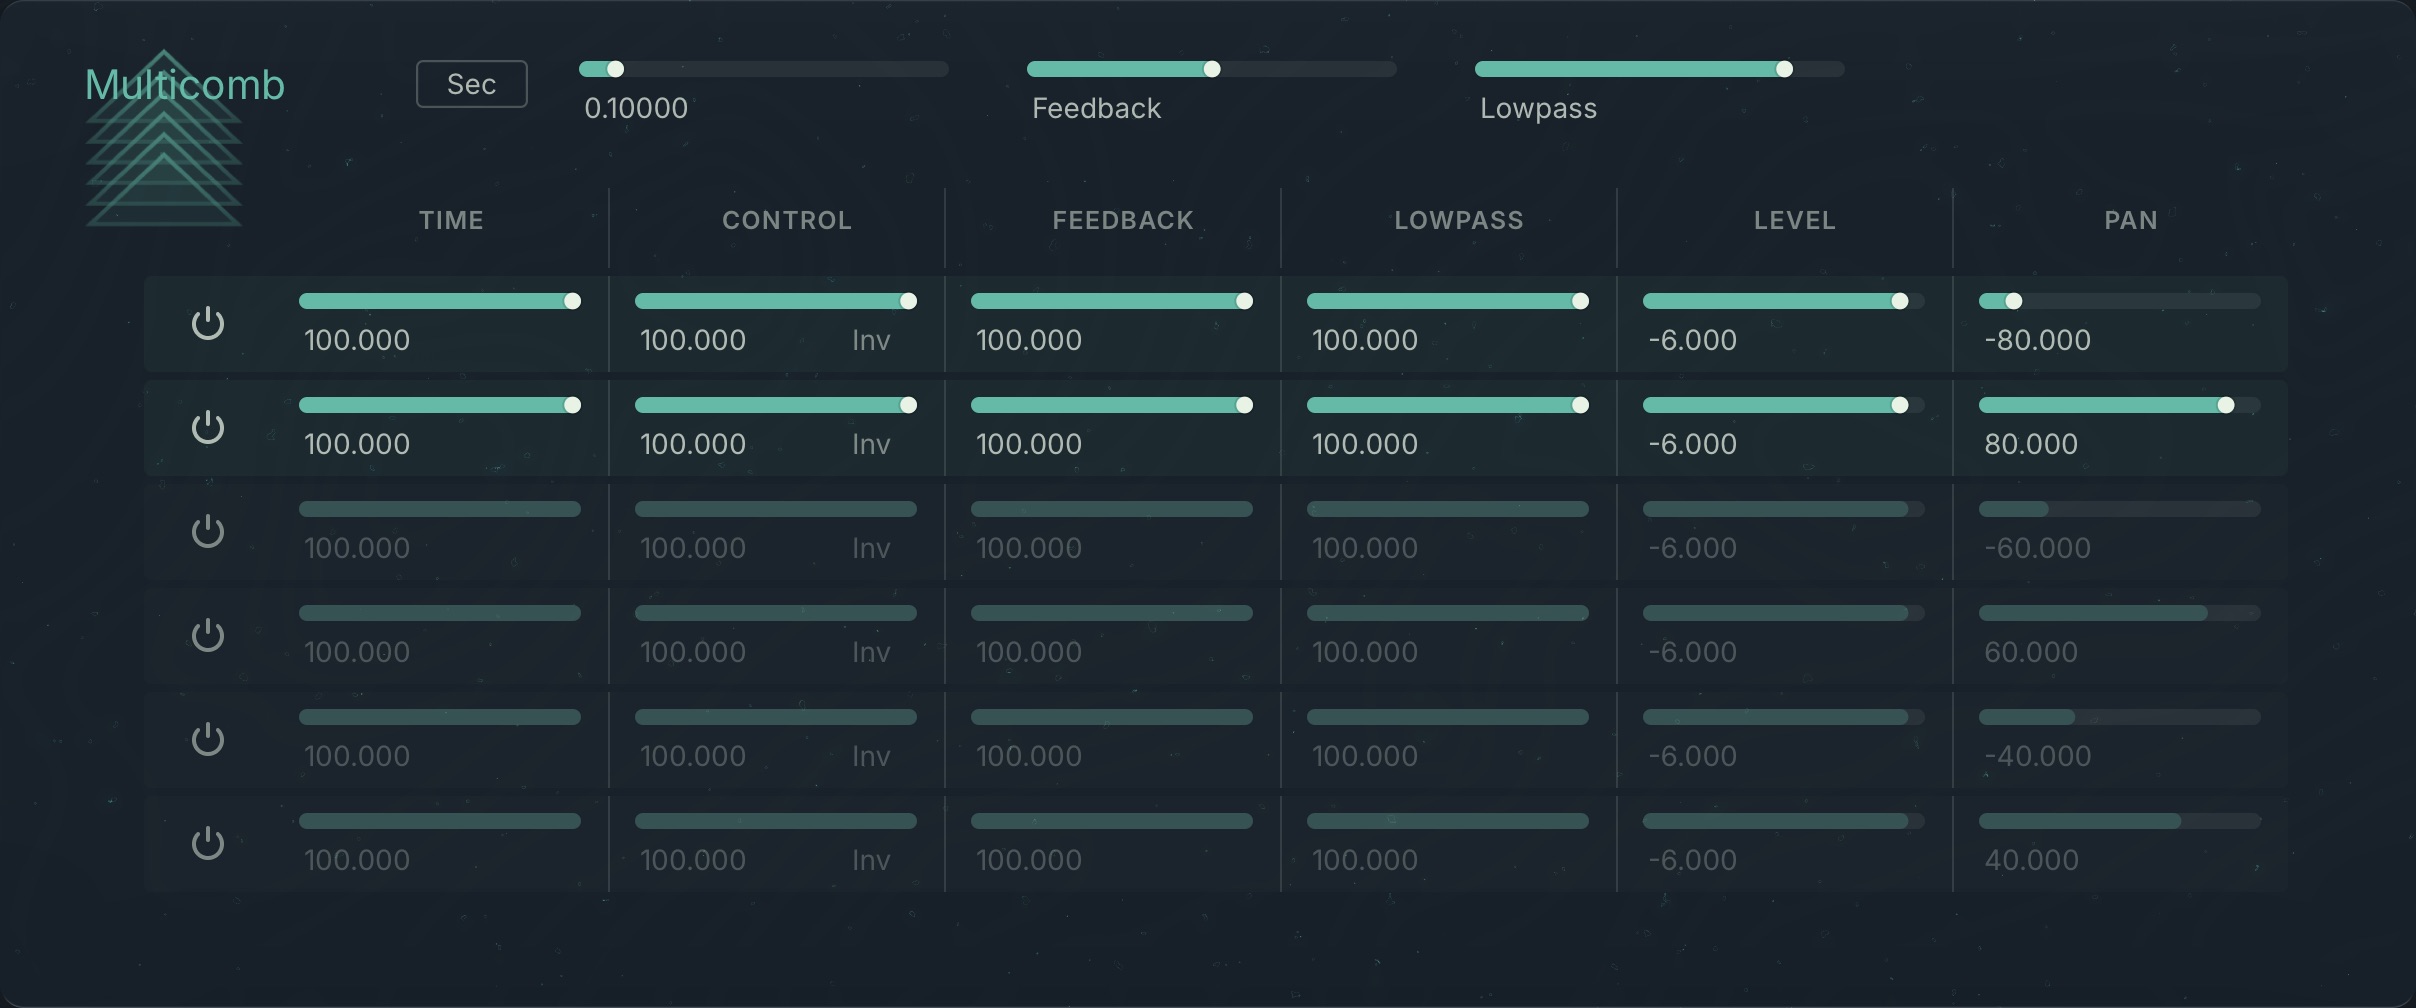
Beat/Sec: Switches the Time control between time intervals (Sec) and musical beats in quarter notes (Beat).
Time: Determines the maximum delay of the feedback signal, i.e. the combfilter’s frequency. A high value results in a long delay and thus a long vibration, i.e. a deep frequency.
Feedback: Defines the maximum level of the feedback signal, as a percentage value related to the original signal’s level. At high levels, the combfilter has a high resonance, and the sound’s overtones produce a saw-tooth curve.
Lowpass: Determines the cut-off frequency of the Lowpass filter, which is run through via the feedback signal (in Hz).
Each of the individual comb filters contains the following controls:
On/Off: Allows each of the six comb filters to be turned on or off.
Time: Defines the frequency (and hence the delay time) of the respective comb filter. This is measured in percentage, and correlates to the value you have selected in the Master Time control.
Control: Adjusts the amount of modulation applied from the Macro control selected in the Control section to the Time control (in percent).
Inv: If you turn on the Inversion switch, you invert the effect of the Macro Control’s control signal (see the section on Modulation und Sensitivity control).
Feedback: Establishes the feedback signals’ level of every individual filter as a percentage, which correlates to the value you choose in the Master Feedback control.
Lowpass: Controls the cut-off frequency of each Lowpass filter. This is measured in percent, which again correlates to the value set forth in the Master Lowpass control.
Level: Determines the level of each respective comb filter signal at the output signal in dB.
Pan: Positions the signal of the respective comb filter within the panorama of the output signal. The value 0 corresponds to the position on the extreme left and 1 corresponds to the position on the extreme right. 0.5 corresponds to the middle position.
Resonators
Resonators consists of three virtual resonant bodies. These resonators can produce echo and reverb effects from infinite spaces to shorter, brighter sounding rooms, or simulate the sound of specific objects such as metal bars, brake drums and bottles.
Resonators contains the following controls:
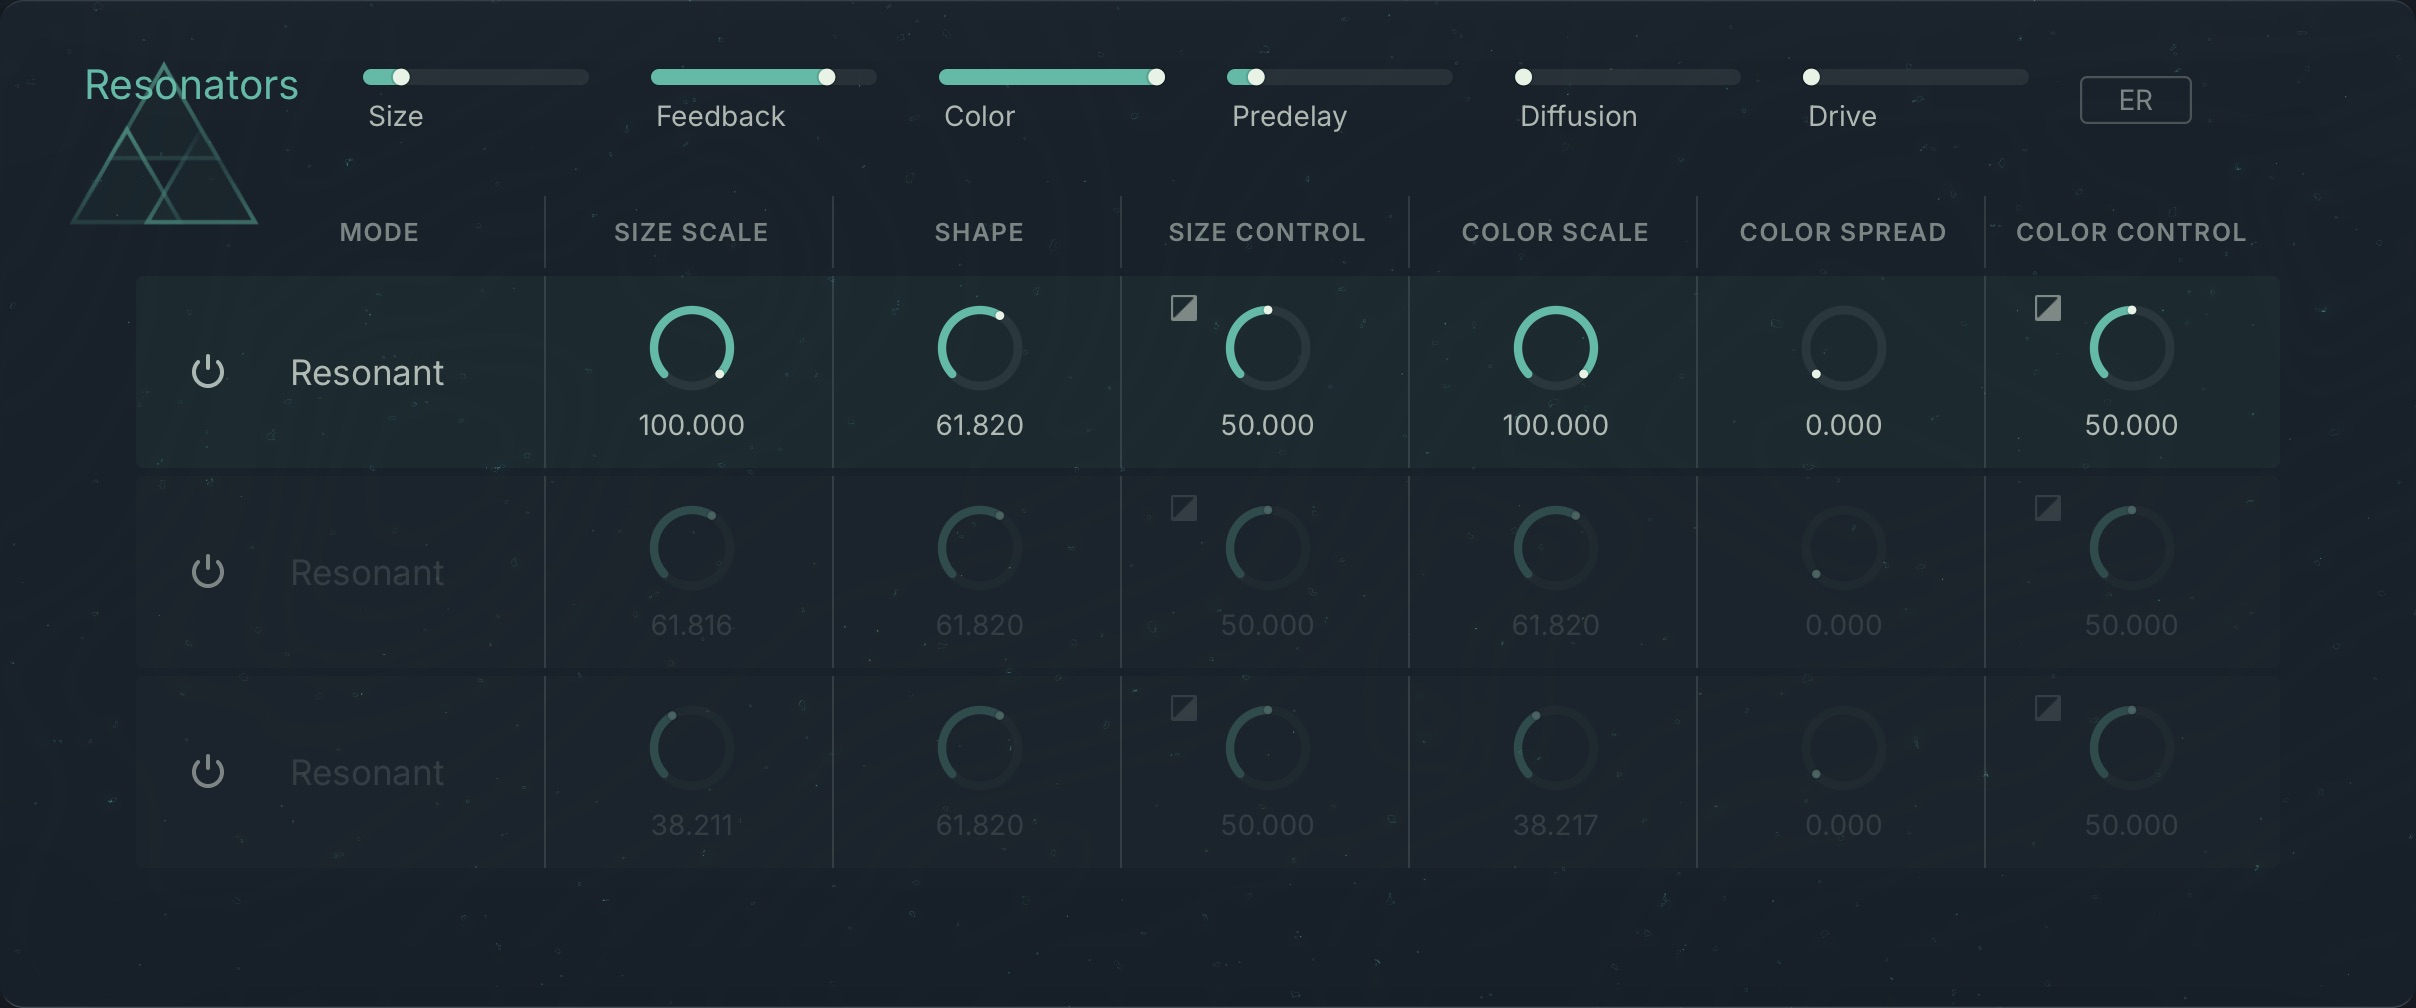
Size: Sets the maximum delay-length between 0% and 100%.
Feedback: Controls the feedback amount (from 0 to 100).
Color: Controls the filters inside the resonators. The effect depends on which feature is selected in the Mode menu (see below).
Predelay: Sets the delay in milliseconds, before the onset of the resonation effect.
Diffusion: Creates random delay variations. A good adjustment will reduce how much the resonator “rings” less, and higher values make it sound grainier. Range: 0 to 100.
Drive: Regulates the input level. This parameter determines the input signal’s degree of saturation. If a high input level distorts the signal, the resonators react differently to when stimulated by a clean signal. This is a very powerful setting, since it also affects all other parameters.
ER: Turns the “early reflections” on or off.
Each of the individual echo paths contains the following controls:
Mode: Selects one of the following resonator modes.
Clean: Dampened delay. The sound flutters and is less diffuse
Natural: More diffuse variation. Sounds rather dark.
Resonant: More diffuse, brighter sound.
Synthetic: Like Resonant, just more extreme. The parameter Tone control (see above) produces very different effects depending on which operating mode you are using. Have an experiment with this parameter’s extreme settings.
Size Scale: The resonator size is the determined by the value set by the Master section's Size control multiplied by this setting.
Shape: Allows you to adjust the various delay ratios. For a hall effect, changing this value would be like changing the space's volume or form.
Size Control: Adjusts the amount of modulation applied from the Macro control selected in the Control section to the Size control (in percent). The Inversion switch inverts the sensitivity.
Color Scale: The sounds created here are the result of a fixed Master Tone value multiplied by the setting selected in Tone Scale control.
Color Spread: Increasing the value of this produces a more diffuse sound and also reduces feedback.
Color Control: Adjusts the amount of modulation applied from the Macro control selected in the Control section to the Color control (in percent). The Inversion switch inverts the sensitivity.
Pipe
Pipe replicates the physical qualities of resonating bodies and resembles a so-called waveguide. Unlike waveguides based on physical modelling, Pipe's algorithm does not attempt to realistically simulate existing instruments or other natural resonating bodies. It is helpful to imagine Pipe as a kind of string or pipe. The string model using an exciter at a variable position of the string (Input Position) and two pickups, which can also be placed freely along the string (Output Left Position, Output Right Position).
You can modulate the string’s length and the pickups’ position using LFOs or a MIDI Controller. This way, various flanging, pitch-shifting and rotary speaker effects can be achieved. These effects are particularly apparent when the modulation of the pickups are modulated in opposite directions. LFO modulation applied to the output positions in opposite directions creates interesting panning effects. If the two points intersect, the output becomes mono.
Tip
When Output left Position or Output right Position cross Input Position, a muffled side tone can be heard. When modulating Length, any values crossing the output position can produce a muffled click. However, Output left Position and Output right Position can cross freely without artifacts.
Pipe contains the following controls:

Beat/Sec: Switches the Master Length control between time intervals (Sec) and musical beats in quarter notes (Beat).
Length: Determines the virtual string’s maximum length. In terms of application this means: that’s where the maximal delay can be set.
Feedback: Determines the level of the feedback signal in percentage of the original level; at higher values, the virtual string resonates longer, at lower values it is silenced faster.
Lowpass: Defines the cutoff-frequency of the Lowpass filter, through which the feedback signal passes (in Hz). It changes the string’s sustain characteristic.
Control Delay: Adjusts the amount of modulation applied from the Macro control selected in the Control section to the Length control (in percent).
Inversion: If you turn on the Inversion switch, the effect of the control signal received via the Macro Control is inverted (see the section on Modulation und Sensitivity control).
Input Position: Adjusts the position of the exciter on the string.
Output Left/Right Position: Adjusts the position for the the pickup on the string.
Output Left/Right Control: Adjusts the amount of macro control applied to Position.
Display: Shows the string model along with the positions of the exciter (In) and the two pickups (Out L, Out R), including modulation.
Echoes
Echoes is tailored towards creating classic echo-effects. The input signal can be delayed individually in up to three delay paths, each with its own filter configuration including low-pass, high-pass and all-pass filters. The Pan controls enable the three delay paths’ output signals to be separated in the stereo field. Each delay path can be directly mixed to the output using the Gain control. At the same time, it can be sent back to its own input using the Feedback control. An echo can lose high and low frequencies when sent through a filter and thus sound duller or more ethereal. The Allpass filter introduces phase shifts that produce interesting results, particularly using short delay times and when modulated by an envelope.
Echoes contains the following controls:
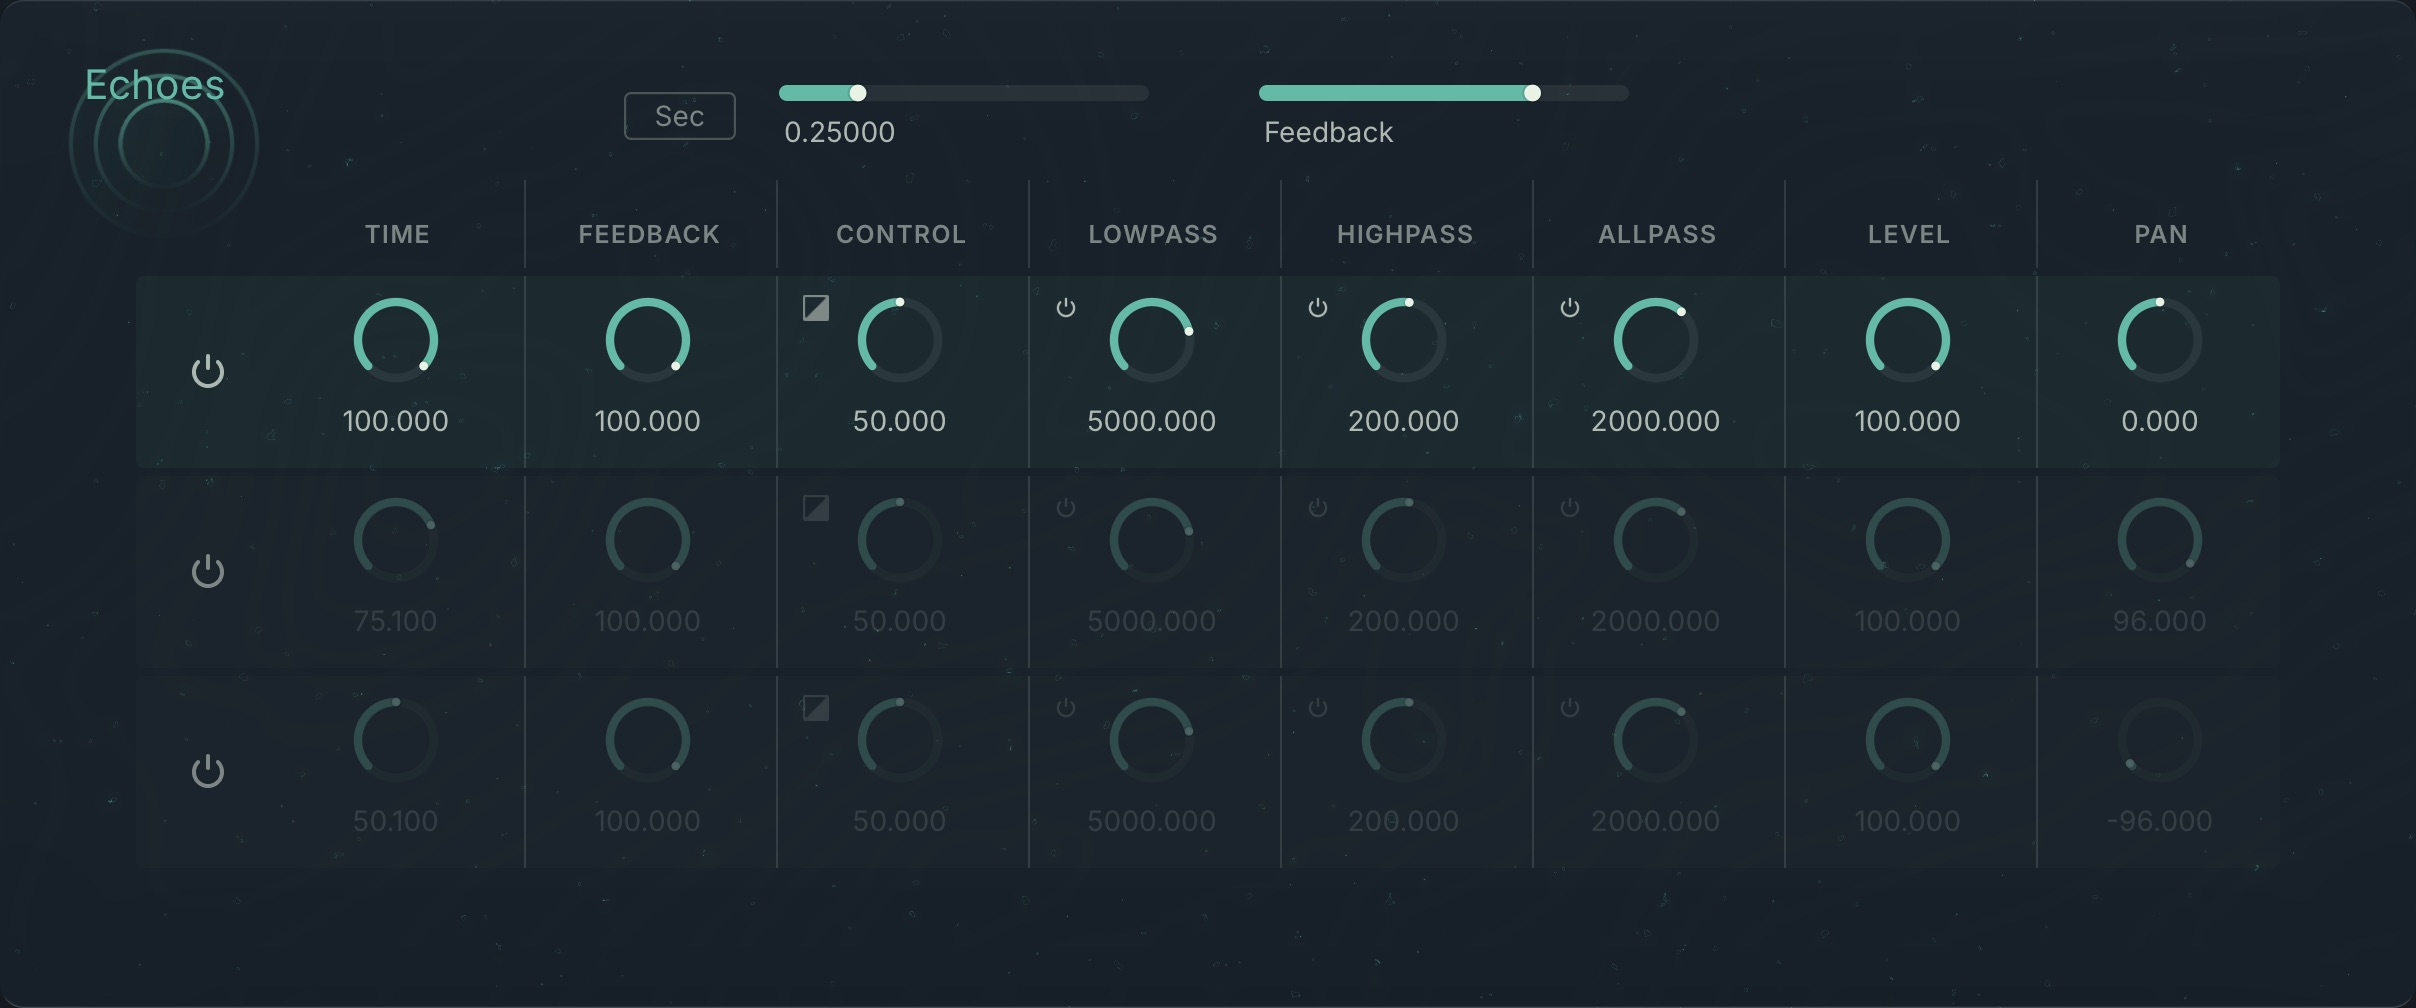
Beat/Sec: Switches the Time control between time intervals (Sec) and musical beats in quarter notes (Beat).
Time: Determines the maximum delay of the three taps.
Feedback: Defines the feedback intensity.
Each of the individual echo paths contains the following controls:
Time: Determines the delay of each echo (in percent) relative to the value set in Time control in the Master section
Feedback: Sets the level of an echo’s signal, which is routed back to the input, as a percentage of the original signal’s level.
Control: Adjusts the amount of modulation applied from the Macro control selected in the Control section to the Time control (in percent).
Lowpass: Determines the cut-off frequency of the Lowpass filter that is applied to the signal in the feedback loop. The value in Lowpass control can range from 1.0 to 22050 Hz.
Highpass: Determines the cut-off frequency of the Highpass filter that is applied to the signal in the feedback loop. The value in Highpass control can range from 1.0 to 22050 Hz.
Allpass: Determines the cut-off frequency of an Allpass filter, which is similar to the Allpass 4 function in the Filter Module in the Patch Window. Allpass filters let all frequencies pass through, but change the signal’s phase depending on the filter frequency. The Allpass filter produces its most impressive results when the parameters are modulated, thus creating phasing effects.
Level: Defines the output signal’s level of the respective echo (in dB). A value of -6dB reduces the signal level by half.
Pan: Positions the respective echo signal in the panorama of the output signal. A 0 value corresponds to a position at the extreme left, 1 a position at the extreme right and 0.5 to the middle.
Multitap
Multitap is a simple delay with three taps. The input signal is delayed according to the time set for each tap, creating three copies of the input signal. Interesting effects can be achieved by routing the delayed signal back to the input after the first tap, producing dense delay clusters.
Tip
Try to shift the positions of the three taps during the tonal progression through an envelope or an LFO. By setting the modulation source on the three taps’ Pan controls and feeding the Effect module with short, differentiated sounds, the signals will move around in a more powerful way.
Multitab contains the following controls:

Beat/Sec: Switches the Time control between time intervals (Sec) and musical beats in quarter notes (Beat).
Time: Determines the maximum delay of the three taps.
Lowpass: Determines the cut-off frequency of the lowpass filter, which the feedback signal runs through (in Hz).
Each of the individual delay taps contains the following controls:
Time: Determines the delay of each respective tap in percent of the value selected in the Time control in the Master section.
Control: Adjusts the amount of modulation applied from the Macro control selected in the Control section to the Time control (in percent).
Level: Defines the signal proportions for each tap at the output in dB. For example, a value of -6dB reduces the level by half.
Pan: Positions the respective tap’s signal in the panorama of the output signal. A 0 value corresponds to a position at the extreme left, 1 to a position at the extreme right and 0.5 to the middle.
Feedback: This parameter exists only for the first delay tap. It regulates the level of the signal, which is re-routed to the input, as a percentage of the original signal’s level.