Absynth 6 overview
This section introduces you to the main areas and elements in Absynth 6.
Absynth 6 consists of the following main areas:
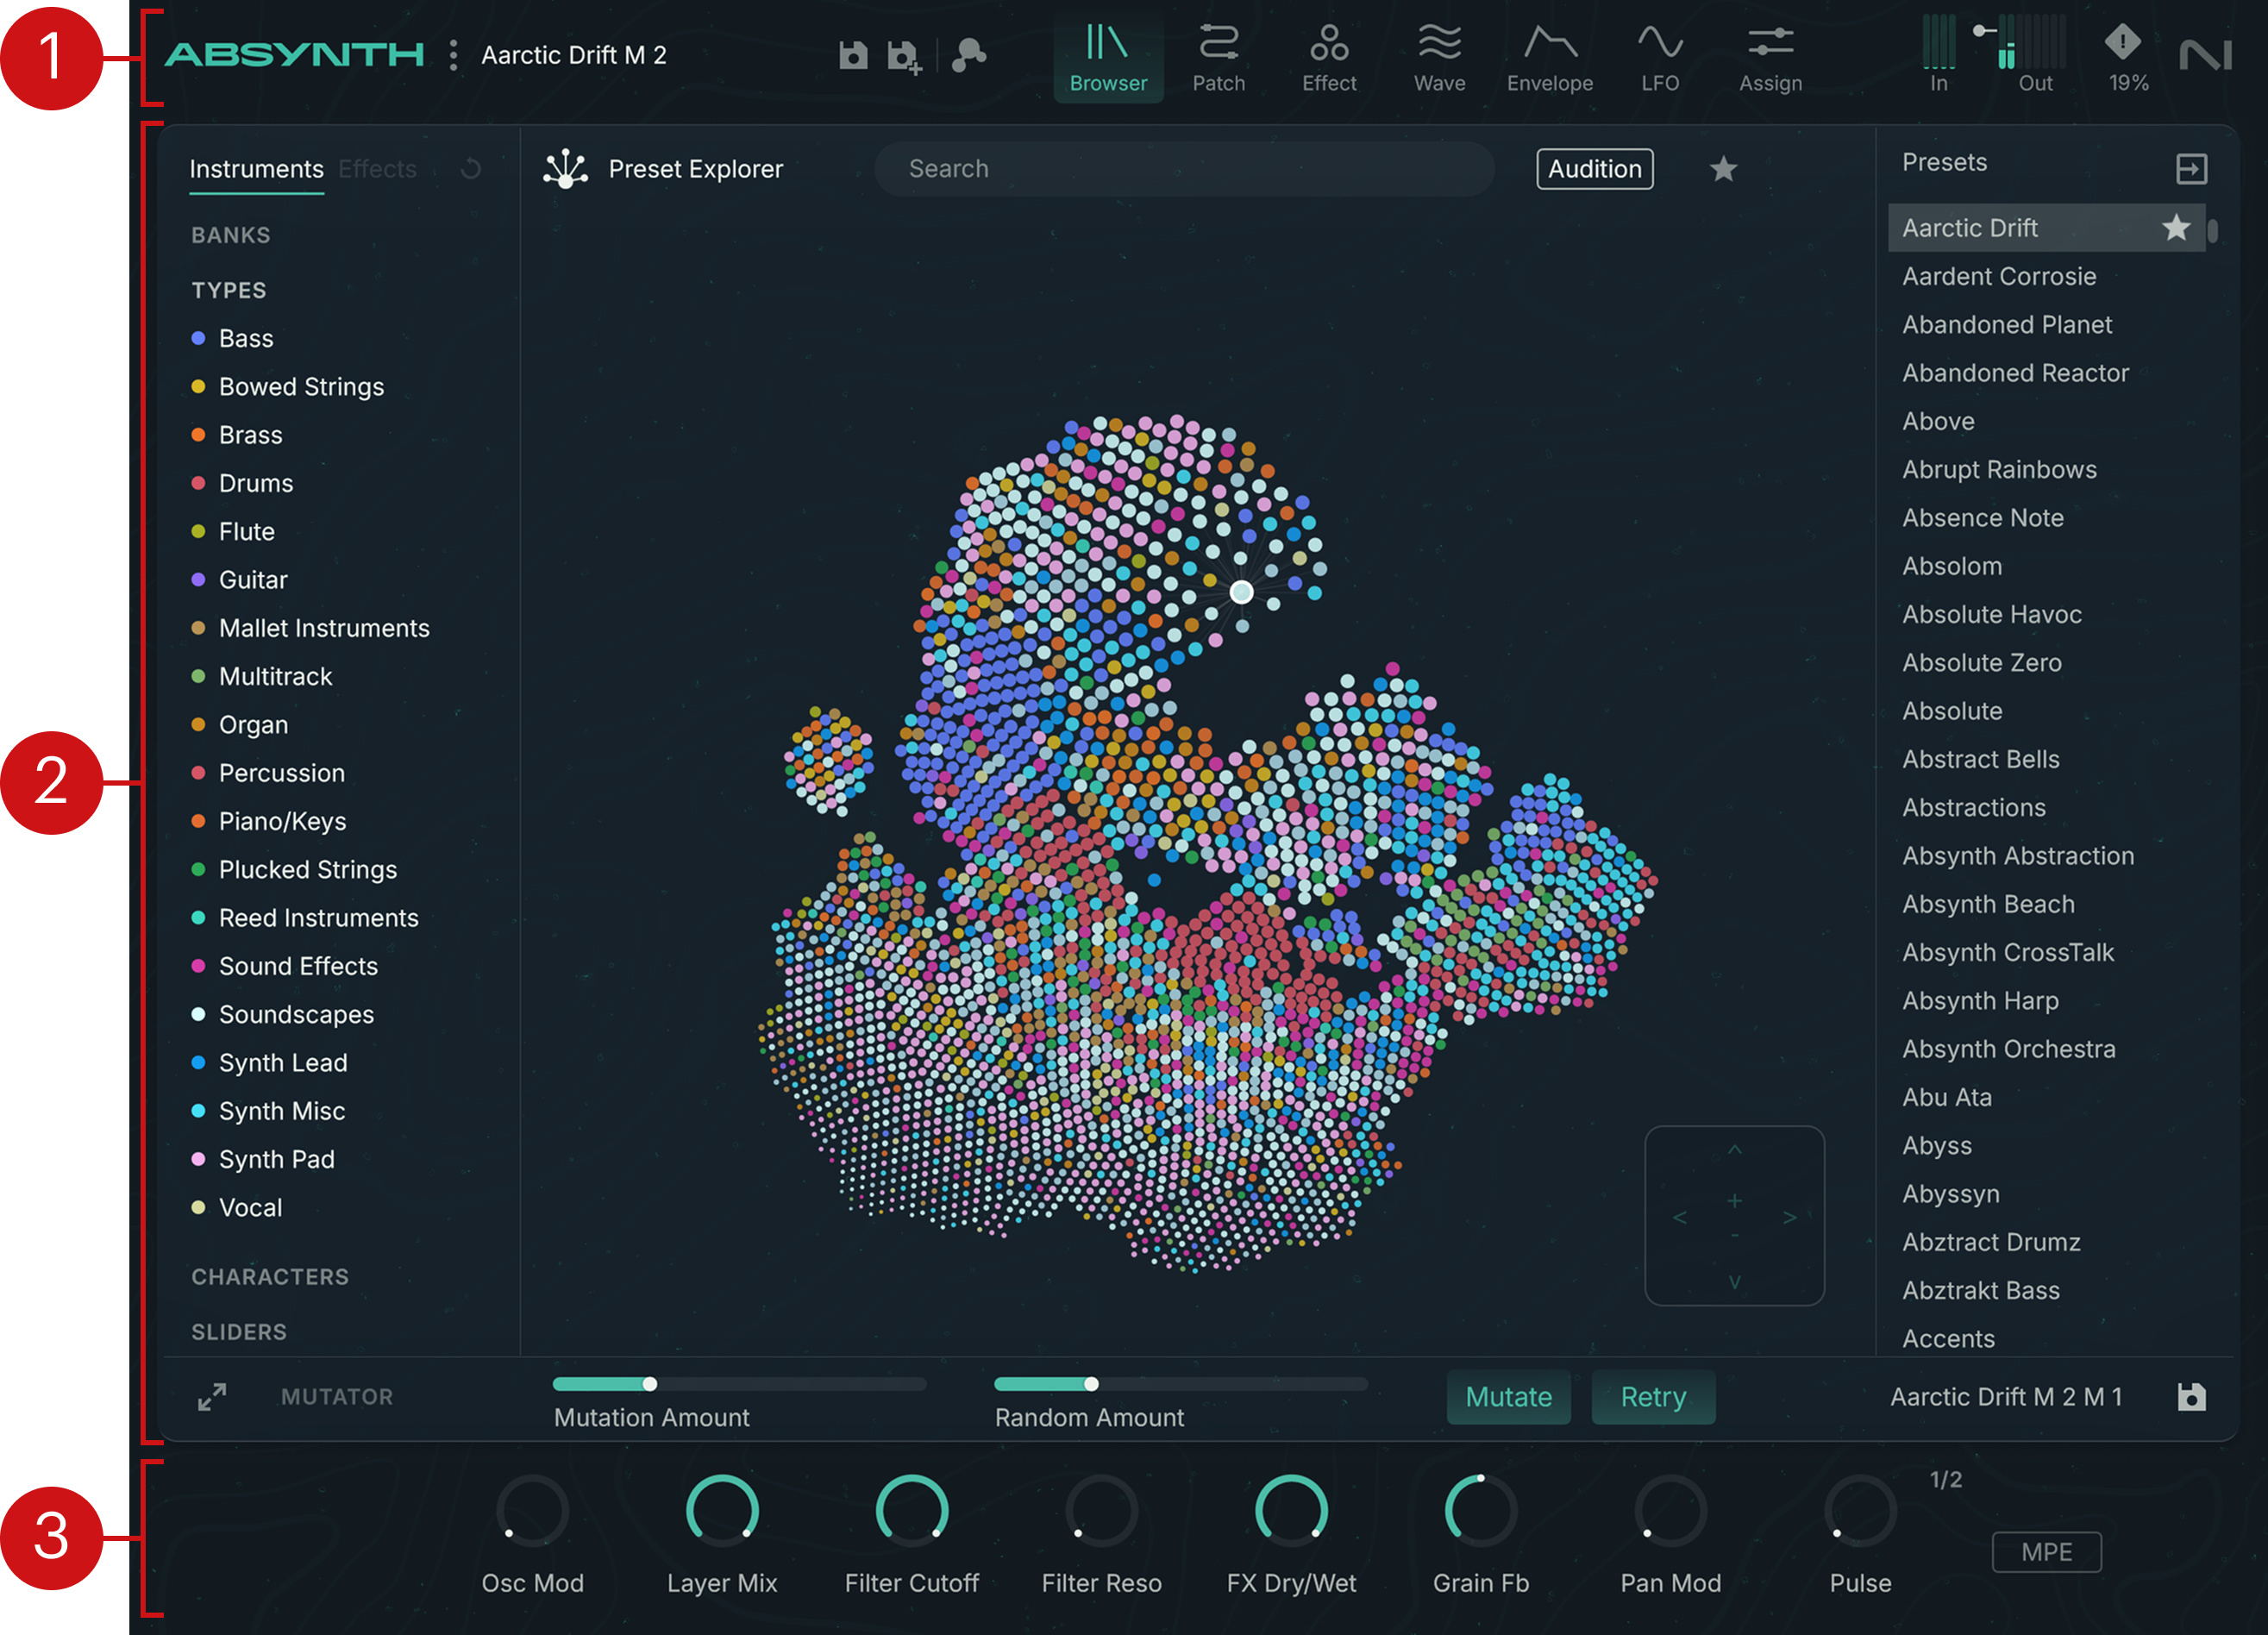
Header: Contains global commands and indicators that let you switch between Absynth 6 presets, show the desired page of the instrument, check and adjust the input/output levels, and display the About screen. You can find more information in Absynth Header.
Pages: The biggest part of the Absynth 6 interface can show various pages, each page focusing onto a specific aspect of the instrument. You can select pages for display using the Page buttons in the Header.
Macro controls: Always visible at the bottom of the window, the Macro controls let you quickly adjust the Macros defined in the current preset. You can find more information in Macro controls.
Absynth Header
At the top of the instrument, the Header is always visible and provides a set of global commands, quick shortcuts, and indicators:

Absynth logo: Opens the About screen, which shows various information about the software like the version number, the serial number, and the credits.
Absynth menu (three vertical dots): Provides a set of generic options and commands for creating, loading, and saving presets, adjusting various settings, changing the size of the user interface, and rescanning your preset library. Refer to Absynth menu.
Preset selector: Shows the name of the loaded preset. When you hover over the preset name with your mouse, three little arrows appear on the right that let you quickly load other presets from the current search results in the Browser: Clicking the left or right arrow loads the previous or next preset from the results, and clicking the downwards arrow opens the search results as a drop-down menu from which you can quickly select the desired preset for loading.
Save / Save As… button: Saves the current state of the instrument. The button operates based on whether a factory or user preset is loaded:
When a factory preset is loaded, the button shows a floppy disk with an additional “+” icon and acts as a Save As button: Clicking the button opens the Save Preset As dialog and lets you save a new user preset.

When a user preset is loaded, the button only shows a floppy disk and acts as a Save button: Clicking the button saves your changes to the current user preset, overwriting its contents.

If the user preset has not been edited, the button is grayed out and inactive. When hovering over the button with your mouse, a down-pointing arrow appears below the button and lets you access the Save As command.
Note
The Save and Save As… commands are also available in the Absynth menu.
Undo and Redo buttons: Clicking Undo (left arrow) reverts your last parameter change. Clicking Redo (right arrow) restores the parameter change that you have just undone. The Undo history (the list of your previous changes) is cleared when you load a new preset.
Mutate button: Triggers a new mutation of the current preset. This button is a shortcut for the Mutate button in the Mutator, at the bottom of the Browser page.
Page buttons: These buttons let you switch between the corresponding pages of Absynth 6. The highlighted button indicates the page currently displayed. The following buttons are available:
Browser: Opens the Browser page, which lets you explore and load your factory and user presets, and configure new mutations of the loaded preset. Refer to Browser page.
Patch: Opens the Patch page, which lets you combine and adjust the modules that make up the preset’s sound. Refer to Patch page.
Effect: Opens the Effect page, where you can choose and configure the effect module used in the main channel of your patch. Refer to Effect page.
Wave: Opens the Wave page, which provides intuitive tools to adjust the existing waveforms or shape new ones from scratch. You can then use these waveforms in various modules of the instrument. Refer to Wave page.
Envelope: Opens the Envelope page, where you can design advanced envelopes to modulate the parameters of the instrument. Refer to Envelope page.
LFO: Opens the LFO page, which lets you configure up to three LFOs as additional modulation sources. Refer to LFO page.
Assign: Opens the Assign page, where you can configure the control, modulation, and automation of the Absynth 6 parameters in multiple ways. Refer to Assign page.
Input/Output Level meters (In/Out): The In and Out LED bars indicate the level of the audio signals on the activated input and output channels, respectively. The LED bars for deactivated channels are grayed out and inactive. On the Out meters, a slider lets you adjust the overall output level of the instrument: You can drag the slider vertically with your mouse or double-click the slider and enter the desired value on your computer keyboard.
Note
If Absynth 6 is running as a plugin, you can activate or deactivate the plugin’s input and output channels in your DAW (refer to your DAW documentation for more details). If Absynth 6 is running as a standalone application, you can set up its output channels in the Audio/MIDI Settings dialog.
Engine Restart button (! icon): Stops any audio stream and resets the audio engine. This can be useful when the instrument get stuck on notes or overload the CPU persistently. Any settings that you made in the instrument are preserved.
NI logo: Like the Absynth logo, clicking the NI logo opens the About screen, which shows various information about the software like the version number, the serial number, and the credits.
CPU Load indicator: Shows the CPU load in percent, giving you visual feedback about the available processing resources.
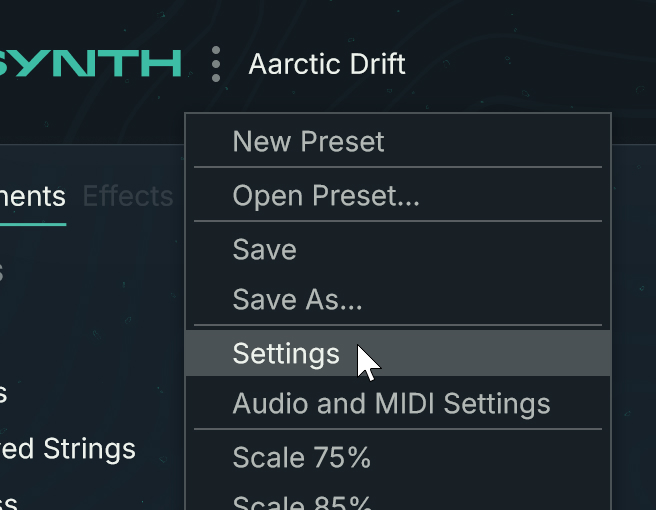
Absynth menu
You can open the Absynth menu by clicking the three dots right of the Absynth logo:
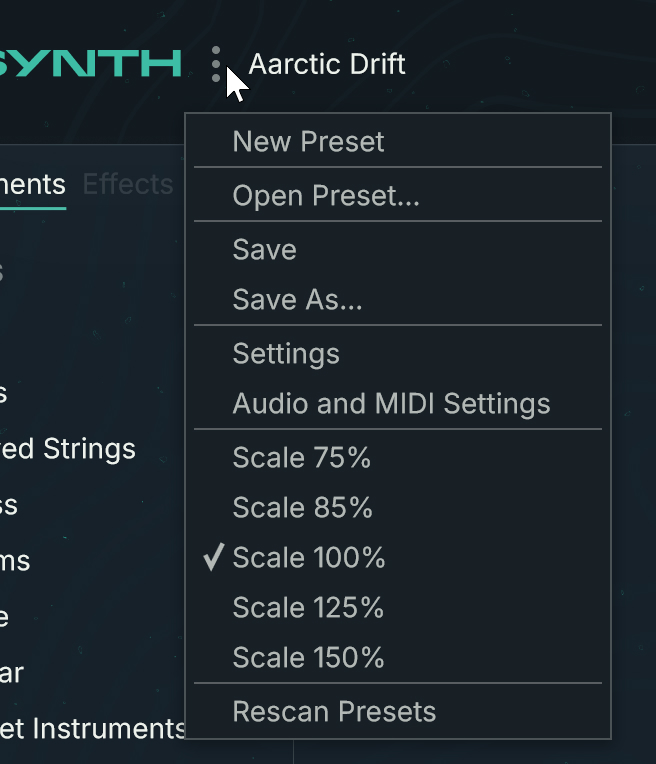 |
The Absynth menu contains the following entries:
New Preset: Creates a new empty patch containing only one basic Oscillator on Channel A. You can find more information on the patch structure in Patch page.
Open Preset…: Opens a dialog that lets select and load another Absynth preset file on your hard drive. In the dialog, you can navigate to the containing folder, select the desired preset file, and click Open or double-click the file to load it. The selected preset will replace the current preset.
Save: Saves the changes made to the loaded preset. If a factory preset is loaded or if you started from a new empty patch that has not been saved yet, the Save entry acts as the Save As… entry.
Save As…: Saves the current state of the instrument as a new user preset. Clicking this entry opens a Save Preset As dialog in which you can navigate to the folder where you want to save your preset, type a new name for the preset, and click Save to save it. Instrument presets are saved in the NKSF file format, while effect presets are saved in the NKSFX file format. The saved preset will then appear in the instrument or effect category in the user content of the Browser.
Settings: Opens a dialog providing global settings for Absynth. This dialog is described in Settings dialog.
Audio and MIDI Settings (only visible in the standalone application): Opens the Audio/MIDI Settings dialog. This dialog is described in Configuring the audio and MIDI settings.
Rescan Presets: Triggers a new scan of your Absynth 6 factory and user libraries. This is useful if you have manually moved some preset files or folders using the Finder (macOS) or the Explorer (Windows).
Show User Content Folder: Opens the user content folder in the Finder (macOS) or Explorer (Windows).
View Size 75% – 150%: Adjusts the size of the Absynth window.
Note
You can define a default size in the General tab of the Settings dialog.
Settings dialog
The Settings dialog lets you adjust global settings for the instrument.
To open the Settings dialog, click the three little dots in the Absynth Header and select Settings from the menu:
In the Settings dialog, the settings are organized into three tabs. You can show either tab by clicking its name at the top of the dialog:
General: Lets you choose the default page, adjust the zoom setting, and activate the usage data tracking. Refer to General settings.
Content: Lets you specify options affecting user presets. Refer to Content settings.
Surround: Lets you adjust the surround configuration of Absynth. Refer to Surround settings.
General settings
The General tab of the Settings dialog contains the following settings:
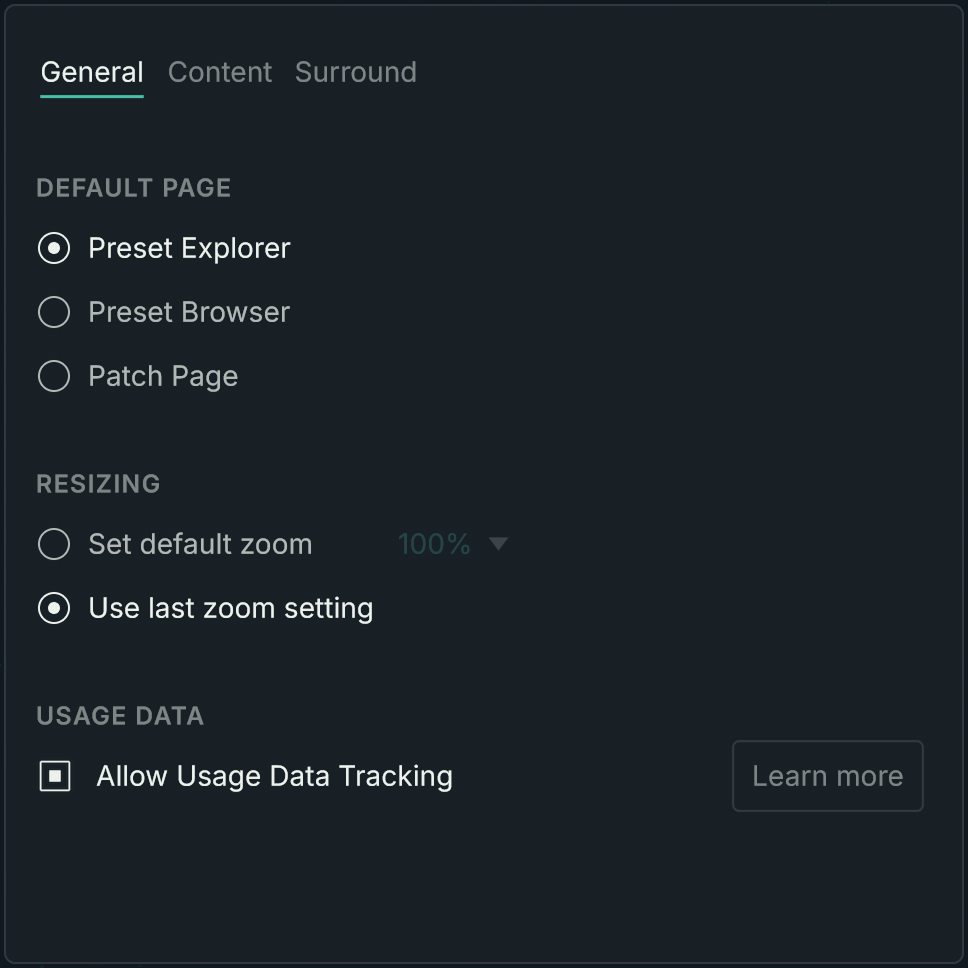 |
Default Page: Chooses the page or view displayed first when you open Absynth. The following options are available: Preset Explorer selects the Preset Explorer view of the Browser, Preset Browser selects the the Preset List view of the Browser, and Patch Page selects the Patch page.
View Size: Selects the default window size when you open Absynth. You can select Set default view size and choose a fixed size from the menu on the right, or select Use last view size to let Absynth reuse the same size as when you last closed it.
Note
You can change the window size at any time using the dedicated entries in the Absynth menu.
Usage Data: You can activate or deactivate the Allow usage data tracking check box. We encourage all users to keep Usage Data Tracking activated as it provides a valuable tool for understanding the performance and usage of Native Instruments applications, which in turn helps us improve our products. Clicking the Learn more button opens a link to a page with more information about usage data tracking on the Native Instruments website.
Content settings
The Content tab of the Settings dialog contains the following settings:
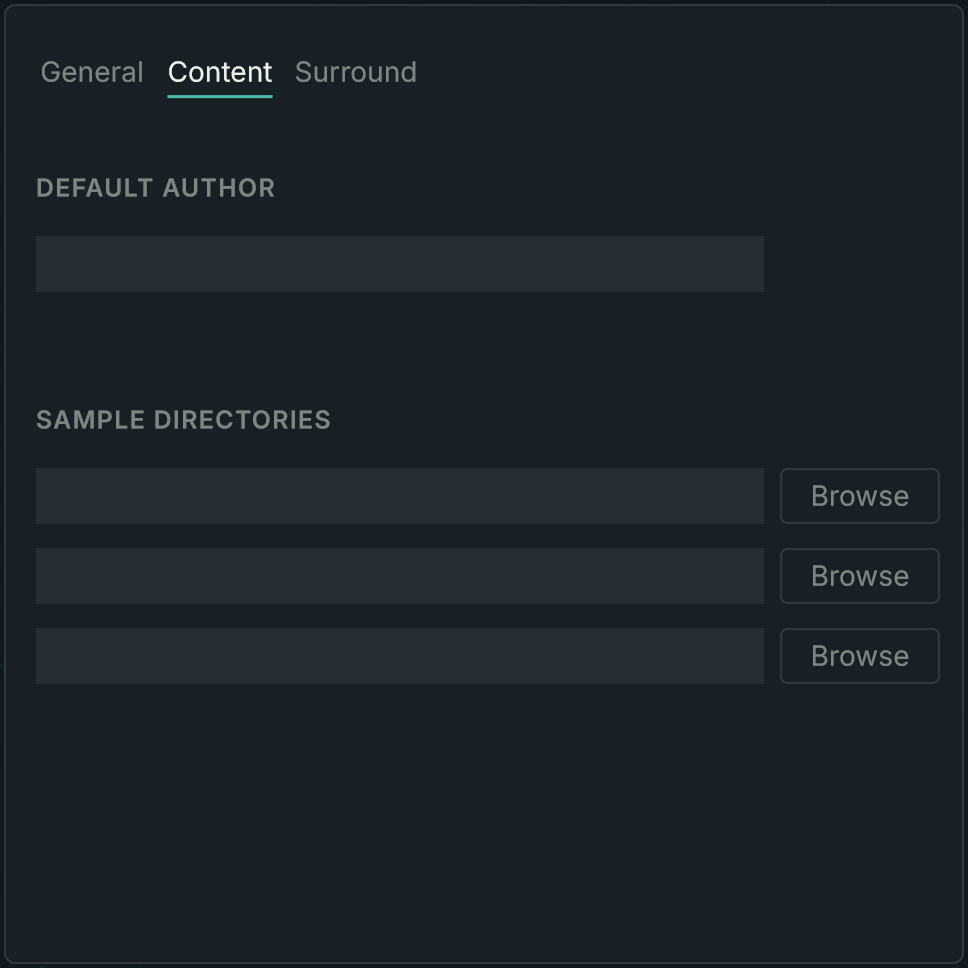 |
Default Author: Specifies the default text that will be saved to the Author field of the Properties panel for new user presets, depending on how they were created:
Use for New Sound: If active, the default author will be applied when you select the New Preset entry from the Absynth menu.
Use for Save Sound As: If active, the default author will be applied when you select the Save As… entry from the Absynth menu or the Save As button from the Absynth Header.
Note
You can manually edit the Author field in the Properties panel of the Preset List view in the Browser.
Sample Directories: The three fields let you define the paths to the folders containing the samples used in your presets. To define or modify a path, click the Browse button on its right, navigate to the desired folder on your hard drive, and click OK to confirm.
Surround settings
Absynth 6 can have up to eight separate audio outputs. The Surround tab of the Settings dialog lets you assign the available output channels to specific positions in the panoramic field.
Note
If Absynth 6 is running as a plugin, the actual number of audio outputs depends on the track’s settings in your DAW. If Absynth 6 is running as a standalone application, the number of audio outputs depends on how many output channels are activated in the Audio/MIDI Settings dialog.
The Surround tab contains the following elements:
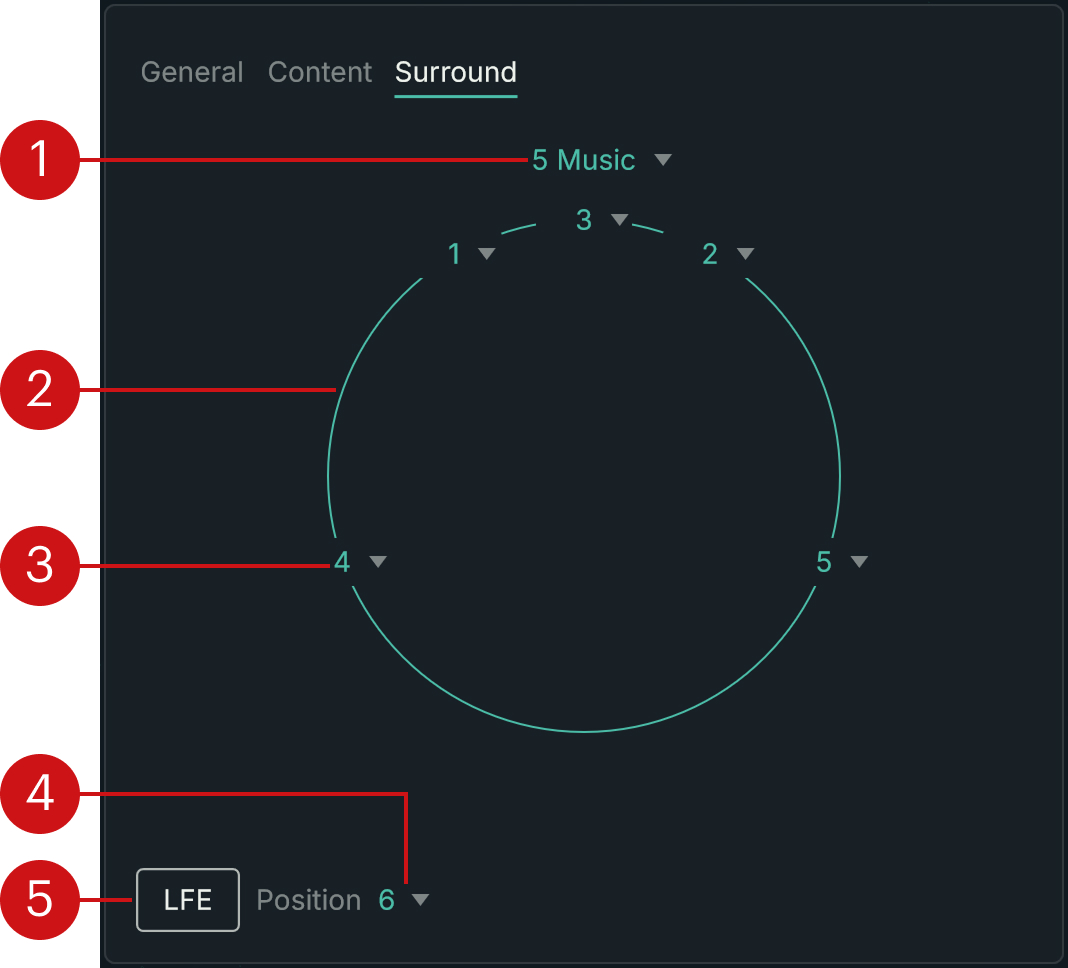 |
Surround menu: Shows the selected surround configuration. You can click the name and select another configuration from the menu. The name of each configuration indicates the number of included channels and a quick description of the channels’ position.
Field display: Illustrates the spatial position of each channel on a circle centered on the listener.
Channel menus: The menus on the circle let you assign one output channel to each position in the current surround configuration.
Position menu: This menu is active only when LFE is on. It specifies the output channel of Absynth that should be used for the LFE signal (Low-Frequency Effects). When you select another configuration from the Surround menu, the next available channel is automatically selected in the Position menu.
LFE button: Activates or deactivates the additional LFE channel (Low-Frequency Effects). When on, you can assign an output channel to the LFE signal using the Position menu.
Macro controls
At the bottom of the Absynth window, the Macro controls are always visible and let you quickly adjust the values of the Macros defined in the current preset. Macros are customizable shortcuts to one or more parameters of the instrument. They are also available for host and MIDI automation. Each preset can contain up to 16 Macros.
The Macro controls contain the following elements:
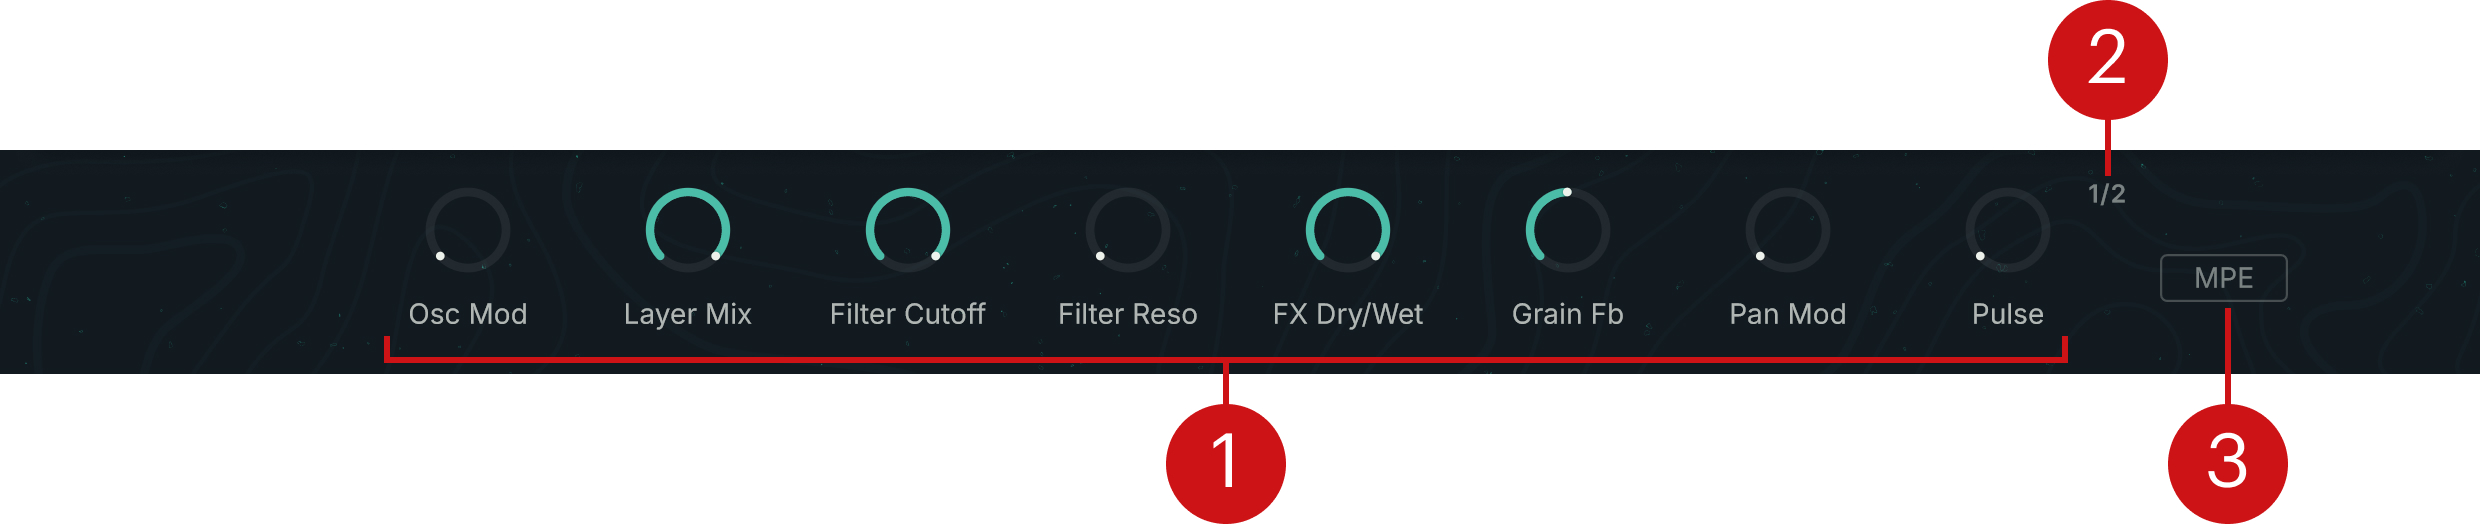
Macros knobs: The eight knobs adjust the Macros 1–8 or 9–16. The Macro names, behaviors, and target parameters vary with each preset. You can configure them in detail in the Assign page.
Macro Page button: Switches between the two pages of eight Macro knobs: When the button reads 1/2 the eight knobs adjust the Macros 1–8, when the button reads 2/2 the eight knobs adjust the Macros 9–16.
MPE button: Activates or deactivates MPE control globally for all Macros. If you want to use MPE (MIDI Polyphonic Expression) for a particular Macro, you need to activate this MPE button and to configure MPE support in the Macro assignment details of the Assign page.