Session Percussionist overview
Learn the main concepts and interface elements of Session Percussionist.
This chapter introduces the main concepts of Session Percussionist and its interface.
When you first open Session Percussionist, you see the Main page along with a set of global controls:
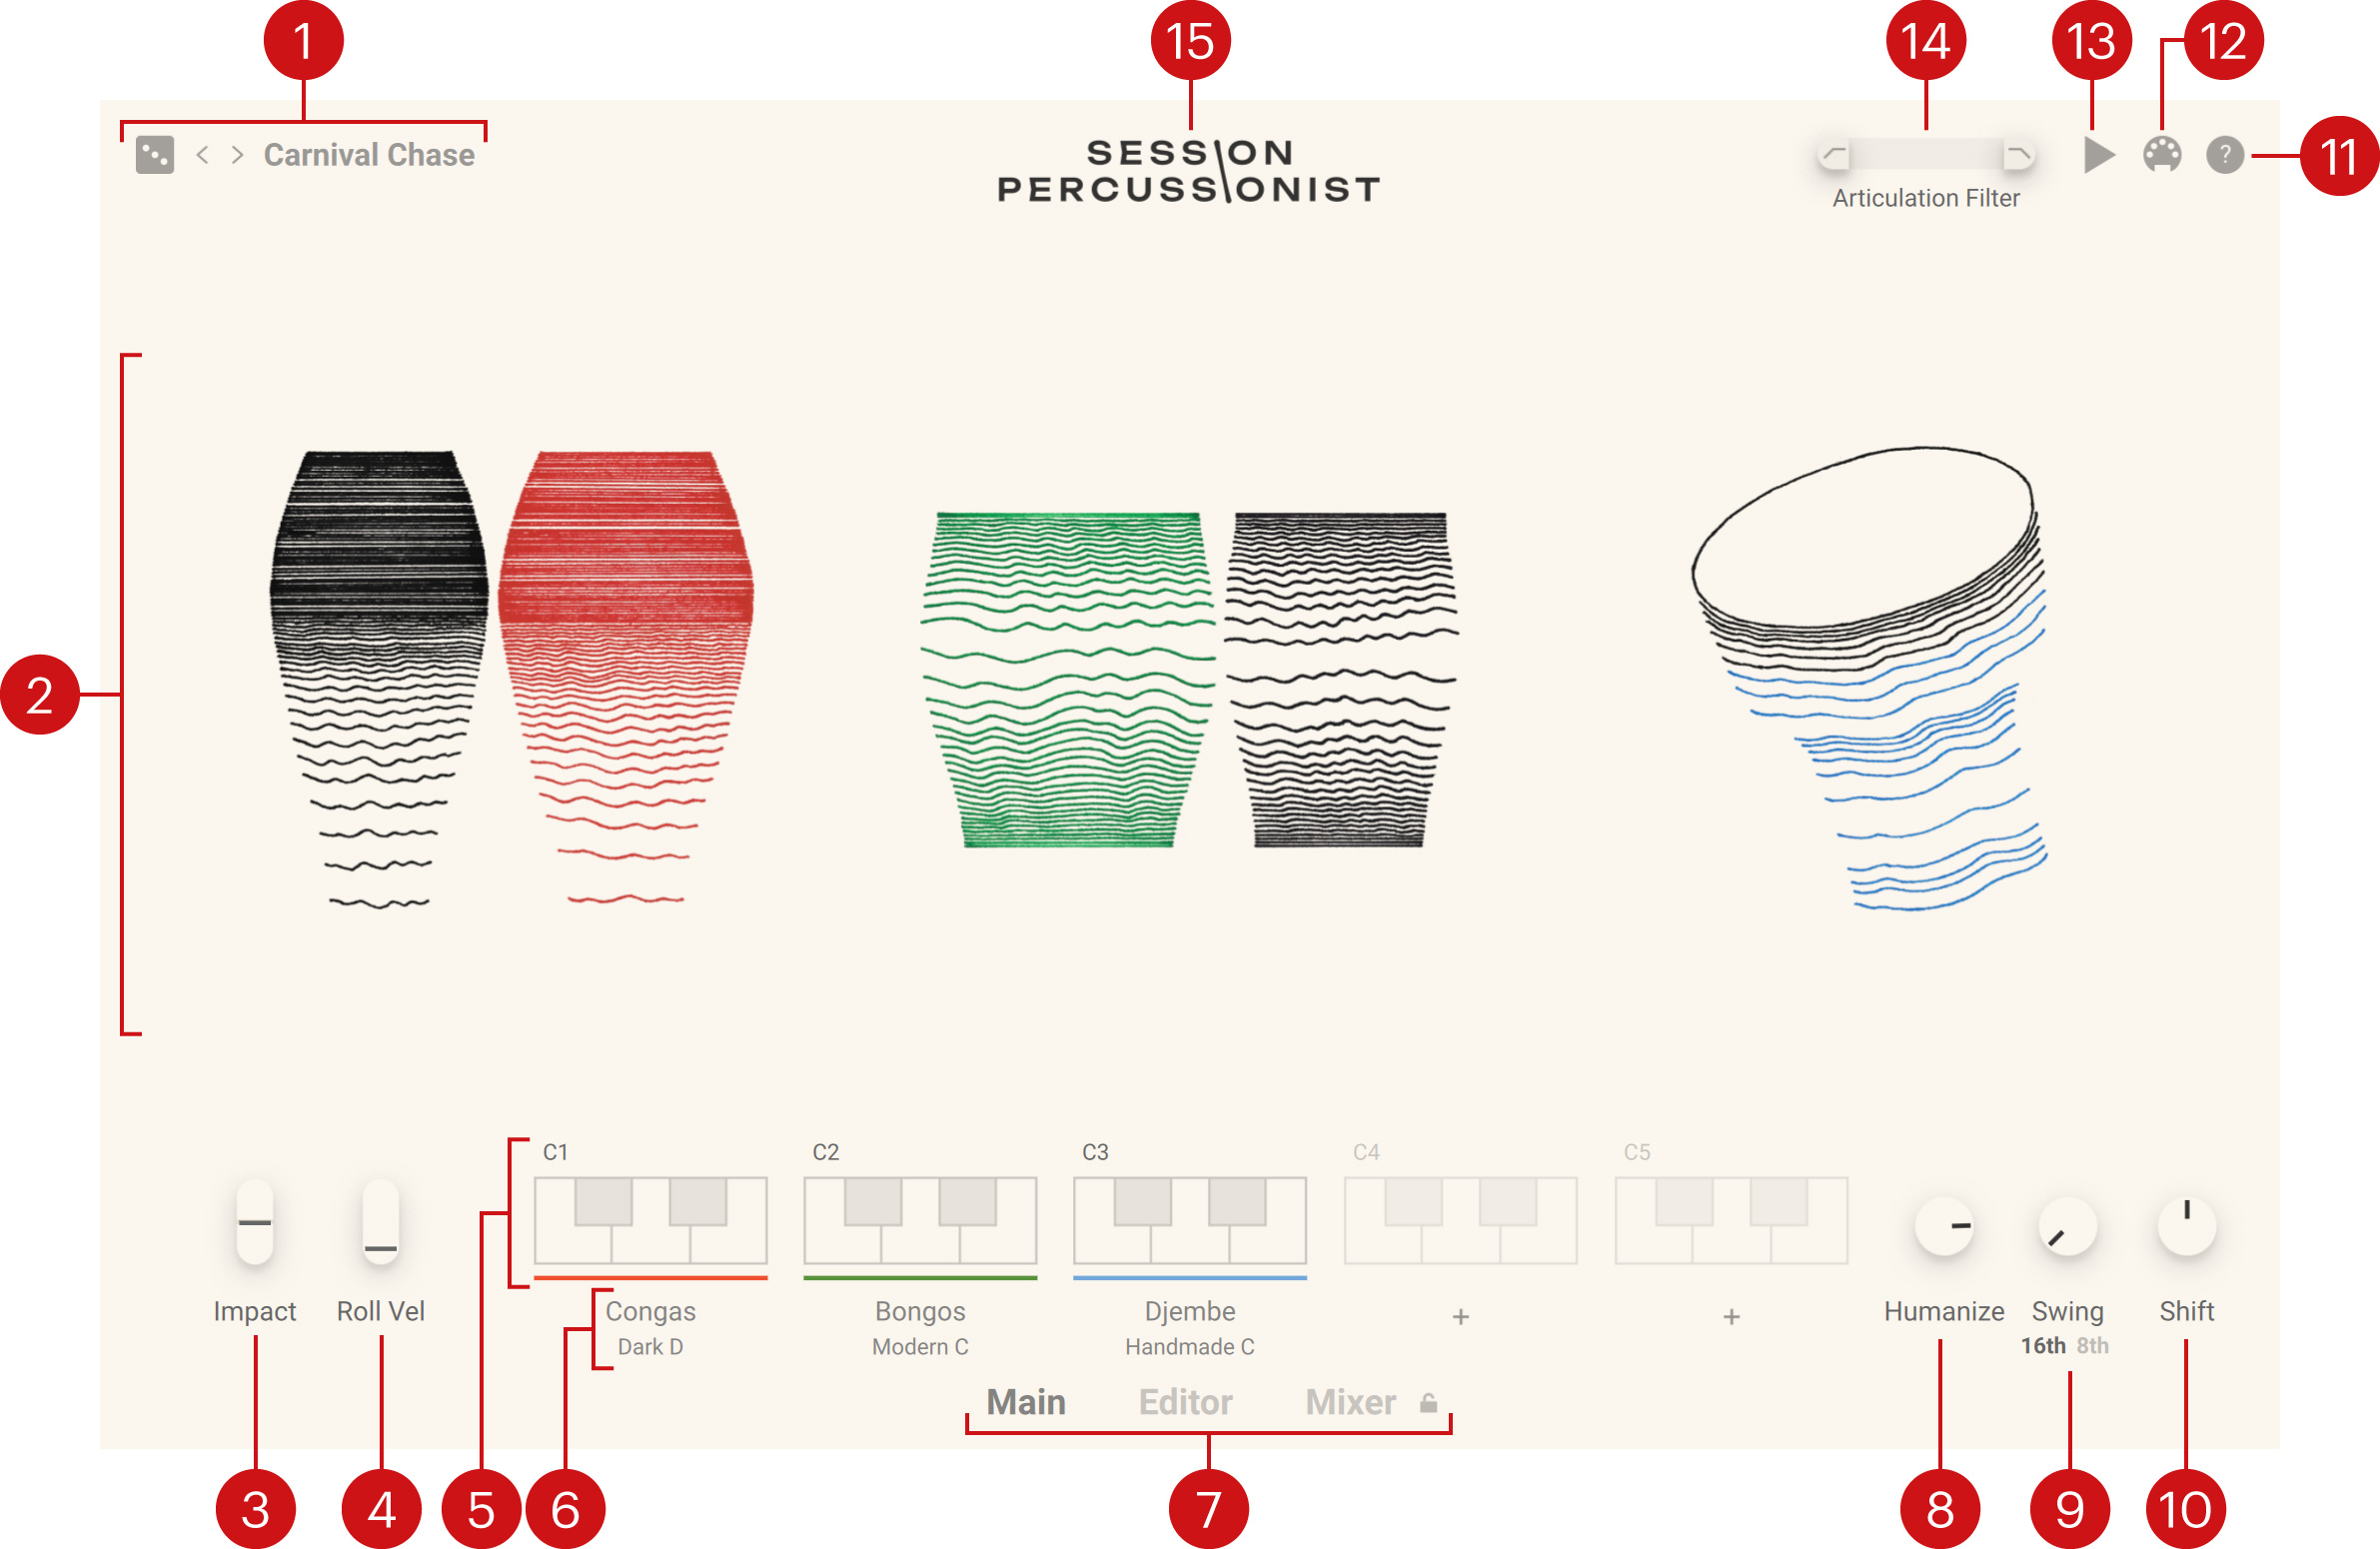
Ensemble preset: Displays the name of the loaded ensemble preset. Ensemble presets are Kontakt Snapshots: They are global presets containing values for all parameters of the instrument, including the number of players, the players’ instruments, the patterns and the mixer settings, etc. You can click the left and right arrows to cycle through ensemble presets, click the dice to load a random ensemble preset, or click the name of the ensemble preset to open the Ensemble Browser and look for another ensemble preset from the Session Percussionist factory library.
Central area: This is the biggest part of the instrument and it can display various pages of parameters and Browsers. By default, it shows the Main page, which displays artworks depicting the various instruments in the current ensemble, each of them using the player’s dedicated color. You can click any instrument to open the Instrument Browser and choose another instrument for this player.
Impact: Modulates the velocities of all instruments in your ensemble. This control is assigned to the pitch wheel on your MIDI keyboard. At 0 % (wheel at rest), the notes are played at the velocities defined in the patterns. Push the wheel to increase all velocities and make your ensemble sound more energetic. Pull the wheel to decrease all velocities and make your ensemble sound calmer.
Roll Vel: Adjusts the tempo and dynamics of the second roll (B keys) for all instruments. It is assigned to the modulation wheel on your MIDI keyboard. Note that the first roll (A♯ keys) is not affected by this setting, it reacts instead to the key velocity.
Key selector: Shows for each player the five keys that trigger rhythmic patterns. You can click any key to open the corresponding pattern in the Pattern Editor and modify the pattern assigned to that key. You can drag a key and drop it onto another key (possibly in another instrument/octave) to quickly duplicate the pattern. Duplicating the pattern also works across different instrument categories: in that case, the articulations will be remapped. Alternatively, you can use [option] + click (Mac) or [Alt] + click (Windows) on a key to remove the pattern from that key. The Key selector is not available on the Mixer page. As you trigger a pattern from your MIDI keyboard, the corresponding key lights up in the Key selector.
Instrument selector: Shows for each player the instrument category and the particular instrument variation loaded. You can click the label to open the Instrument Browser for that player and select another instrument variation from the Session Percussionist factory library. Alternatively you can click the left and right arrows to cycle through all instrument variations within the same category. You can also press [option] + click (Mac) or [Alt] + click (Windows) on the label to remove the instrument from the ensemble.
Page selector: Switches the central area between the Main page (depicted above), the Editor page and the Mixer page. Click a tab to display the corresponding page. The Editor page contains the Pattern Editor and the Mixer page contains the Mixer.
Humanize: Scales up or down the timings for all notes played by the ensemble. The original timings are defined on the Timing grids in the Pattern Editor for each pattern and instrument. By default, Humanize is set to 100 % and the exact timings defined in the patterns are applied. Turn Humanize left to make the patterns globally sound more mechanical, turn it right to amplify or even overplay the patterns’ human feel.
Swing: Adds groove to your patterns by delaying off-beat notes, either on a 16th or 8th time base. Turn the knob right to increase the swing. Below the knob, click the 16th or 8th button to select the time base.
Shift: Globally shifts the timings of all notes played by the ensemble in the range from -80 ticks to +80 ticks (one 16th note equals 240 ticks).
Help: Opens a help page containing useful reminders on how to play the instrument from your MIDI keyboard.
MIDI Follow: When this button is turned on, you can use your MIDI keyboard to select patterns for editing. Please make sure that the Pattern Editor is opened to use this feature. Please note that refreshing the user interface has an impact on your processor, so MIDI Follow should be deactivated before closing the Kontakt plugin window running in your DAW.
Global Audition: Plays back the selected patterns for the entire ensemble. This is useful to get an idea of how your ensemble sounds. While running, clicking on another key in the Key selector will synchronize the ensemble playback to that key.
Articulation Filter: Prevents notes from being triggered if their perceived main frequency is outside the defined range. For example, this tool can be very useful if you have additional drum or percussion tracks in your DAW: The Articulation Filter lets you nicely insert your ensemble into the mix without interfering with the other tracks. Drag the left and right handles to define the minimum and maximum perceived frequencies that should pass through. Any notes outside this range will not be triggered. The Articulation Filter also differentiates notes from a single instrument: some articulations might be filtered out while other would pass through, depending on their individual perceived frequencies. The Articulation Filter can also be controlled via MIDI by using CC#89 and CC#90 messages to set the lower handle and the upper handle, respectively.
About: Click the instrument name to open the About screen, which displays the credits for this instrument.