Claire overview
Learn the main concepts and interface elements of Claire.
This chapter introduces the main controls and areas of Claire.
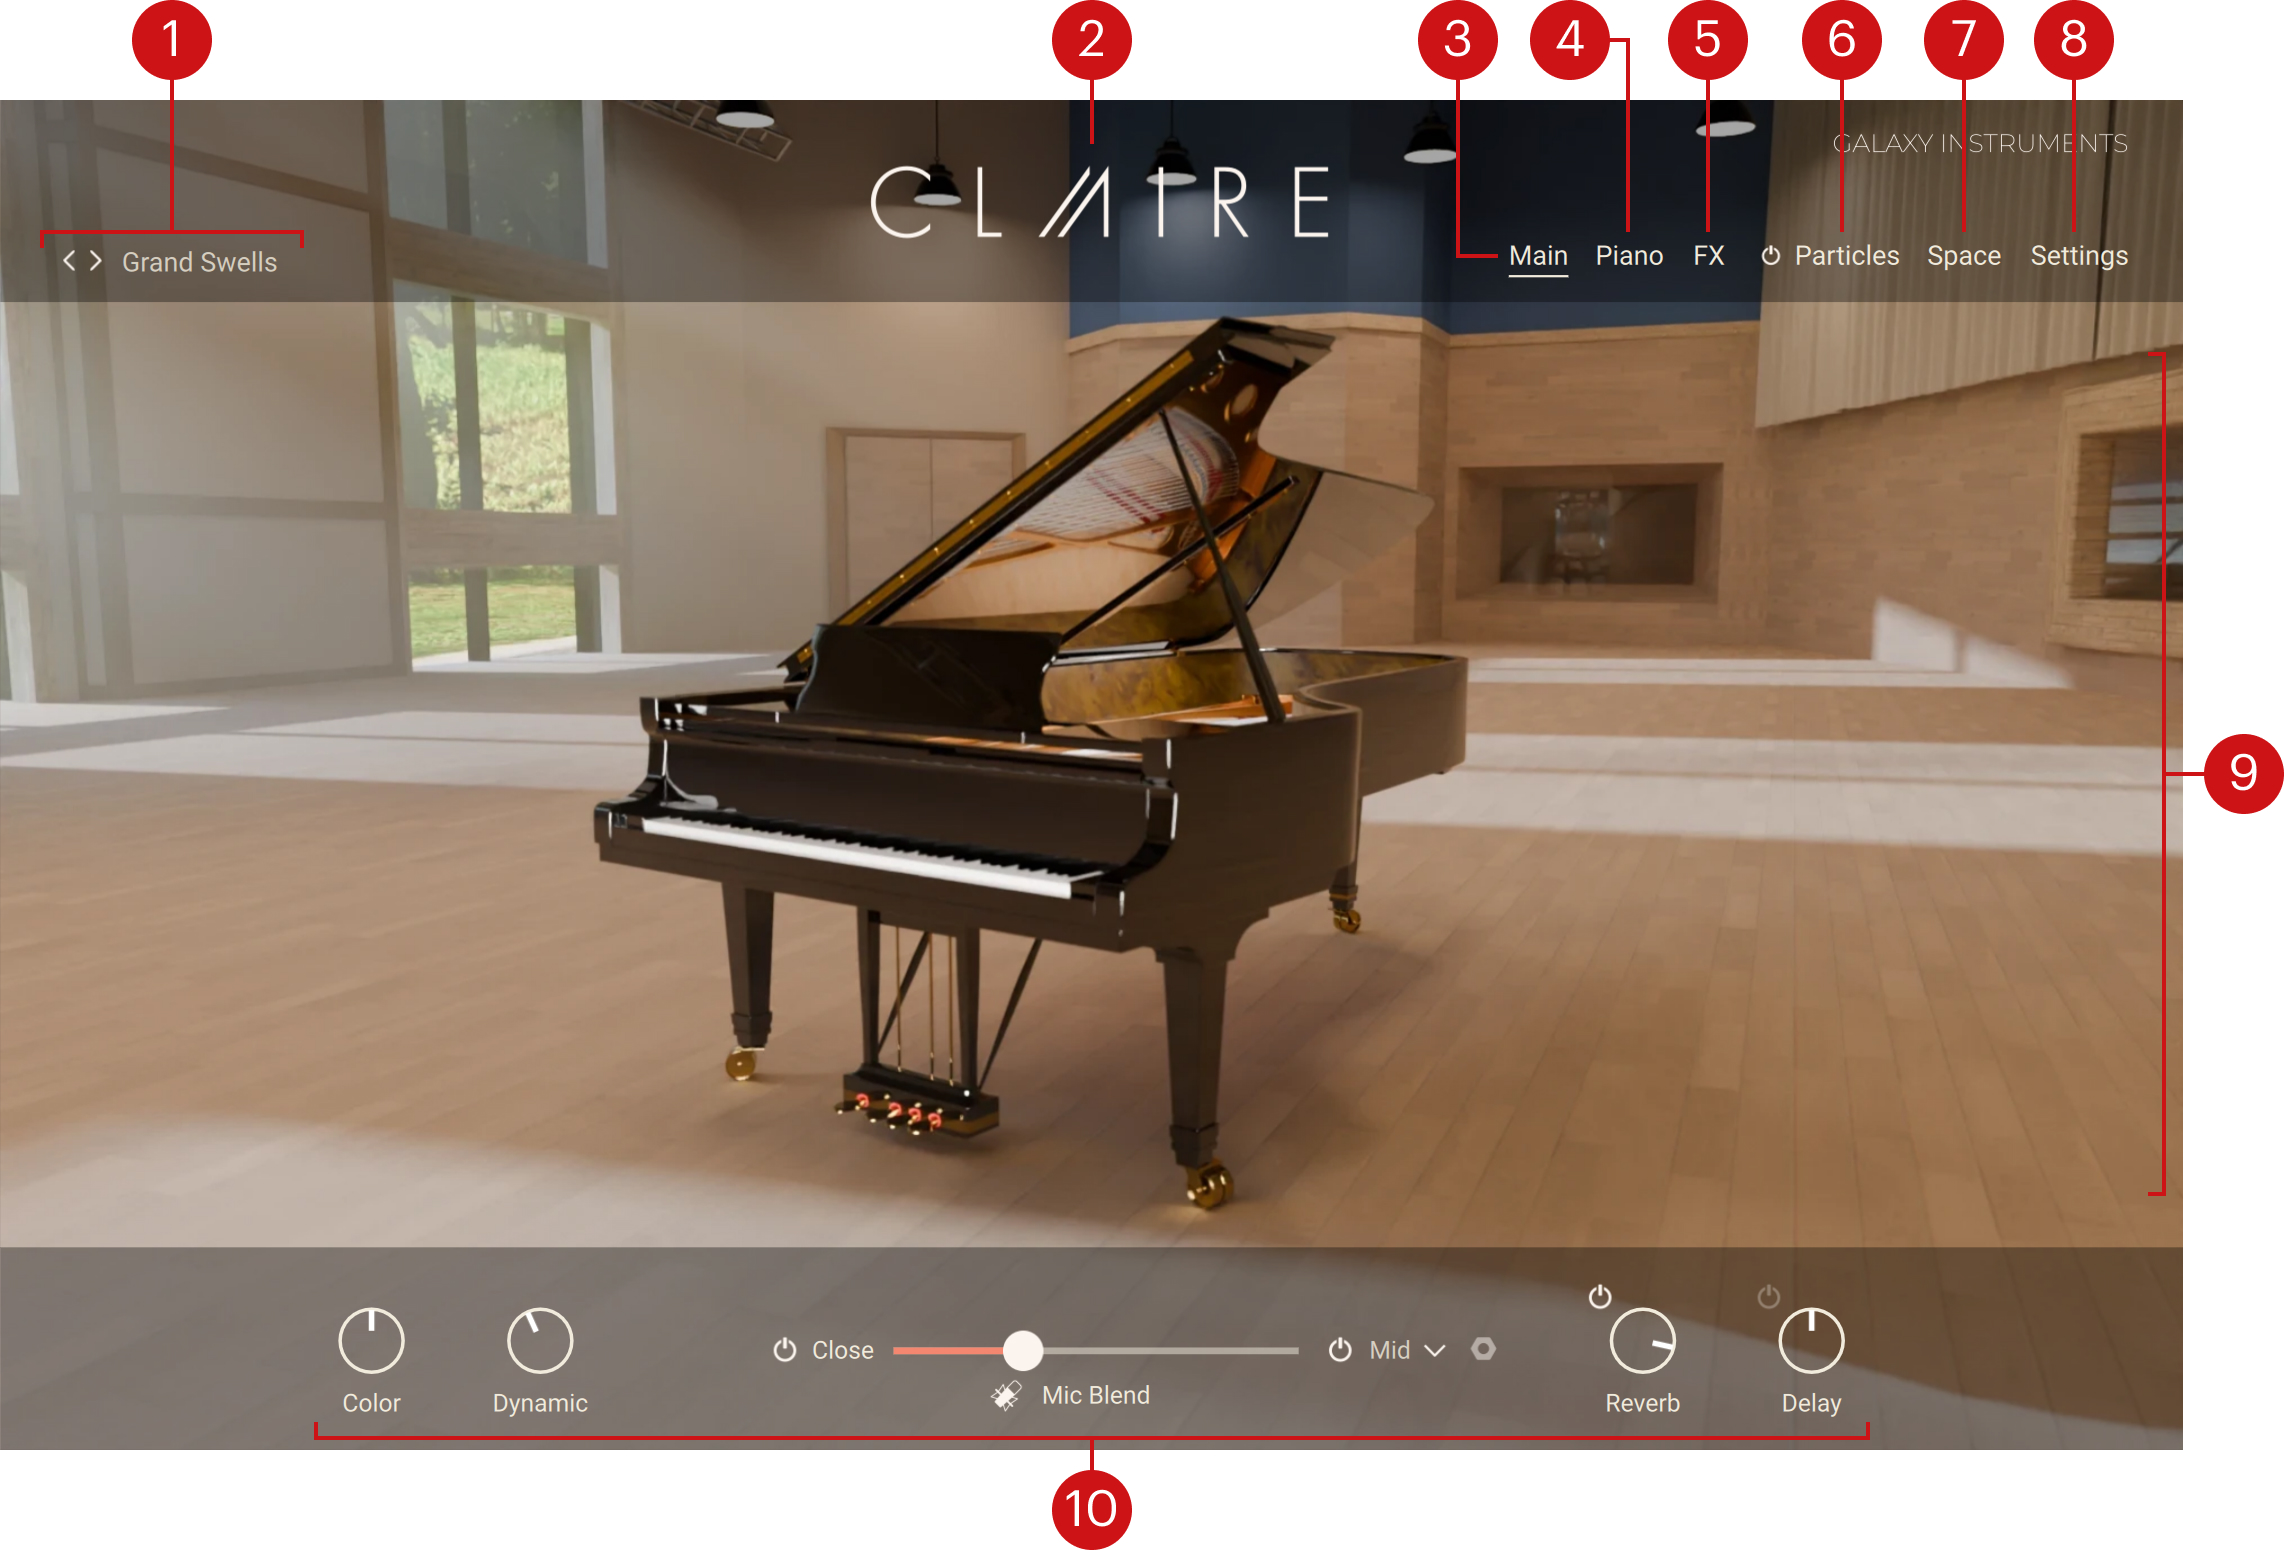
When you first open Claire, you see the Main page along with a set of global controls:

Preset selector: The name of the loaded preset is always visible. Presets contain values for all parameters of the instrument: They correspond to Kontakt Snapshots. The name of the preset currently loaded is displayed here. Click the left and right arrows to cycle through presets, or click the name of the preset to open the Preset Browser and select another preset from the Claire factory library.
About: Click the instrument name to open the About screen, which displays the credits for this instrument.
Main: Opens the Main page, showing an animated artwork of the original instrument (depicted above). This is the default page that appears when you load the instrument in Kontakt. In the picture, the point of view follows your adjustments to the Mic Blend fader below. Refer to Mic Blend controls for more information on this fader.
Piano: Opens the Piano page, which lets you adjust the sonic characteristics of your instrument. Refer to Piano page.
FX: Opens the Effect page, where you can configure various effects that will process the sound of your instrument, including equalization, dynamics, saturation, stereo image, creative, and ambience effects. Refer to Effect page.
Particles: Opens the Particles page, where you can configure the Particles engine. The Particles engine generates and processes a cloud of additional notes based on the notes that you play on the keyboard. Refer to Particles page. The little on/off switch left of the Particles button lets you quickly turn the Particles engine on or off.
Space: Opens the Space page, which lets you adjust a reverberation and a delay used as send effects. Refer to Space page.
Settings: Opens the Settings page, which provides global settings including tuning, response, and pedal controls. Refer to Settings page.
Central area: This is the biggest part of the instrument and it shows the various pages and Browsers.
Performance controls: Provide a set of controls directly available while playing the Instrument. The Performance controls are always visible. Refer to Performance controls for more information.
Performance controls
The Performance controls are always available at the bottom of the instrument. They include the following elements:

Color: Adjusts the tone from soft to hard by readjusting the sample mapping. Turning the knob right will make the instrument sound harder and crisper, with a more pronounced attack phase. Turning the Color knob to the left will achieve a warmer and softer sound, and the attack phase will be less pronounced.
Dynamic: Controls the dynamic range by adjusting the volume while still using all velocity samples. Turning the knob left will compress the sound, turning it right will expand the dynamic range.
Mic Blend controls: This special feature lets you configure the blend between the close microphones and the room microphones used to record the instrument. Refer to Mic Blend controls.
Reverb: Controls the amount of signal sent to the reverb unit, and thus determines the volume of the reverb signal. The little on/off switch at the top left lets you turn the reverb unit on or off. The parameters of the reverb are available in the Reverb section of the Space page. Refer to Reverb.
Delay: Controls the amount of signal sent to the reverb unit, and thus determines the volume of the delay signal. The little on/off switch at the top left lets you turn the delay unit on or off. The parameters of the delay are available in the Delay section of the Space page. Refer to Delay.
Mic Blend controls
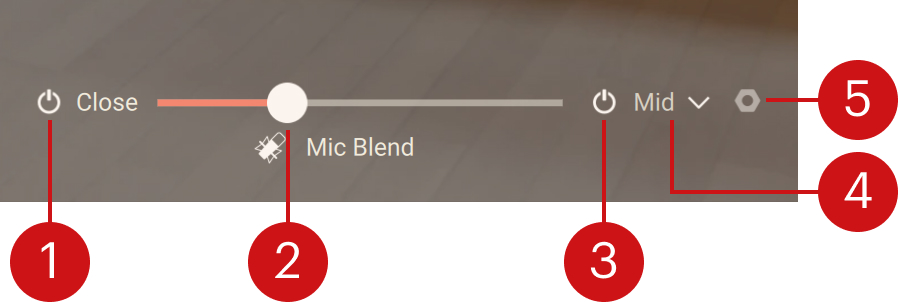
The Mic Blend controls let you modify the balance between the close microphones and the room microphones used to record the instrument.
 |
Close Mics on/off switch: Turns the close microphones on or off. When off, the Mic Blend fader is locked at full right and you hear only the room microphones.
Mic Blend fader: Adjusts the mix between the close microphones on the left and the room microphones on the right. Moving the fader to the left makes the sound more direct and clear, while moving it to the right adds depth to the sound. The fader also controls the animation on the Main page, showing the piano closer if you move the fader towards the close microphones on the left, or showing more of the room when moving the fader towards the room microphones on the right.
Room Mics on/off switch: Turns the room microphones on or off. When off, the Mic Blend fader is locked at full left and you hear only the close microphones.
Mid/Far menu: Selects between two distinct sample sets for the room microphones. For the Mid recordings the microphones are about 3 meters away from the instrument, whereas for the Far recordings they are 11 meters away.
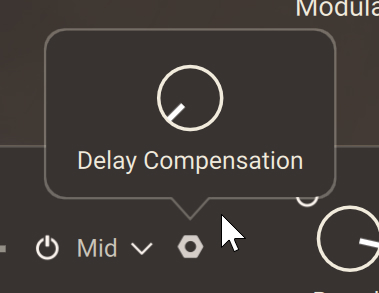
Nut icon: Opens a panel with an additional Delay Compensation knob. Because of their distance to the instrument, the room microphones induce a natural pre-delay. As you move the Mic Blend fader further to the right, this pre-delay can blur the clarity of the sound and even feel like a latency for the player. The Delay Compensation knob lets you counterbalance this effect by moving the room signal slightly ahead in time. With the knob at full left, no compensation is applied and you hear the room microphones with their natural pre-delay. With the knob at full right, you fully compensate the natural pre-delay for a clearer sound and a more direct playing experience.

Note
When both switches are off on either side of the Mic Blend fader, the fader is locked in the middle position.