Playing Action Strings 2
Action Strings 2 is designed to be played using a MIDI keyboard. This section guides you through the various playing techniques and functions.
Action Strings 2 is designed to be played using a MIDI keyboard:
You can press any key between C2 and A6 to trigger the current Phrases at the corresponding pitch. Phrases are automatically synchronized to the tempo of your DAW, or to the tempo of Kontakt / Kontakt Player if running in stand-alone mode.
You can select other Phrases directly from your keyboard, enabling orchestral scoring in an immediate manner.
You can adjust the dynamics of your sequence using the modulation wheel (or another MIDI control).
You can control your instrument remotely or record automation by mapping MIDI controls to its parameters.
Note
You can also remap the trigger keys onto the desired scale by activating the Scaler.
Selecting Phrases from the MIDI keyboard
You can build sequences by selecting different Phrases directly from your MIDI keyboard. To facilitate this, a range of MIDI notes have been configured as keyswitches to trigger the Phrases. Starting from C0, ten keyswitches are assigned to a combination of high and low Phrases or Articulations. In most cases, the keyswitches from E0 to G♯0 are assigned to single independently playable Articulations.
On Kontakt’s on-screen keyboard as well as on the Light Guide of your Kontrol keyboard, the keyswitches are displayed in red while the range of playable keys (trigger keys) are displayed in blue:

The Kontakt on-screen keyboard displaying the active keyswitches (in red), trigger keys (in blue), and solo keyswitches (in yellow)
To select a Phrase using your MIDI keyboard, press the corresponding keyswitch. You can switch between Phrases at any time, enabling you to change a sequence during playback without missing a beat.
Note
You can select the same Phrase in the user interface by clicking its keyswitch at the bottom of the Main and Editor pages.
In addition, two solo keyswitches allow you to focus on either Ensemble:
To hear only the Phrase played by the Low or High Ensemble, press the solo keyswitch A-1 or B-1 (in yellow).
Tip
For more information on keyswitches, refer to Keyswitches.
Controlling the dynamics
The Dynamic Mod setting gives you control over the dynamics of your sequence. It smoothly blends between different velocity layers based on recordings. You can use this to add dynamic expression and realistic phrasing to your compositions. By default, Dynamic Mod is mapped to the modulation wheel (CC #1) on your MIDI keyboard.
Tip
You can change this default mapping to another MIDI CC in the Settings panel.
To adjust the dynamics of the sequence from your MIDI keyboard:
Hold a note on your keyboard to play a sequence.
Move the modulation wheel up and down. Moving the modulation wheel up makes the sequence more intense while moving it down makes it more gentle.
The dynamics of your sequence follow the movements of the modulation wheel.
The Dynamic Mod slider in the upper left corner of the instrument shows the dynamic value while you are playing:
 |
You can also adjust the dynamics of your sequence by clicking and dragging the Dynamic Mod slider horizontally.
Mapping MIDI controls
You can use your MIDI keyboard or MIDI controller to control Action Strings 2 externally and record automation.
To map a knob or fader on your MIDI device to a control in Action Strings 2:
Ensure that the MIDI output from your device is routed to the instance of Kontakt or Komplete Kontrol you are using.
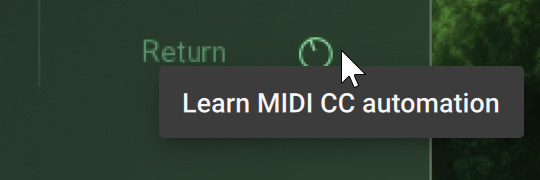
Right-click the desired control in the Action Strings 2 user interface.
Click Learn MIDI CC Automation.

Turn the desired knob or move the desired fader on your MIDI device.
The knob or fader is mapped to the control in Action Strings 2.