Basic concepts
Learn about Maschine's main elements and terminology and how they relate to one another, as well as how to set up your audio and MIDI connections.
This chapter will introduce you to Maschine’s main elements and terminology and explain how they relate to one another. You will also learn how to set up your audio interface and connect MIDI devices.
Important names and concepts
Here is a list (in alphabetical order) of the most important concepts and names.
Arranger
The Arranger is the big area located in the upper part of the Maschine window, right under the Header. The Arranger has two views: Ideas view and Song view. Ideas view allows you to develop your ideas independently from the timeline. The song view will enable you to combine Sections (references to Scenes) and arrange them into a song.
Browser
The Browser is the front end for accessing all the elements of your Maschine Projects: Projects, Groups, Sounds, instruments and effect presets, and Samples. Each of these can be stored and tagged in a way that allows you easy access to all of them. Maschine’s factory library has already been completely tagged, including the factory libraries of any Native Instruments products installed on your computer. You can also import your files into the Library and tag them as well. For more information, refer to Browser.
Effect
Maschine comes with many different effects in the form of Internal Plug-ins. You may also use Native Instruments or third-party VST/AU effect plug-ins. Each Sound, each Group, and the Master can hold any number of effects that can be applied as insert effects. The flexible routing system also allows you to create send effects, multi-effects, and side-chains. For more information, refer to Using effects. For an complete description of all internal effects, refer to Effect reference.
Event
Events are the individual drum hits or notes that make up a Pattern. In the Pattern Editor, events are visually represented by rectangles in the Event area. Depending on the current view in the Pattern Editor, you can see events for all Sounds slots (Group view) or for the selected Sound slot only (Keyboard view). For more information, refer to Working with Patterns and Clips.
Group
A Group contains 16 Sound slots. In addition to the Effect Plug-ins applied to each individual Sound, a Group can have its own insert effect. These affect all the Sounds in the Group. A Group can also contain any number of Patterns (grouped into banks of 16 Patterns each). For more information, refer to Managing Sounds, Groups, and your Project.
Ideas view
The Ideas view allows you to experiment with your musical ideas without being tied to a timeline or arrangement. You can create Patterns for each Group and combine them into a Scene. Scenes can then be added to Sections in the Song view to create a larger musical structure.
Master
This is where all audio signals from each of the Groups and Sounds come together and get mixed. The Master channel can also host any number of insert effects of its own, these effects are applied to all Groups and the Sounds within them. For more information, refer to Managing Sounds, Groups, and your Project.
Pattern
A Pattern is a sequence that plays Sounds from a Group. It belongs to that Group and will be saved together with the Group. In every Scene you can choose for each Group which of its Patterns has to be played. For more information, refer to Working with Patterns and Clips.
Plug-in
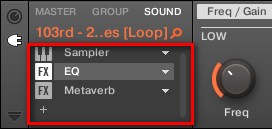
Each Sound, each Group, and the Master can hold any number of Plug-ins. Plug-ins can be instruments or effects, and they can be internal (included with Maschine), from other Native Instruments products (instruments or effects), or external (third-party VST/AU plug-ins). Instrument and Effect Plug-ins can be loaded in the first Plug-in slot of Sounds. The other Plug-in slots of Sounds, as well as the Plug-in slots of Groups and of the Master can hold Effect Plug-ins only. At each level (Sound, Group, and Master), Plug-ins process the audio in series, according to the order in which they are stacked up. For more information, refer to Working with Plug-ins.
Project
A Project contains all data needed for a song: Groups with their Patterns, all Scenes and all settings, modulation, effects, routings, Sounds, and Samples. It’s like a snapshot of the entire state of Maschine. Please read the Maschine Getting Started for a complete overview of the Maschine Project structure.
Scene
A Scene is a combination of Patterns for each Group. They can be used to combine Patterns in order to create musical ideas. Scenes are created in the Ideas view and then added to Sections in the Song view to create an arrangement. For more information, refer to Using the Song view.
Section
A Section is a reference to a specific Scene on the Timeline of the Song view. They are used to arrange the Scenes into a larger musical structure. The benefit of using Sections is that any changes made to a Scene are replicated in each Section where the Scene is referenced therefore making the process of changing parts of a song quick and easy.
Song view
Song view will enable you to combine Sections (references to Scenes) and arrange them into a song in the Arranger.
Sound
Sounds are the building blocks of all sound content in Maschine. A Sound is made up of any number of Plug-ins. Each Sound of the selected Group is mapped to one of the 16 pads on the hardware controller, so you can play the Sounds by pressing the pads. For more information, refer to Managing Sounds, Groups, and your Project.
Adjusting the Maschine user interface
The Maschine software user interface is very flexible and allows you to display what you need so you can focus on your workflow. This section shows you how to adjust it.
Adjusting the size of the interface
From the View menu in the Application Menu Bar and from the View submenu in the Maschine menu you can select one of four different sizes to display Maschine’s software GUI:
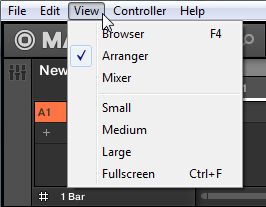
The View menu in the Application Menu Bar (Windows depicted)
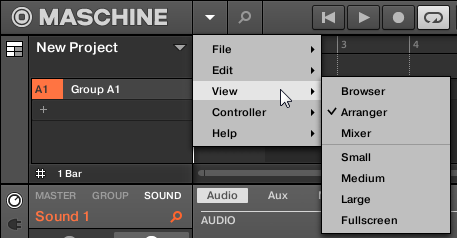
The View submenu in the Maschine menu
Tip
Full screen view is also available from your computer keyboard via [Ctrl]+[F] (macOS: [Cmd]+[F]).
Switching between Ideas view and Song view
Showing/hiding the Browser
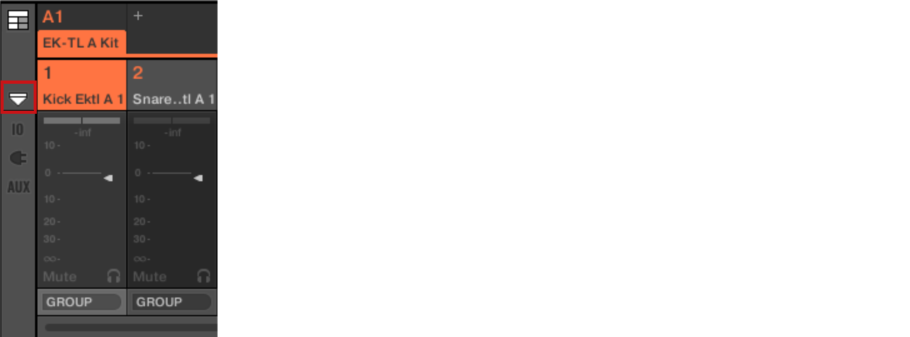
Minimizing the Mixer
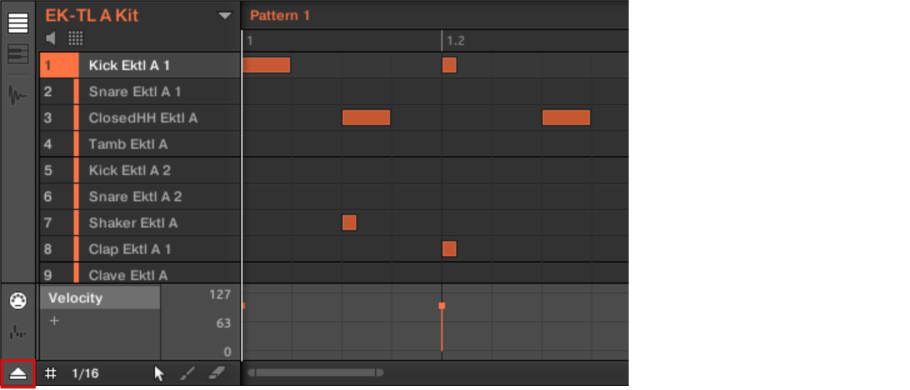
Showing/hiding the Control Lane
Common operations
This section introduces a few common operations in Maschine that you will encounter in numerous situations.
Adjusting the volume, swing and tempo
At any time you can quickly adjust the volume levels, the swing, and the overall tempo of your Project.
Adjusting the volume, swing and tempo in the software
Adjusting the volume
To adjust the overall output level, click and drag the Master Volume slider located on the right part of the Header, at the top of the window.

Use the Master Volume slider in the Header to adjust the overall volume of Maschine.
Notice
You can also use Mix view to adjust your Sound and Group levels. Mix view gives you quick access to the level and routing settings of all your Sounds, Groups, and the Master. In addition, it provides you with an intuitive interface for adjusting the parameters of all your Plug-ins. More on this in section The Mixer.
Adjusting the swing
To adjust the overall swing of your song, you can use the SWING display in the Header, at the top of the Maschine window:

The SWING control in the Header.
To adjust the swing value of your Project, click the SWING value, hold the mouse button and drag vertically.
Adjusting the tempo
To adjust the overall tempo of your song, you can use the BPM display in the Header, at the top of the Maschine window:

The BPM control in the Header.
To adjust the tempo value (in beats per minute) of your Project, click the BPM value, hold the mouse button and drag vertically. You can also double-click the BPM value, enter the desired tempo, and press [Enter] to confirm.
Tip
You can also use the BPM control to define different tempo values for specific Scenes. For more information, refer to Changing the Scene tempo.
Using the metronome
The metronome will help you to keep time when recording in real-time or adjusting existing events.
Notice
The metronome can be heard only when the sequencer is playing.
The metronome signal is sent to the Cue bus. To know how to use the Cue bus, refer to Using the Cue bus.
You can customize the metronome in various ways in the Preferences panel:
You can adjust the metronome’s volume and time signature in the Preferences’ General page. For more information, refer to Preferences – General page.
You can select custom sounds for the metronome’s downbeats and upbeats in the Preferences’ Default page. For more information, refer to Preferences – Default page.
Tip
The time signature of the metronome can be set to differ from the time signature of your Project. This can be useful to record unusual rhythms in a Pattern. Reminder: the time signature of your Project is defined in the Maschine Header (Maschine in stand-alone mode) or by your host application (Maschine running as a plug-in).
Undo/redo
Undoing and re-doing your last actions can be useful to cancel operations you have performed or to compare two versions before and after a change. You can undo nearly everything you did after loading or creating your Project.
Notice
Note: If you save your Project, you will no longer be able to undo or redo any actions performed before saving!
Maschine provides two different undo/redo features, each of them being suited for specific situations:
Step Undo allows you to cancel your last single action. This is the classic undo/redo found in most applications. It cancels or re-executes each single action you have performed.
Take Undo allows you to cancel your last group of actions. Take Undo/Redo is an extended undo/redo available while recording that allows you to cancel or re-execute a whole group of actions at once. It is the default undo/redo in Maschine. For example, suppose that you have just recorded a 16th-note hi-hat beat over four bars, but then decide to cancel it. Normally you would have to cancel the 64 notes one at a time, repeatedly calling the undo function 64 times in a row. Instead, a single Take Undo does the job.
Notice
Take Undo is available when recording in Control mode, recording in Step mode, and recording modulation. Outside of these three situations, Take Undo has the same effect as Step Undo.
Focusing on a Group or a Sound
To display the content and the parameters of a particular Sound or Group, you need to bring it into focus.
Focusing on a Sound or Group is slightly different than selecting it: The focus defines the Sound or Group whose details are displayed, whereas the selection defines the Sound(s) or Group(s) affected by your edits. There is always one single Sound/Group in focus, and it is always in the selection. You can extend the selection to include additional Sounds/Groups and apply your edits to all of them at once. Refer to section Selecting multiple Sounds or Groups for more information.
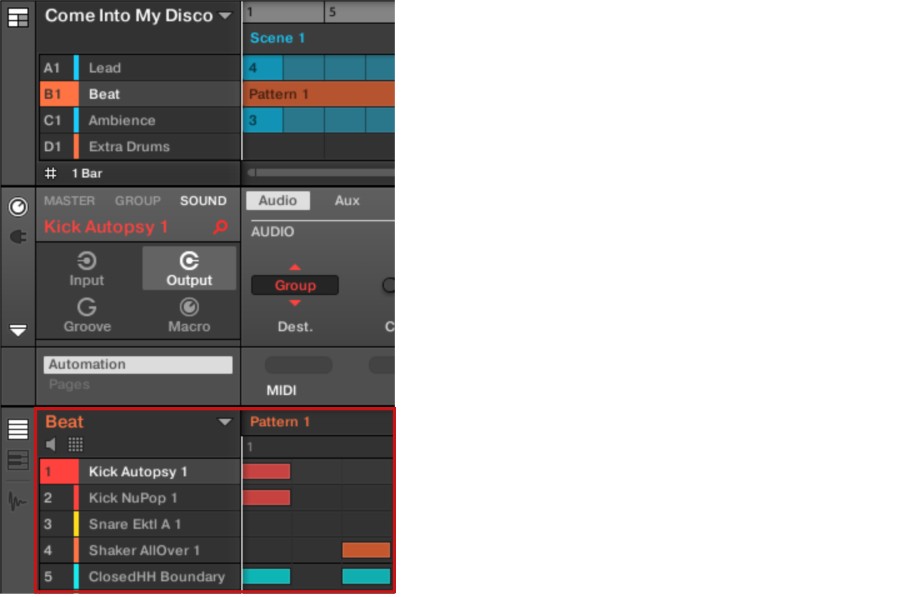
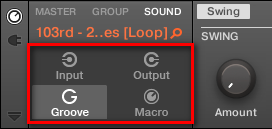
Switching between the Master, Group, and Sound levels
Using your computer keyboard as a MIDI keyboard
You can use your computer keyboard to play MIDI notes in Maschine. This can be useful to play and record patterns even when no Maschine controller is connected. To do this:
Click the Keys button in the Maschine header to activate or deactivate the use of your computer keyboard as a MIDI keyboard:

Alternatively you can use the keyboard shortcut [Ctrl] + [K] (Windows) or [command] + [K] (macOS).
When the Keys button is active, you can use your computer keyboard as follows:
The upper two rows of letters trigger a range of 18 MIDI keys from C to F (by default from C3 to F4). When the Pattern Editor is in Keyboard view, the piano roll highlights this key range.
The lower row of letters lets you adjust the following keyboard settings: Pressing [Z] or [X] transposes the key range downwards or upwards in octaves, and pressing [C] or [V] adjusts the velocity of the triggered notes. For both the range and the velocity settings, the new value is temporarily displayed as an overlay at the bottom of the Maschine window.
Note
When the Keys button is active, you cannot use the keyboard shortcuts for the mouse edit modes in the Event area. For more information on the mouse edit modes, refer to Editing events with the mouse.
Native Kontrol Standard
Native Kontrol Standard (NKS) is a software instrument format that allows third-party developers to integrate with Maschine and Komplete Kontrol hardware and software at the same deep level as Komplete Instruments.
The Native Kontrol Standard includes:
Seamless integration into the Maschine and Komplete Kontrol Browser for a unified browsing experience.
Full parameter mapping for instant hands-on control.
Support of Komplete Kontrol S-SERIES features such as the Light Guide.
NKS instruments can be found in the Maschine Browser next to your Komplete Instruments. All of their presets are fully tagged, so filtering in the Browser gives you matching results from both Komplete Instruments and NKS instruments (refer to section Selecting Type and Character tags). And when you load a preset from an NKS instrument, its parameters are mapped to the controls on your Komplete Kontrol S-SERIES keyboard in a meaningful way, just like any preset from your Komplete Instruments.
NKS instruments are automatically added to your Library when you start Maschine or Komplete Kontrol for the first time after installing the instrument (except Kontakt instruments with NKS support, refer to below). The folders containing the preset files for NKS support can be managed in the Factory pane on the Library page of the Preferences (refer to section Preferences – Library page).
Installing Kontakt Instruments with NKS Support
Third-party developers of Kontakt instruments provide you with a folder that contains all instrument files, including presets and samples. Instead of running an installer, this folder needs to be stored on the hard drive. The instrument can then be activated with Native Access, which also adds it to the Maschine and Komplete Kontrol Libraries. If you are using Kontakt, the instrument is automatically added to your Kontakt Browser too.
To activate your Kontakt instrument with NKS support and add it to the Maschine Library, follow the steps below:
Start the stand-alone version of the Maschine software.
In the File menu click on Manage Products… .
Native Access opens, showing all installed products.
Click on Add a serial in the top-left corner of Native Access.
Enter the serial number of the instrument and click ADD SERIAL.
Native Access asks you to browse the folder containing the instrument files. Before you do this, ensure that you have copied the folder to its final location on your computer.
Click BROWSE and open the folder containing the instrument files in the file dialog.
Click on INSTALL to add the instrument to your Maschine Library.
The instrument is installed. Maschine automatically scans for the new content and adds it to the Maschine Browser.
Notice
The Maschine, and Komplete Kontrol Libraries, and the Kontakt Browser reference the instrument files contained in the folder. It is recommended to not delete or move the folder afterward, or otherwise, Maschine, Komplete Kontrol, and Kontakt will not be able to find the instrument files. If an instrument cannot be found, use the Rescan function on the Preferences’ Library page to update the Library with the correct folder location (refer to section Preferences – Library page).
Stand-alone and plug-in operation
You can run the Maschine software as a stand-alone application or integrate it into your favorite host by loading it as a plug-in. The Maschine software is available in the VST3, Audio Unit, and AAX plug-in formats. For further information on plug-in compatibility and for a detailed description of how to use plug-ins in your host, refer to the documentation included with your host software.
Differences between stand-alone and plug-in
Transport functions
The most noticeable difference between using Maschine as a stand-alone application and as a plug-in relates to the interaction with Maschine’s sequencer. Indeed, when Maschine is used as a plug-in within a host sequencer software (e.g., Cubase or Pro Tools), Maschine’s sequencer is exclusively controlled by the host application: you cannot, for example, manually start, stop or restart the playback in Maschine, nor modify the tempo or the time signature of your Project within the Maschine plug-in itself, these are synchronized to your host’s own transport functions and tempo settings. As a direct consequence, when Maschine is used as a plug-in, the Restart and Play buttons and the Tempo and Time Signature fields are grayed out and inactive in the Maschine Header. You cannot control Maschine’s playback and tempo settings from your Maschine controller either.
Audio and MIDI handling
In stand-alone mode, Maschine directly communicates with your audio and MIDI interface. You can select which physical audio/MIDI ports have to be used on your interface and configure crucial audio settings like the sample rate. All this is done via the Audio and MIDI Settings panel.
When Maschine is used as a plug-in within a host application, the host manages the communication with your audio and MIDI interface. The Maschine plug-in only communicates with the host. Native Instruments’ Online Knowledge Base provides howtos that will help you route the Maschine plug-in to multiple tracks/outputs in the major hosts:
How to route Maschine to multiple outputs in Ableton Live:http://www.native-instruments.com/knowledge/questions/1705
How to route Maschine to multiple outputs in Cubase:http://www.native-instruments.com/knowledge/questions/1707
How to route Maschine to multiple outputs in Pro Tools:http://www.native-instruments.com/knowledge/questions/1709
How to route Maschine to multiple outputs in Logic Pro:http://www.native-instruments.com/knowledge/questions/1711
Notice
For all details on your host application’s audio and MIDI configuration, please refer to its documentation.
Multiple plug-in instances
When using Maschine as a plug-in within a host application, you can open multiple Maschine instances. You can load as many instances of Maschine as your computer, and your host application can handle CPU-wise. In contrast to the stand-alone application, they are always synced to the host. In plug-in mode, you can also send MIDI Program Change messages from your host to switch between Maschine’s Scenes or between patches of other plug-ins loaded into Maschine or record automation for Maschine parameters. For more information, refer to Triggering Sections or Scenes via MIDI and Using MIDI control and host automation.
Switching instances
When two or more instances of the Maschine software are running (for example, as plug-ins on different tracks of your DAW), you must choose which instance you want to control from your hardware controller. You can do this both from your controller and in the software.
Preferences
The Preferences panel lets you specify various settings for Maschine.
To open the Preferences:
Open the Maschine menu (macOS) or File menu (Windows) of the Application Menu Bar, or the File submenu of the Maschine menu.
Click Preferences….
The following pages are available in the Preferences panel:
General: Global settings for Maschine. Refer to Preferences – General page.
Audio: Settings for your audio interface and audio input/output routing. Refer to Preferences – Audio page.
MIDI: Settings for MIDI inputs/outputs. Refer to Preferences – MIDI page.
Default: Default settings for new Projects. Refer to Preferences – Default page.
Library: Settings for the locations of all your Maschine factory and user libraries. Refer to Preferences – Library page.
Plug-ins: Management of the plug-ins to be used in Maschine. Refer to Preferences – Plug-ins page.
Hardware: Settings specific to your controller. Refer to Preferences – Hardware page.
Colors: Default colors for your Scenes, Groups, and Sounds. Refer to Preferences – Colors page.
Preferences – General page
The General page holds all of the global settings for Maschine.
To display the General page, click the General tab on the left of the Preferences panel.
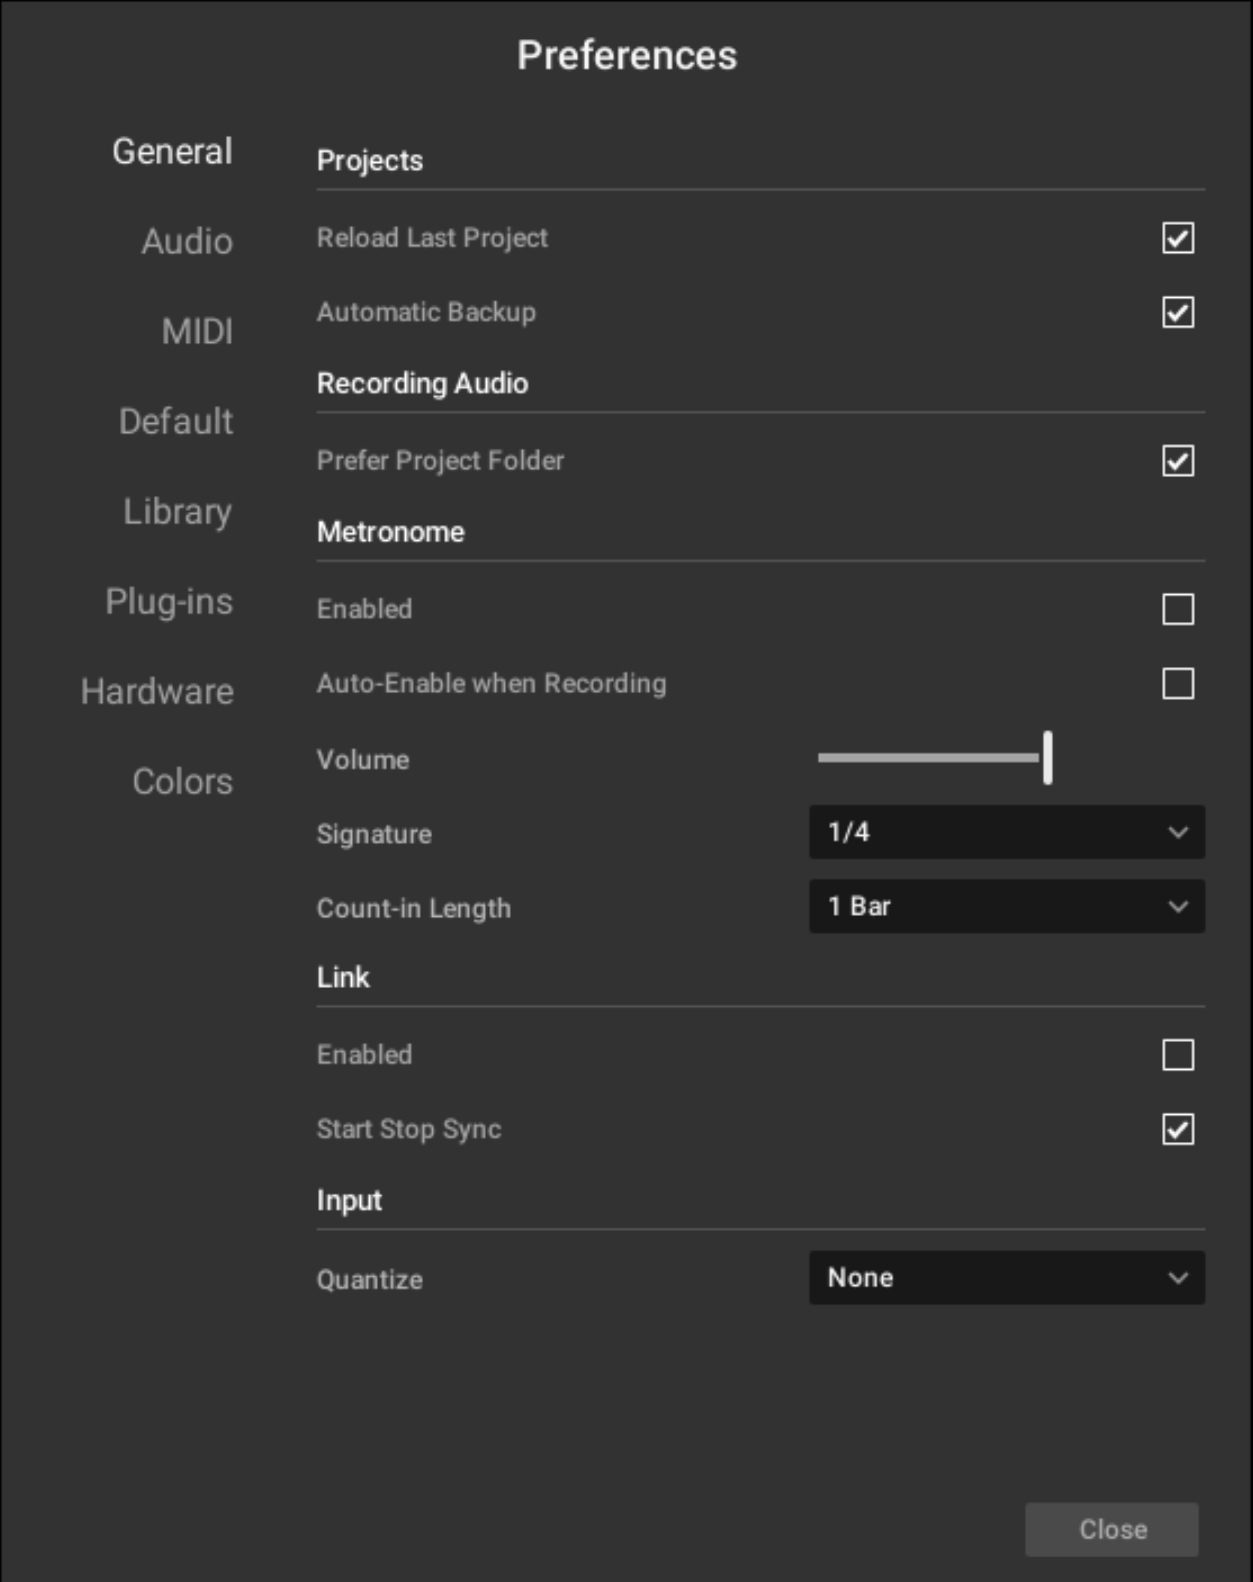 |
The Preferences – General page.
Setting | Description |
|---|---|
Projects | |
Reload Last Project | Automatically reloads the last Project on startup. |
Automatic Backup | Automatically saves your work to prevent the loss of important changes in the event Maschine quits unexpectedly. If Maschine quits unexpectedly a dialog will appear when you restart, asking if you want to use the automatic backup version of your Project. If you choose not to use this, Maschine opens instead the last manually-saved version of your Project. |
Recording Audio | |
Prefer Project Folder | Adds the samples you record to a subdirectory of the folder where your project is saved. If not, your recordings will be saved in the generic Recordings folder in your standard user directory. Refer to Preferences – Default page. |
Metronome | |
Enabled | Activates the metronome. You can also activate the metronome by clicking the Metronome button in the Maschine Header. |
Auto-Enable when Recording | Activates the Auto-Enable option. This automatically turns on the metronome when you start recording a Pattern. The metronome is automatically activated when you start recording a Pattern (typically by pressing REC on your controller). When you exit recording (for example, by pressing the lit REC button) the metronome returns to its state before the recording (this can be on or off). The Auto-Enable option can be activated/deactivated both in the software and from your controller. The Auto-Enable option does not affect the Count-in: Even if Auto-Enable is deactivated, the metronome turns on when you press SHIFT + REC to start the Count-in. |
Volume | |
Signature | Adjusts the time interval between each tick of the metronome. By default, the metronome indicates the beats (the quarter notes, 1/4). Here you can select another note value for the ticks. |
Count-in Length | Adjusts the duration of the Count-in, i.e. how long the metronome will sound before the recording actually starts. |
Link | |
Enabled | Joins or leaves the Ableton Link session. This check box mirrors the LINK button available in the Maschine header. Applications that support Ableton Link can join a Link session when connected to the same network. Refer to Syncing Maschine using Ableton Link. |
Start Stop Sync | Activates or deactivates the synchronized start/stop commands in the Link session. Refer to Syncing Maschine using Ableton Link. |
Input | |
Quantize | Automatically quantizes your hits on the pads as you record. Select one of the following Input Quantization modes:
|
Usage Data Tracking | |
Allow usage data tracking | Activates or Deactivates Usage Data Tracking. Usage Data Tracking technology allows Maschine to automatically track anonymous usage data that you choose to share with us. All users should keep Data Tracking activated as it provides a valuable tool for understanding the performance of Native Instruments applications when they are used in real-life situations. The data sent to Native Instruments is one hundred percent anonymous and will not affect performance. For more detailed information about Usage Data Tracking, please refer to the following Knowledge Base article on the Native Instruments website:https://support.native-instruments.com/hc/en-us/articles/209545029 |
Preferences – Audio page
The Audio page holds settings related to your audio interface .
The Routings section allows you to configure the connections between the virtual inputs/outputs of Maschine and the physical inputs/outputs of your audio interface .
To display the Audio page, click the Audio tab on the left of the Preferences panel.
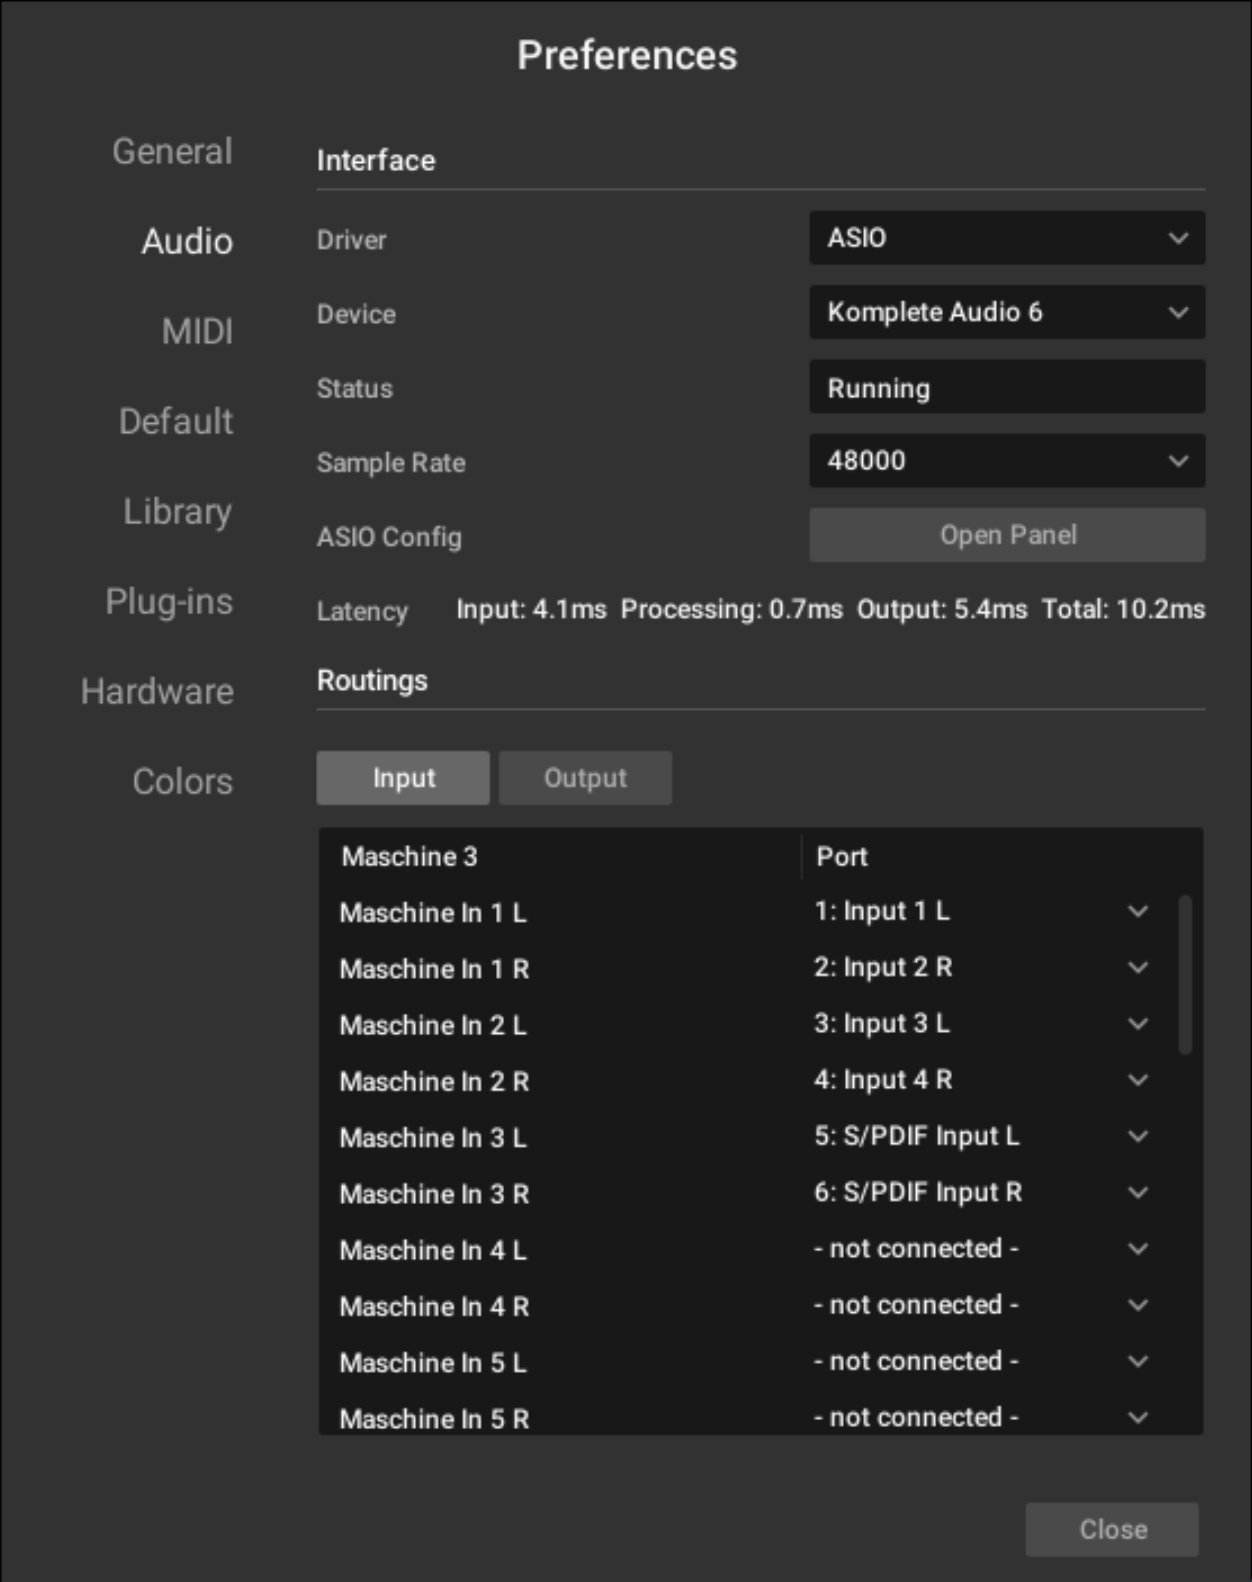 |
Preferences – Audio page.
Preferences – MIDI page
The MIDI page allows you to set up the MIDI input and output ports you want to use with Maschine.
To display the MIDI page, click the MIDI tab on the left of the Preferences panel.
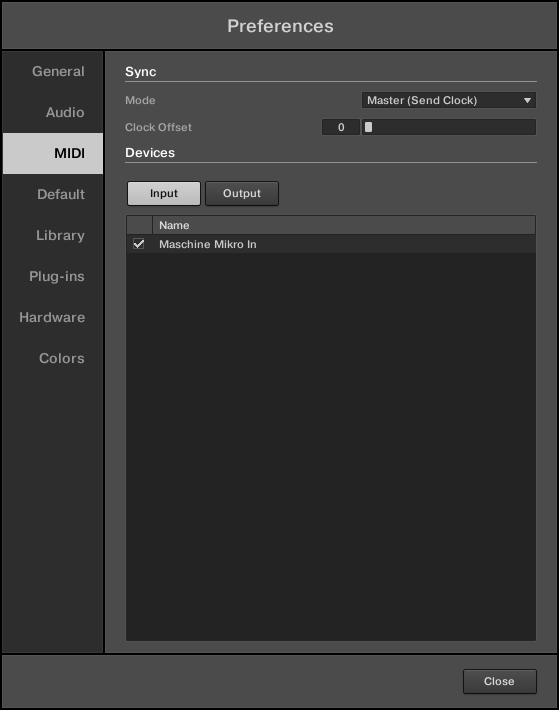
The Preferences – MIDI page.
Setting | Description |
|---|---|
Sync | |
Mode | Sets the MIDI Sync mode preference for Maschine: Off: No MIDI sync mode is selected. Master (Send Clock): If Maschine is running as a stand-alone application, it can also send a MIDI Clock signal to any device that is capable of receiving MIDI Clock. This could be hardware such as a drum machine, another groove box, or even another software sequencer. Receive (Receive Clock): If Maschine is running as a stand-alone application, it can be controlled externally via MIDI Clock by any device that is capable of sending MIDI Clock. This could be hardware such as a drum machine, another groove box or sequencer, or even another software sequencer. Please note that the Receive (Receive Clock) option is unavailable when LINK is active. For more information on Link, refer to Syncing Maschine using Ableton Link. |
Clock Offset (appears when Mode is set to Receive) | Compensates for delays that may occur during MIDI data transmission. Delayed MIDI Clock data will cause external devices to respond too late, thus making your track sound out of sync. By adjusting the Clock Offset value you can set an amount of latency to be compensated (in milliseconds). Maschine will then send MIDI Clock events ahead of time as defined. |
Devices | |
Input | Displays a list of all the MIDI inputs. You can activate/deactivate each input by clicking the fields in the Status column, which displays the current status of the corresponding port. |
Output | Displays a list of all the MIDI outputs of your system. You can activate/deactivate each output by clicking the fields in the Status column, which displays the current status of the corresponding port. |
Preferences – Default page
The Default page allows you to define the default settings that will be used for each new Project.
To display the Default page, click the Default tab on the left of the Preferences panel.
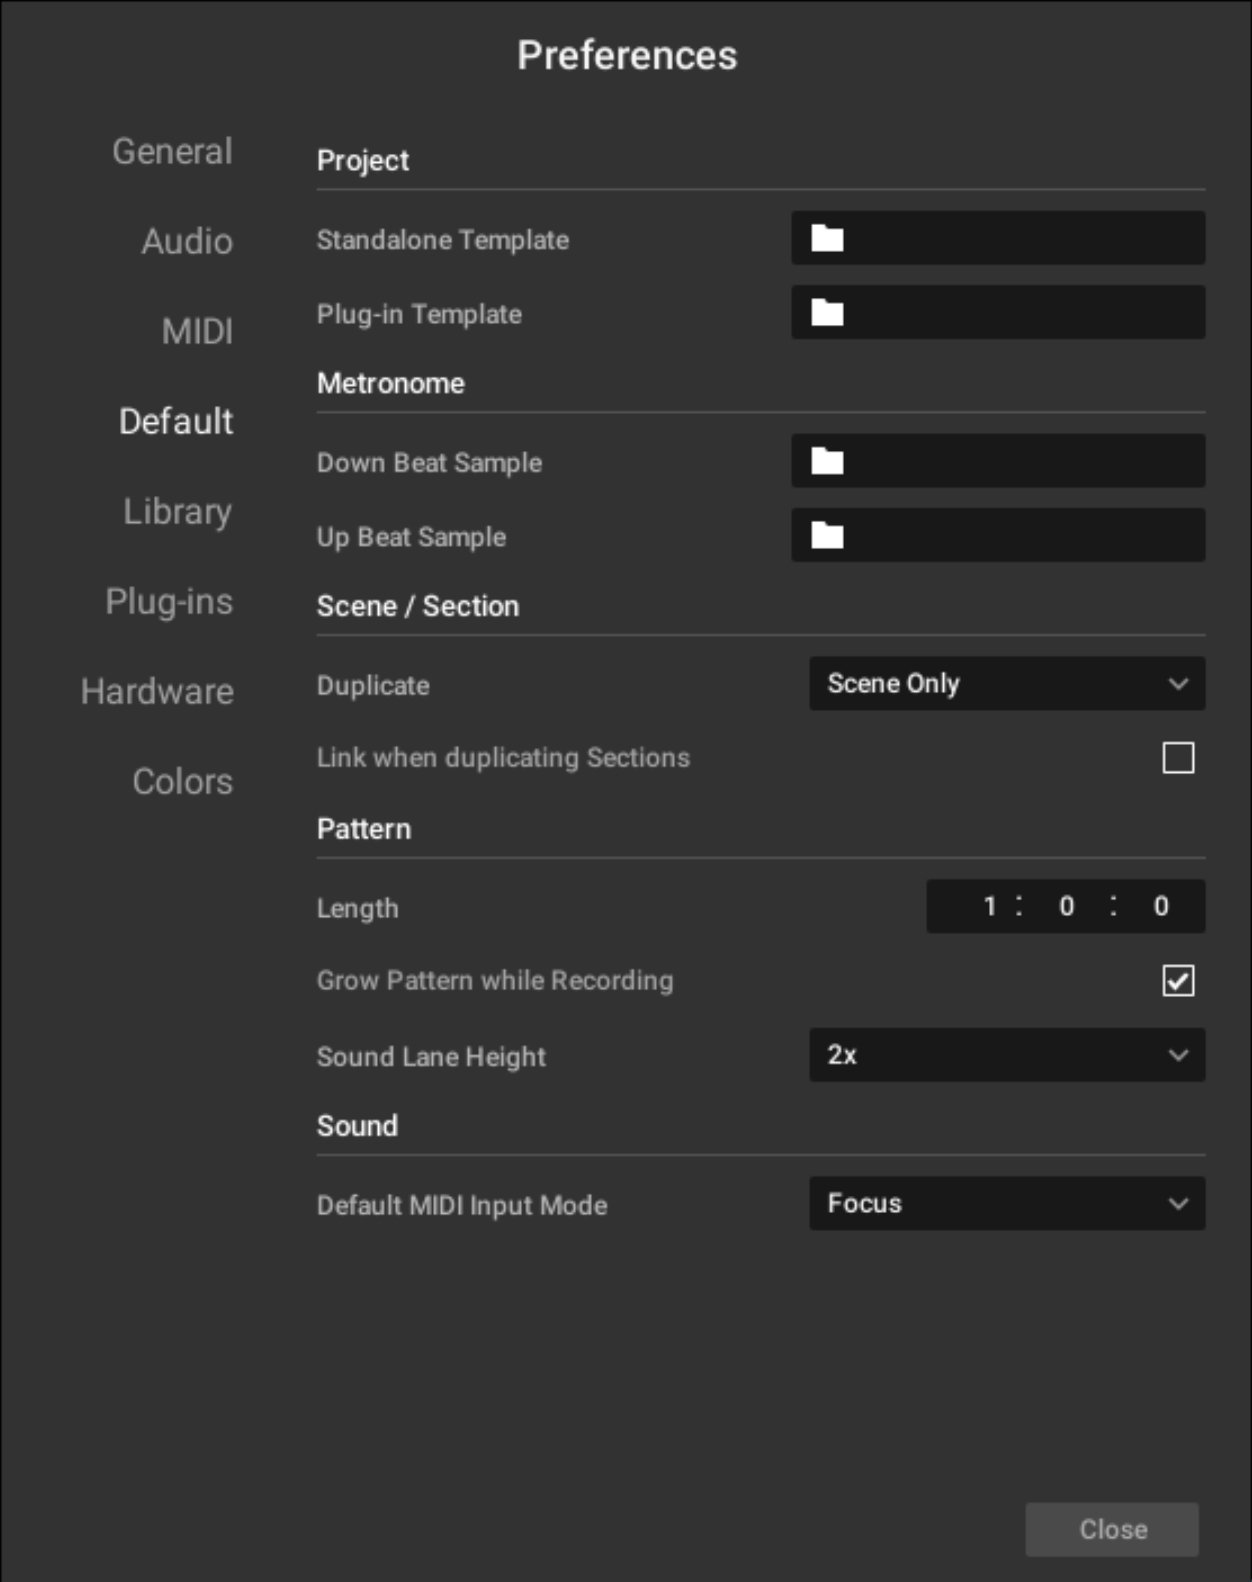 |
The Preferences – Default page.
Setting | Description |
|---|---|
Project | |
Standalone Template | Allows you to select a Project to load automatically when you start a new Project in Maschine used as a stand-alone application. The field displays the location of the Template Project selected for use. Click the folder icon to select another Template Project. Any Project file can be used as a template; this can be from the Maschine Library, or you could create a file, for example with your preferred instruments and effects already loaded into the Plug-in slots. If you have already set a Template Project, click the cross icon to unset it and start new Projects from scratch instead. |
Plug-in Template | Selects a Project to load automatically when Maschine is used as a plug-in within a Digital Audio Workstation. The field displays the location of the Template Project selected for use. Click the folder icon to select another Template Project. Any Project file can be used as a template; this can be from the Maschine Library, or you can create a file, for example with your preferred instruments and effects loaded into the Plug-in slots. If you have already set a Template Project, click the cross icon to unset it and start new Projects from scratch instead. |
Metronome | |
Down Beat Sample and Up Beat Sample | Selects audio files to be used as upbeat and downbeat of the metronome, respectively. The fields display the locations of the audio files selected for use. Click the fields to select other files. Click the little crosses on the right of the fields to remove the custom audio files and use the default metronome sounds instead. |
Scene / Section | |
Duplicate | Select from the drop-down menu how the Duplicate function in Maschine will operate when duplicating Scenes. Scene Only Only the Scene is duplicated. The result is a new unlinked Scene with the same Patterns referenced. Scene and Patterns The Scene itself and additionally all Patterns are duplicated. The new Scene and Patterns are now completely independent from the originals. |
Link when duplicating Sections | Click the checkbox to enable a linked copy of a Section when using the Duplicate function. By default this feature is deactivated. When activated, the Duplicate function will create a linked copy of a Section. A linked copy will automatically be updated when any instance of a linked Section is edited. This way, you don’t need to keep track of which Section is the “original.” |
Pattern | |
Length | Enter the default length of new Patterns. The length is measured in bars, beats, and sixteenths. To adjust the value, click the desired number (bars, beats or sixteenths) and drag your mouse vertically. For more information on Pattern Length refer to Adjusting the Arrange Grid and the Pattern Length. |
Grow Pattern while Recording | When active (default setting), you can record Patterns without any predefined length: The length of the Pattern will grow until you stop recording. |
Sound Lane Height | Select the default height of the Sound lane in the Pattern Editor by choosing between normal 1x or 2x zoom from the menu. 1x displays all sixteen sounds, and 2x displays only the first eight Sounds of a Group, making it easier to edit events. |
Sound | |
Default MIDI Input Mode | Allows you to play your Sounds via MIDI notes, for example, from a MIDI keyboard. By default and without any configuration, incoming MIDI notes on any MIDI port and any MIDI channel will trigger the pitch of the focused Sound. In addition, you can select that a Sound receives no MIDI input, and also define the default setting for MIDI input by selecting the Default MIDI Input Mode preference. Select one of the following MIDI input mode options from the drop-down menu: Focus: MIDI input from any connected controller can be used to trigger the focused (selected) Sound slot. None: The selected Sound will not receive MIDI data. |
Preferences – Library page
The Library page lets you edit the locations of all Maschine library files (both factory and user) that appear in the LIBRARY pane of the Browser.
Notice
The LIBRARY pane of the Browser is described in section Searching and loading files from the Library.
To display the Library page click the Library tab on the left of the Preferences panel.
The Factory and User buttons at the top of the page allow you to switch between the Factory pane and the User pane.
Factory pane
To display the Factory pane, click the Factory button at the top of the Library page.
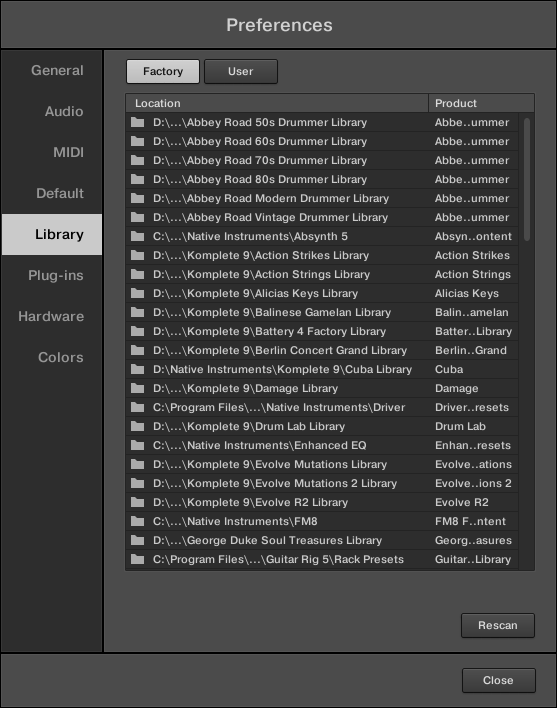
The Preferences panel – the Library page’s Factory pane.
The Factory pane displays all factory libraries available. These include the Maschine Factory Library, libraries imported from other NI products, and installed Maschine EXPANSIONS.
These libraries will appear in the Factory view of the Browser’s Library pane.
Element | Description |
|---|---|
Location column | Displays the path of each library. If you have moved any library to another location on your computer, click the folder icon on the left of that library and select its new path. |
Product column | Displays the name of each product. These names cannot be edited. |
Rescan button | Rescans the Library for any changes. If you have made any change to a library (for example, changed its location), select the modified item in the list and click the Rescan button to rescan that library. |
User pane
To display the User pane, click the User button at the top of the Library page.
The Preferences panel – the Library page’s User pane.
The User pane displays all user libraries currently in use. This includes the standard Maschine user directory as well as any other user directory you might have defined. These libraries will appear in the User view of the Browser’s Library pane.
Element | Description |
|---|---|
Location | Displays the path of each library. If you have moved any library to another location on your computer, click the folder icon on the left of that library and select its new path. |
Alias | Displays the alias stored for each library. Click an alias to edit it. Defining aliases for your user folders is not mandatory, but it can be of great help when working on different computers (see description below). After adding a location (see Add below), click the field in the new row and in the Alias column to set the alias for that new location. The alias of the default user folder, Standard User Directory, cannot be edited, as this is the location where all your user files will be stored by default. |
Add | Adds directories to the user library. See below for more details. |
Remove | Removes the selected user library. Files will only be removed from the Maschine Browser, not from your hard disk. |
Rescan | Rescans the Library for any changes. If you have made any change to a library (for example, changed its location), select the changed item in the list and click the Rescan button to rescan that library. |
Scan user content for changes at start-up | Scans for changes to the User content directory during start-up. |
Tip
You can resize the Preferences panel at your convenience using the usual method on your operating system. You can also resize each column by clicking and dragging the border between both column headers.
User Content folder included in Maschine’s user paths
Products from Native Instruments will store user-generated content in a centralized User Content folder. In Maschine, this User Content folder is automatically added to the list of user directories in the User pane of the Library page in the Preferences panel. As a consequence, its files are available in the Maschine Browser.
The User Content folder can neither be renamed nor removed from the list. However, you can modify its path in the Location column.
Standard User Directory cannot be removed
The Standard User Directory can not be renamed nor removed from the list in the User pane of the Library page in the Preferences panel. You can modify its path in the Location column.
Canceling library rescan
In the Library page of the Preferences panel, the Rescan button allows you to rescan the selected library (or all your libraries if none is selected) so that the Maschine Browser mirrors any changes you have made to the files. Clicking this Rescan button triggers the scan, and an Updating Database dialog shows you the scan’s progress.
The Updating Database dialog includes a CANCEL button allowing you to interrupt the scanning process without harming the database permanently:

The Updating Database dialog now includes a Cancel button.
Click CANCEL in the Updating Database dialog to interrupt the scan.
A Cancel Rescan dialog opens up, asking you to confirm that you want to cancel the scan. The dialog warns you that canceling the scan may lead to inconsistencies or missing items in your Maschine Library.
If you still want to cancel the scan, click CANCEL RESCAN at the bottom right, and the scan will be canceled.
If you prefer not to cancel the scan, click CONTINUE or press [Esc] on your computer keyboard, and the scan will continue.
If you cancel the scan, any inconsistencies or missing items in your Maschine Library will be resolved by re-scanning the same path(s) again (via the Rescan button mentioned above).
Notice
In opposition to the rescan process described here, you cannot cancel the import of files into the Maschine Library (via the FILES pane of the Browser or via the Library page of the Preferences panel) nor the process of applying changes to the file tags and properties (via the Attribute Editor in the Browser).
Using aliases
The aliases that are available in the Alias column act as references to the paths shown in the Location column. When you save a Project, the saved data includes both the path and the alias for each file used in the Project. This will allow you to use a Project on different computers even if the files used in the Project (for example, Samples) are stored in different locations on each computer: Simply define the same alias for these locations on each computer, and Maschine will replace the path saved on the first computer with the path set to the same alias on the second computer to retrieve the files on this second computer, therefore avoiding the possibility of missing Samples.
Adding folders to the user library
In the User pane of the Library page, you can add other folders to the user content of your Maschine Library. To do this:
Click Add at the bottom of the pane.
A folder selection dialog opens.
In the dialog, navigate to the desired folder on your computer and click OK (Choose on macOS).
All Maschine-compatible files found in the selected folder are added to your user content in Maschine.
Furthermore, the imported files will have their attributes (product/bank/sub-bank, Type/Sub-Type/Mode tags, as well as properties) set as follows:
For all file types, any attributes already in the files will be retained.
For Samples, if the product/bank/sub-bank attributes are empty, they will be set to the folders in which the Samples are located:
The product will be set to the name of the folder you have selected.
If Samples reside in a subfolder of this folder, the subfolder name will be used as a bank.
If Samples reside in a subfolder of this subfolder, the name of the lower subfolder will be used as a sub-bank.
By adding a folder to the user content of your Maschine Library, you make their files available in the Browser’s LIBRARY pane for quick searching and loading! For more information on how to use the LIBRARY pane of the Browser, please refer to section Searching and loading files from the Library.
Notice
Paths to folders added via the IMPORT button in the Browser’s FILES pane will also show up here. The only difference between adding folders via the Add button in the Preferences panel described here and via the IMPORT button in the FILES pane of the Browser is that the latter allows you to directly tag the files as they are imported. See section Using the Result list for more information on how to import folders via the FILES pane.
Please note that the selected folder cannot contain, or be contained within, a folder already listed in the User or Factory pane. If Maschine detects such a folder as you press OK (Choose on macOS) in the folder selection dialog. In that case, a Duplicate Location message appears: Click OK to return to the folder selection dialog and select another folder on your computer.
Removing folders from the user library
You can also remove any user folder from your library, except the default user.
Preferences – Plug-ins page
The Plug-ins page lets you manage the Native Instruments and External Plug-ins you want to use in Maschine.
To display the Plug-ins page, click the Plug-ins tab on the left of the Preferences panel.
At the top of the page, the Manager and Locations buttons allow you to switch between the Manager pane and the Locations pane.
Manager pane
To display the Manager pane, click the Manager button at the top of the Plug-ins page.
In the Manager pane of the Plug-ins page, you can enable/disable VST/AU plug-ins, rescan their directories, and set default presets for your Native Instruments and External Plug-ins.
When a Native Instruments or External Plug-in is deactivated, it will not be available for loading (from the various Plug-in menus in the software and from the Plug-in Browser on your controller). If, for example, you do not use certain VST plug-ins in Maschine, it could be useful to disable them so that they do not overload the list of available Plug-ins.
Tip
For more information on Native Instruments Plug-ins, External Plug-ins, and other Plug-ins in Maschine, refer to Working with Plug-ins.
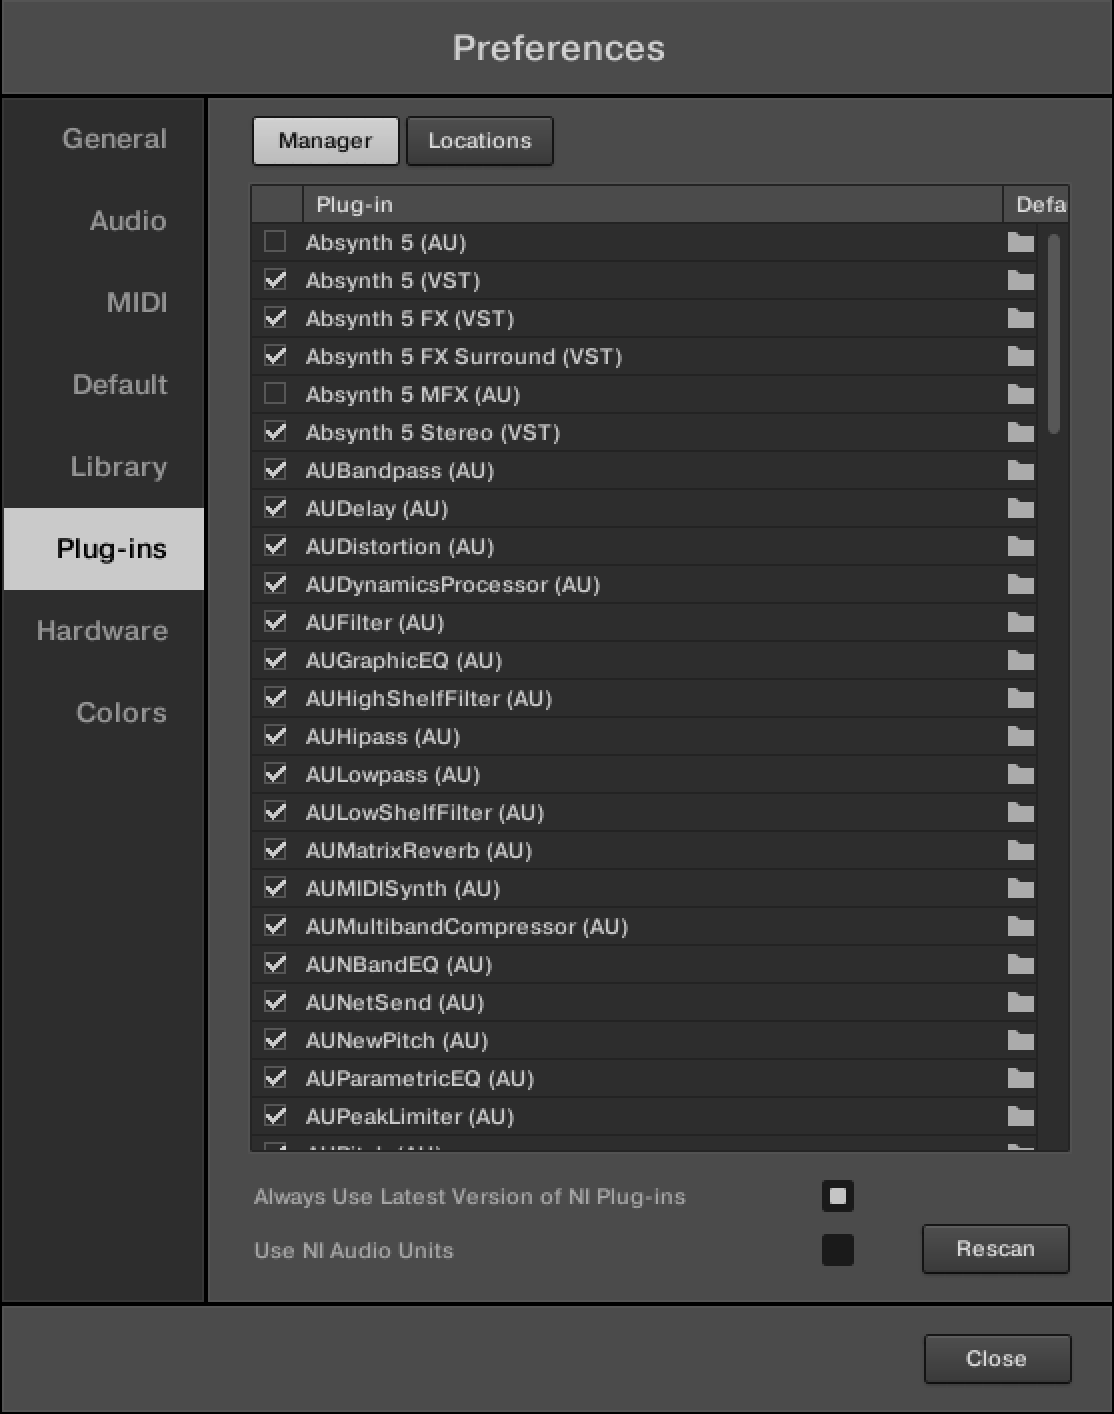 |
The Preferences panel – the Plug-ins page’s Manager pane
Element | Description |
|---|---|
Plug-in | Lists all available VST/AU plug-ins from the directories specified in the Locations pane (see below). This includes all activated or deactivated 32-bit VST/AU plug-ins when Maschine is running in 32-bit mode, or all activated or deactivated VST/AU 64-bit plug-ins when Maschine is running in 64-bit mode. A checkbox on the left of each plug-in in the list allows you to enable/disable this plug-in in Maschine. When a plug-in is deactivated, it will not be available for loading in Maschine. |
Default Config | Sets a default preset for each plug-in. Click the folder icon on the left to choose a default plug-in preset. You can also save a preset as default for the plug-in via the Save As Default… entry in the Plug-in menu. If no default is set here, the parameters of this plug-in will be auto-mapped when loading it into a plug-in slot. To remove a default plug-in preset, click the little cross on the right. |
Always Use Latest Version of NI Plug-ins | Sets the latest version of a plug-in as the default. If a project was saved using older plug-ins, such as older versions of Reaktor or Kontakt, the newest installed versions would be used when loading the project while this preference is activated. If the preference is off, Maschine will attempt to load using the versions originally used when creating the project. Additionally, if only the newest versions of the required plug-ins are installed on the system, the latest versions will be used even if this preference is turned off. |
Use NI Audio Units | Shows or hides AU plug-ins in the plug-in dropdown when right-clicking a sound slot (note that loading from the Browser will always instantiate a VST plug-in) |
Rescan | If you have changed the content of any directory specified in the Locations pane (see below), you should rescan your plug-in directories in order to keep the list of available external plug-ins up to date. Clicking Rescan will check the integrity of your plug-ins and allow you to automatically detect plug-ins that were added or removed or deselect any plug-ins that are not working correctly for any reason. Note that the scan will ignore the plug-ins that are deactivated in the list above. |
Manager pane: use NI Audio Units checkbox (macOS only)
On macOS, the Manager pane contains an additional Use NI Audio Units checkbox. Check this box to include the Audio Units (AU) versions of your Native Instruments plug-ins in the software’s Plug-in menus and in the controller’s Plug-in Browser:
If this checkbox is deactivated (default setting), the AU versions of your Native Instruments plug-ins are still listed in the list above, but they are deactivated (checkbox unchecked): These plug-ins won’t appear in the Native Instruments submenu of the Plug-in menus (software) or in the Plug-in Browser (controller). Additionally, the remaining entries for Native Instruments plug-ins (VST) won’t display the (VST) mention next to their name.
If you enable the Use NI Audio Units checkbox, all Native Instruments’ AU plug-ins are activated in the list above and are available for loading in Maschine. To distinguish them from the VST versions, plug-in entries in the Native Instruments submenu of the Plug-in menus and the Plug-in Browser will display either (VST) or (AU) after their name.
You can also enable or disable Native Instruments’ AU plug-ins individually in the list via the checkboxes described above. As soon as you allow one of them, the Use NI Audio Units checkbox is automatically activated.
Notice
The Use NI Audio Units checkbox relates only to AU plug-ins from Native Instruments. AU plug-ins from third-party manufacturers are not affected by this setting.
Notice
When the Use NI Audio Units checkbox is deactivated or the AU version of a Native Instruments plug-in is deactivated, you can still load Projects that use AU plug-ins.
Location pane
To display the Location pane, click the Location button at the top of the Plug-ins page.
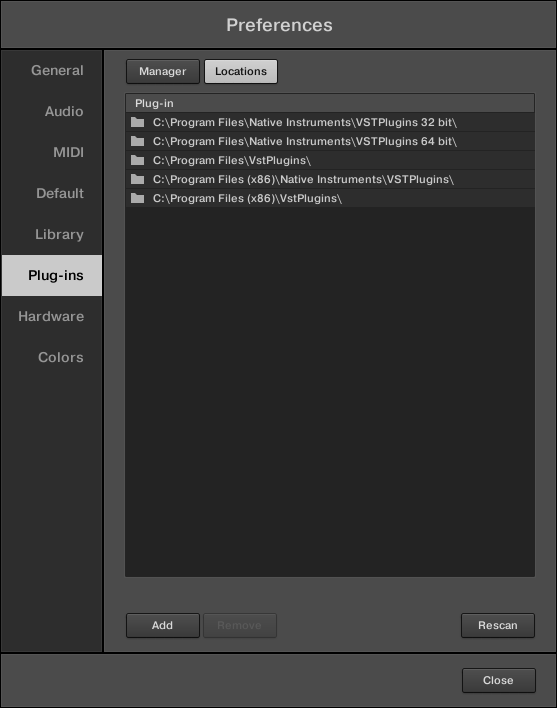
In the Locations section of the Plug-ins page, you can manage the various plug-in directories you want to use in Maschine.
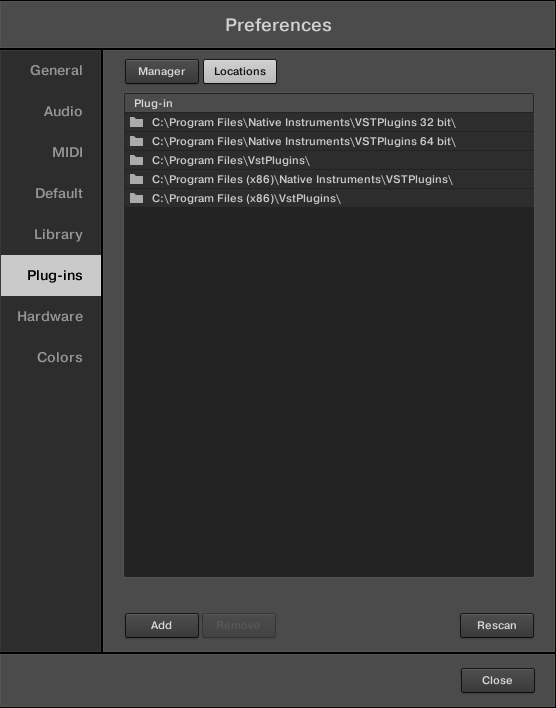
The Preferences panel – the Plug-ins page’s Locations pane
The Locations pane also contains the following controls:
Element | Description |
|---|---|
Plug-in | Lists all plug-in directories used in Maschine. Click the folder icon on the left of an entry to change the path of that plug-in directory. |
Add | Adds plug-in directories. |
Remove | Remove the selected directory. |
Rescan | Rescans the Library for any changes. If you have changed the content of a directory (such as installed or removed plug-ins), you should rescan your plug-in directories to keep the list of available plug-ins up to date. Click Rescan to check the integrity of your plug-ins. This will allow you to automatically detect plug-ins that are added or removed or disable any plug-ins that are not working correctly for any reason. |
Preferences – Hardware page
The Hardware page contains settings for the various hardware controllers of the Maschine family. If no controller is connected, the Hardware page is empty.
To display the Hardware page, click the Hardware tab on the left of the Preferences panel.
Preferences – Colors page
The Colors page enables you to choose default colors for your Scenes, Groups, and Sounds.
To display the Colors page click the Colors tab on the left of the Preferences panel.
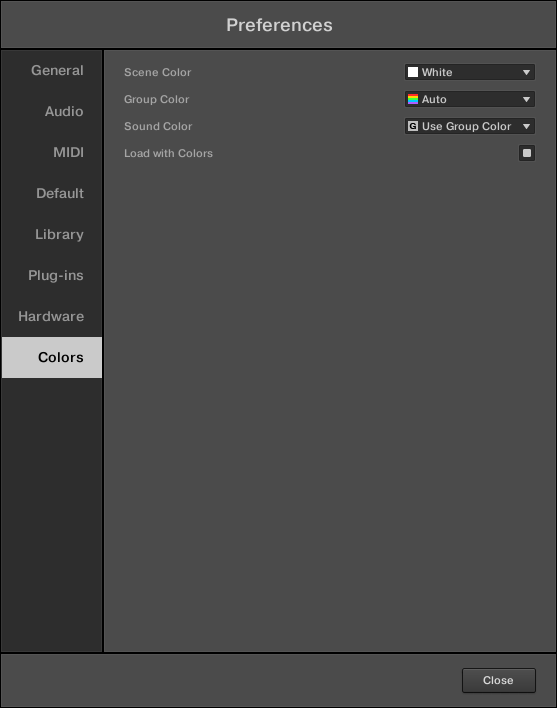
The Preferences panel – Colors page.
Setting | Description |
|---|---|
Scene Default | Selects the default color for your Scenes. You can choose the desired color from the 16-color palette or White (default). The chosen color is displayed in the menu. If you select Auto each Scene will have a different default color. |
Group Default | Selects the default color for your Groups. You can choose the desired color from the 16-color palette in the menu. The chosen color is displayed in the menu. If you select Auto (default), each Group will have a different default color. |
Sound Default | Selects the default color for your Sounds. In the menu, you can choose the desired color from the 16-color palette. The chosen color is displayed in the menu. If you select Auto each Sound will have a different default color. If you select Use Group Color (default), Sounds will mirror the color of the Group to which they belong. |
Load with Colors | Saves your Color settings with your Maschine files (Projects, Groups, Sounds, etc.). If you uncheck Load with Colors (checked by default), saved colors will not be used next time you load the files. The default colors set in this Colors page will be used instead. |
Notice
Please note that the settings in this Colors page define default colors: These colors will only be used when creating a new Project, resetting a Group/Sound, or when Load with Colors is unchecked (see above). To change the color of particular objects (Sounds, Groups, Patterns, and Scenes) in your Project, use the Color submenu in the object’s context menu in the software. Refer to Changing the Sound color, Changing the Group color, Changing the Pattern color, and Changing the color of a Scene for more information respectively.
Tip
As long as an object (Scene, Sound, Group, or Pattern) has the default color, this color is not attached to the object but instead to its “position” in the respective list: In particular, if you move the object to another position the default color will not follow the object, the object will instead take the default color of its new position.
Integrating Maschine into a MIDI setup
You can quickly integrate Maschine into a MIDI setup.
You can use MIDI in Maschine in various ways. Notably:
You can synchronize a MIDI Clock signal between Maschine and other MIDI devices: Sync to external MIDI clock and Send MIDI clock.
If you connect a MIDI keyboard to the MIDI IN, you can directly play the focused Sound with it without having to set anything up.
You can let particular Sounds and Groups react to incoming MIDI data and send MIDI data to the desired port. More on these in section Using MIDI control and host automation.
You can also switch Scenes remotely by sending MIDI Note or MIDI Program Change messages to Maschine. More on this in section Triggering Sections or Scenes via MIDI.
Connecting external MIDI equipment
Sync to external MIDI clock
If Maschine is running as a stand-alone application, it can be controlled externally via MIDI Clock by any device that is capable of sending MIDI Clock. This could be a hardware device (a drum machine, another groovebox, etc.) or a software sequencer.
Notice
If you use Maschine as a plug-in, it is automatically synced to the host application so you don’t have to activate external MIDI sync! See section Stand-alone and plug-in operation for more information on using Maschine as a plug-in.
To configure Maschine to receive MIDI Clock from an external device:
Select the Preferences entry from the File menu.
Select the MIDI page.
In the Sync section select Receive Clock from the Mode menu.
Select the Input button to see a list of available MIDI input devices.
Check the box of the port that is connected to the device sending the MIDI clock signal (the device you want Maschine to sync with).
Maschine can now receive MIDI Clock from this external device.
Notice
You must define at least one MIDI input device in the Devices section of the MIDI page to enable Maschine to sync.
When Receive Clock is selected, the Play button in the Maschine Header are deactivated.
Tip
If you want to configure Maschine to react to other MIDI messages than MIDI Clock, in particular if you want to control Maschine notes and parameters via MIDI, please refer to section Using MIDI control and host automation, where this is described in detail.
Send MIDI clock
If Maschine is running as a stand-alone application, it can send a MIDI Clock signal to any device capable of receiving MIDI Clock. This could be a hardware device (a drum machine, another groovebox, etc.) or a software sequencer.
Notice
If you use Maschine as a plug-in, it cannot send any MIDI Clock signal. See section Stand-alone and plug-in operation for more information on using Maschine as a plug-in.
To configure Maschine to send MIDI Clock to an external device:
Select the Preferences entry from the File menu.
Select the MIDI page.
In the Sync section select Send Clock from the Mode menu.
Maschine will send a MIDI Clock signal to any connected device that is capable of receiving MIDI Clock.
Select the Output button to see a list of available MIDI output devices.
Check the box of the port that is connected to the device receiving the MIDI clock signal (the device you want to sync with Maschine).
Notice
You can adjust the MIDI Clock offset in the MIDI page of the Preferences panel. See Preferences – MIDI page for more information.
Tip
If you want Maschine to send other MIDI messages than MIDI Clock, in particular, if you want to control other MIDI-capable devices via the notes played in Maschine, please refer to section Sending MIDI from Sounds.
Syncing Maschine using Ableton Link
Connecting to a network
Applications that support Ableton Link can join a Link session when connected to the same network. To make Link available within Maschine, make sure that your computer is connected to the same local network as the devices running other applications you want to link to. This can either be a local network or an ad-hoc (computer-to-computer) connection.
For more general information on setting up and using Link, please refer to the Link FAQs article located on the Ableton website:
https://help.ableton.com/hc/en-us/articles/209776125-Link-FAQs.
Joining and leaving a Link session
You can join and leave a Link session at any time. Other applications and devices on the same network can also join the same session if they have Link activated. The first participant to join the session sets the initial tempo, from then on any participant in the session can change the tempo in their respective application. If multiple participants change the tempo at the same time, the last tempo change will take effect.
Joining and leaving a Link session in the software
To start or join a Link session in the software:
To start or join a Link session, click the LINK button in the Maschine header to activate it.

The LINK button turns on. A moving bar appears on the active LINK button even though the Maschine transport is not running. This bar represents the global phase of Link that all participating applications lock into. After clicking the Play button, the playback will resume on the downbeat once the moving bar is filled, and the tempo and phase of Maschine will be in sync with the other Link participants.
To leave the Link session:
To leave the Link session, click the active LINK button in the Maschine header.
The LINK button turns off and the moving bar disappears. The playback in Maschine does not depend on the Link session anymore.
Optionally, you can also synchronize Maschine’s start and stop commands with the Link session. In this case, not only the tempo and phase of the participants will be in sync, but the playback will also start/stop simultaneously for all participants with an active start/stop sync. To do this:
Open the Maschine menu in the Maschine header and select Preferences… in the File submenu to open the Preferences dialog.
Click the General tab on the left to show the General page.
In the Link section, activate the Start Stop Sync check box to synchronize the play state of Maschine with the other Link participants.
From now on, joining a Link session will also synchronize Maschine’s playback state (start/stop) with the other participants with an active start/stop sync: Starting/stopping the playback in any of them will automatically start/stop the playback on all of them.


