Instruments and Tools
Kontakt comes with built-in instruments and Tools, ready to be played as soon as you open the plugin or standalone application.
Kontakt comes with built-in instruments and Factory Tools, ready to be played as soon as you open the plugin or standalone application.
The built-in instruments let you play Kontakt right away and creatively explore sampling:
The Factory Tools are MIDI effects that transform your playing in inspiring ways or provide utility functions:
Arpeggiator transforms the notes you play into a rhythmic sequence.
Chord Builder adds additional harmonies to MIDI notes.
Chords lets you play chords by pressing a single key.
Humanizer adds randomization to the timing, velocity, and pitch of the notes you play.
Patterns combines the features of a polyphonic step sequencer and an arpeggiator.
Phrases lets you play musical phrases by pressing a single key.
Scale Lock maps the notes you play to a musical scale.
Velocity Curve lets you fine-tune how Kontakt responds to the velocity values you play.
Piano Uno instrument
Piano Uno offers a quick way of playing a sound when you open Kontakt, even if you have not installed any other instruments. Its classic sound and immediacy make it a great session starter when you just want to lay down an idea.
Piano Uno contains the following controls:

Noises: Adjusts the level of noise produced by the instrument's hammer mechanism.
Tone: Adjusts the timbre of the sound from dark to bright.
Stereo: Adjusts the stereo width of the direct sound produced by the instrument.
Reverb: Adjusts the amount of convolution reverb added to the sound.
Reverb type: Selects the type of reverb by switching between three different impulse responses for the convolution reverb.
Room: A chamber with a short reverb time for a more intimate reverb effect.
Hall: A classic concert hall with a long reverb time.
Space: A supernatural reverb effect with distinct echoes and a very long reverb time.
Leap instrument
Leap is the standard sampler in Kontakt’s Default view. It lets you play exciting combinations of your loops and one-shot samples as well as curated Expansion kits. Use its engines to make each sound your own, and create exciting performances with Macro knobs and black key effects.
Loading and saving Leap kits
This section shows you how to load kits and individual samples in Leap and how to save your own Leap kits.
Loading samples and kits
You can load samples and kits into Leap using various methods:
In the side pane browser or in the Library browser, double-clicking a factory or user kit from the Leap category will load the kit into Leap.
In the side pane browser or in the Library browser, double-clicking a sample from the Loops or One-shots category will open a new empty Leap kit and load the sample into its first sample slot.
Dragging and dropping samples from the side pane browser’s Loops and One-shots categories, or from a folder on your desktop:
You can drop the sample on an empty area of the Rack to open a new empty Leap and load the sample into the first slot.
In a Leap instance in Single mode, you can drop the sample anywhere on the Keyboard section to load it into the selected slot.
In a Leap instance in Group mode, you can drop the sample on a specific key of the Keyboard section to load it into that slot. You can also drag and drop multiple samples at once: The first sample will be loaded into the target slot and the remaining samples into the following slots.
In a Leap instance with the Edit page open, you can drop the sample on the Waveform to load it into the selected slot.
In a Leap instance in Group mode, you can [Ctrl]-click the desired key in the Keyboard section, select Browse from the context menu, and choose a sample to load it into that slot.
Note
In any case, loading a sample into a slot in Leap will replace the sample previously in that slot (if any).
You can also start with an empty Leap kit by double-clicking in the empty space of the Rack, or by selecting New Leap preset from the File menu in Kontakt’s Header. You can then fill the Leap kit with samples using any of the methods listed above.
Saving your own kits
You can save the current state of the kit in Leap as a user kit:
In the Navigator at the top of the side pane, right-click the Leap’s slot to open the context menu.
Select Save Preset… from the context menu.
Enter a name in the dialog and click Save to confirm.
The kit is saved as a .nkl file on your computer and it will appear in your user content within the Leap category, both in the side pane browser and in the Library browser.
If your kit is a modified version of a factory kit from a Leap Expansion, it will appear in the user content of that Leap Expansion. If you have instead created the kit from scratch by opening an empty Leap instance and filling it with samples, your kit will appear in the user content of a dedicated Leap Expansion named Custom Kit.
Leap overview
Leap contains the following main elements and controls:
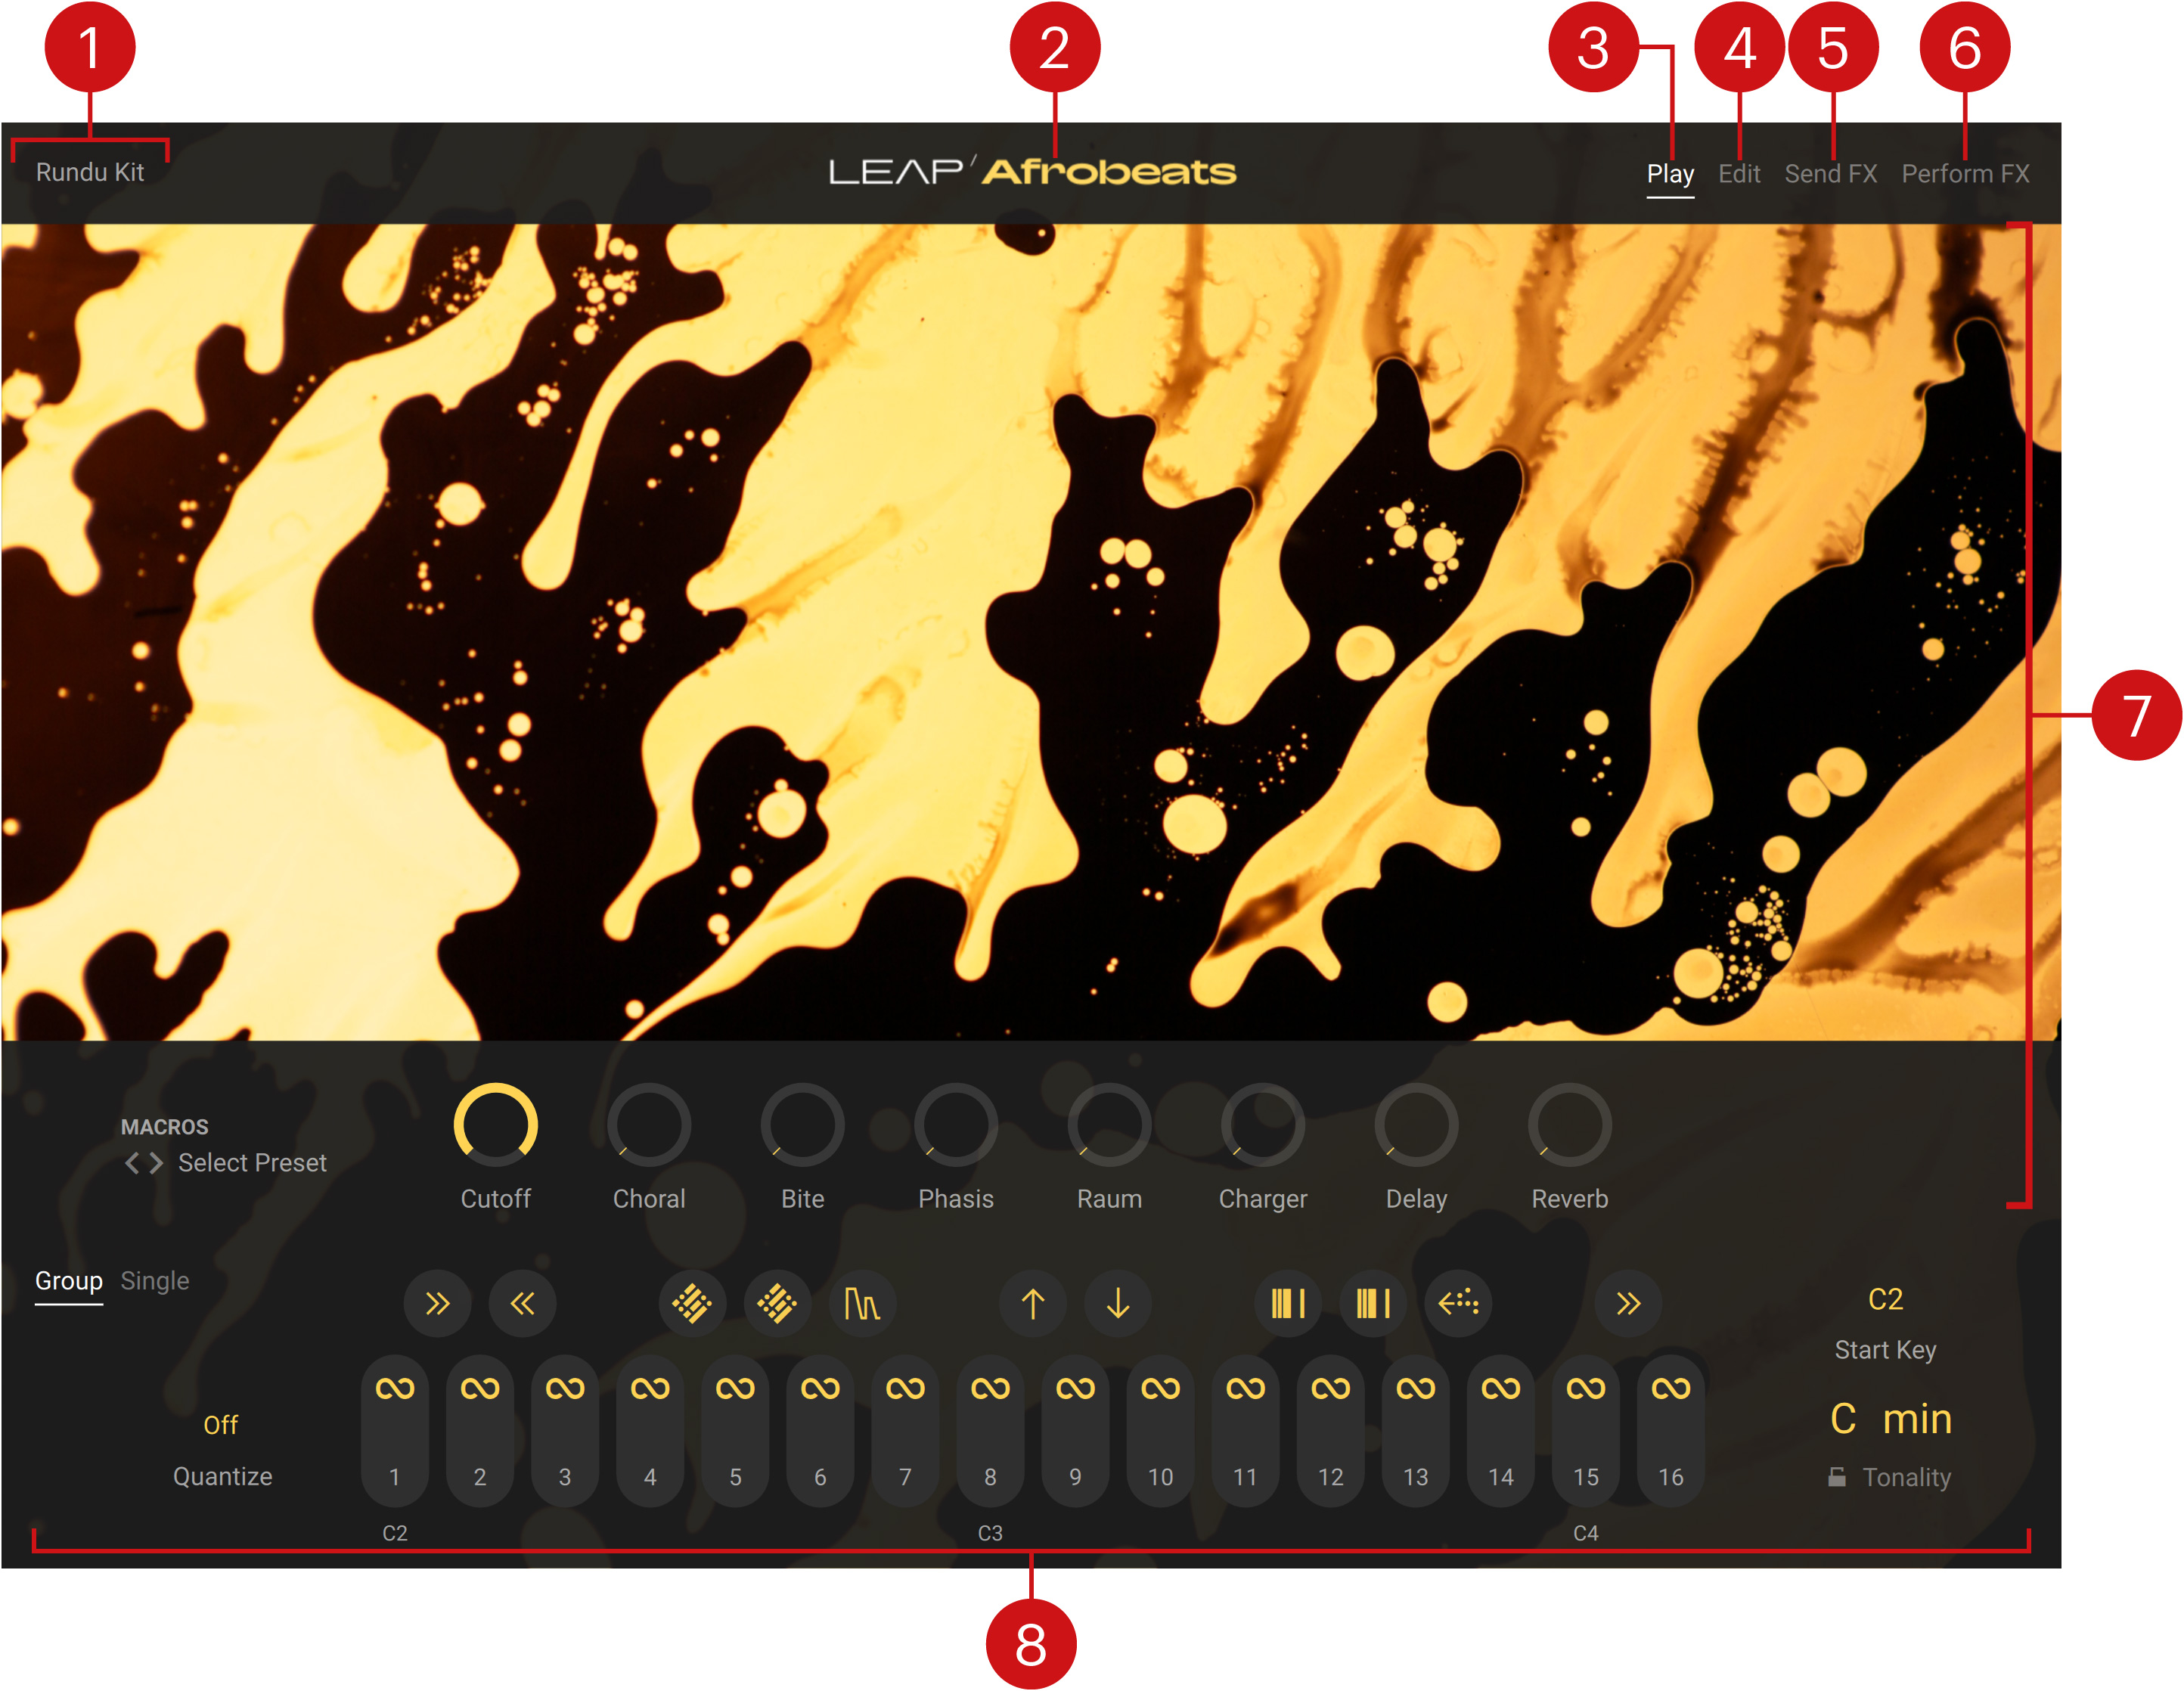
Preset name: Shows the name of Leap preset currently loaded.
Expansion name: Shows the name of the Leap Expansion from which the preset is originating. If you have modified a factory preset and save it as a user preset, this user preset will still show the name of the original Leap Expansion. If you create a Leap preset from scratch, it will belong to the dedicated Custom Kit Expansion.
Play: Opens the Play page, depicted above. This is the default page that appears when you load Leap in Kontakt.
Edit: Opens the Edit page, where you can configure in detail the sound and the playback behavior of each sample in the loaded kit.
Send FX: Opens the Send FX page, which lets you adjust the parameters of the two available send effects.
Perform FX: Opens the Perform FX page, which lets you assign the desired Perform effects to the black keys on your keyboard and adjust their parameters.
Central area: This is the biggest part of the interface and it shows the various pages. In the picture above, the central area shows the Play page, which includes an artwork specific to each Expansion and the Macros below.
Keyboard: Lets you visualize and modify the key mappings used to trigger the samples and the Perform effects from your MIDI keyboard. You can also switch your keyboard between Group and Single modes. For more information, refer to Keyboard section.
Macros
The Macros are a set of eight controls displayed on the Play page below the artwork of the Leap Expansion:

Macro preset selector: Selects a set of eight Macros. You can click the preset name to open a menu where you can select another Macro preset, or you can click the little left and right arrows to quickly switch to the previous or next preset from the list. Each Leap Expansion provides its own Macro presets. The Macro preset selector will collect the Macro presets available in every Leap Expansion installed on your computer.
8 Macro controls: Adjust the various effects available in the selected set. The first six Macros adjust six curated effects made for live performance. The last two Macros adjust your kit’s global send levels to the delay and reverb send effects, respectively.
Tip
The eight Macros are also available on the first page of the Performance view on the Kontrol S-Series keyboards.
Note
The last two Macros (Delay and Reverb) control the global send levels for your kit. You can also configure individual send levels for specific samples in your kit by using the Delay and Reverb controls in the Output section located in the Sound panel of the Edit page.
Keyboard section
The Keyboard section is always visible at the bottom of the Leap interface. It represents the key mappings on your MIDI keyboard, lets you switch Leap between Group mode and Single mode, and provides important keyboard-related settings.

In the top left corner of the Keyboard section, you can choose from the two operating modes available in Leap:
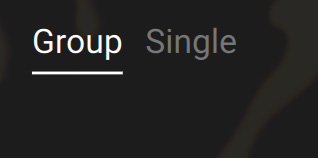 |
Group (default mode): In Group mode you can play the entire kit (up to 16 samples) with the 16 white keys (by default from C2 to D4), and use the 11 black keys in between to trigger the Perform FX. For example, this mode is well suited for drum kits or loop sets. For more information, refer to Group mode.
Single: The Single mode allows you to play one sample from the kit chromatically on all the keys (both white and black). For example, this mode can be handy for samples of melodic instruments. For more information, refer to Single mode.
Group mode
The Group mode is the default Leap operation mode. In Group mode you can play the entire kit (up to 16 samples) with the white keys and use the black keys to trigger the Perform FX. Each sample is played monophonically and all 16 samples are by default time-stretched and tuned to play well together. For example, this mode is well suited for drum kits or sets of rhythmic loops.
In Group mode the Keyboard section contains the following elements and controls:

Group/Single Mode switch: Switches between the Group mode and the Single mode.
Follow: Available only when the Edit page is displayed. If Follow is turned on, you can select each sample by playing its corresponding key on your keyboard. For example, this can be useful when adjusting the same parameter for multiple samples: you can quickly select the samples in a row using your keyboard, and for each sample adjust the desired parameter.
Quantize: Quantizes the start time of the triggered samples to the next time division. By clicking the displayed value you can select another time division to which the incoming notes should be quantized. Or you can deactivate the input quantization by selecting Off from the menu. This input quantization applies both to incoming MIDI notes and to your clicks on the sample slots, but does not affect the black keys (Perform effects) nor the Single mode. For the quantization to work, the playback must be active in your DAW (if Kontakt is running as a plug-in) or in the Master Editor (if Kontakt is running as a standalone application).
Black keys (upper row): Each key represents a Perform effect. The effect is turned on as long as you hold the key depressed (either in this Keyboard section or on your MIDI keyboard). You can configure the Perform effect assigned to each key on the Perform FX page.
White keys (lower row): Each key represents a sample slot. Each sample can be triggered by clicking the slot or pressing the corresponding key on your MIDI keyboard. The slots are numbered from 1 to 16. As a reminder, the first key of each octave is indicated below the keys (by default C2, C3, and C4). Various icons and actions are available on the slots depending on their content and playback mode.
Start Key: Adjusts the lower end (or start key) of the key range used by Leap. This allows you to adapt Leap to the physical key range available on your MIDI keyboard. You can set the Leap range to start either on the C or on the F key in any octave from 0 to 4.
Tonality: Specifies a global tonality for both Group mode and Single mode. In Group mode, the samples for which the Global switch is turned on in the Tuning section of the Engine panel will be transposed to match this global tonality. You can adjust the tonality using two menus: the Key menu on the left sets the root note of the scale, and the Mode menu on the right selects its scale mode between Major and Minor. Click either menu to select the desired value.
Tonality Lock: When the Lock is active, the Tonality values remains untouched when you load another kit.
Icons and actions on the sample slots
In Group mode the slot icons indicate its contents and states:
Icon | Description |
|---|---|
 | Slot containing a looped sample (Loop switch turned on in the Playback section of the Engine panel on the Edit page). |
 | Slot containing a one-shot sample (Loop switch turned off in the Playback section of the Engine panel on the Edit page). |
 | Empty slot. |
 | Selected slot (indicated by the circle). This icon is visible only on the Edit page and it is displayed in addition to the loop/one-shot/empty icon. |
 | Playing slot. The progress bar is displayed in addition to the other icons. When the sample is triggered, the bar starts from the top and runs clockwise along the slot border. A full cycle around the slot corresponds to a full play range or loop range of the sample. |
In addition, in Group mode the following slot actions are available:
Clicking the icon of the selected slot switches between the Play page and the Edit page.
Clicking the icon of an unselected slot selects the slot and opens its Edit page.
Clicking a slot outside its icon triggers the sample.
If the Edit page is open and Follow is on, clicking a slot outside its icon triggers the sample and selects the slot, the slot details showing up in the Edit page above.
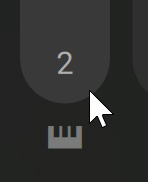
When hovering over a slot with the mouse, a little keyboard icon appears below the slot: Clicking the keyboard icon selects this slot and directly switches to Single mode so that you can play that sample chromatically.
[Ctrl]-clicking (Windows) or [command]-clicking (Mac) a slot outside its icon opens a context menu with the following editing commands:
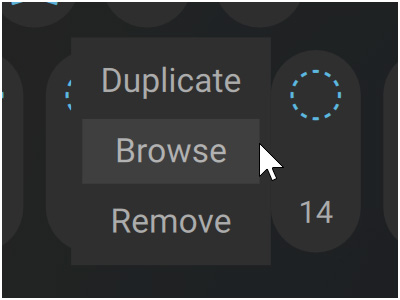
Duplicate: Copies the sample and all its settings into the next free slot on the right. The duplicate is automatically selected and its Edit page opens up. If there is no free slot on the right, nothing happens.
Browse: Opens a Locate Sample dialog that lets you browse your file system and select another sample. When you click Open in the dialog, the selected sample is loaded into the slot, replacing its previous sample, if any.
Remove: Removes the sample from the slot, leaving the slot empty.
Single mode
In Single mode you can play the sample from the selected slot chromatically across the entire key range of your external keyboard.
In Single mode the Keyboard section contains the following elements and controls:

Group/Single Mode switch: Switches between the Group mode and the Single mode.
Sample info: Shows the number (1 – 16) of the selected slot and the name of its sample.
Octave: Transposes the key range available in the Keyboard section by octaves (from -2 to +3 octaves). This key range is indicated by a different color on Kontakt’s on-screen keyboard and on the Light Guide of the Kontrol S-Series keyboards.
Black and white keys: Trigger the sample at different pitches. As a reminder, the first key of each octave is indicated below the white keys (by default C2, C3, and C4).
Scaled: When activated, all the played keys will be quantized to the scale defined by the Tonality control: If you play a note outside that scale, it will be quantized to the nearest note within the scale.
Tonality: Specifies a global tonality for both Group mode and Single mode. In Single mode, this global tonality serves as a reference when quantizing the pitch of the played notes using the Scaled switch. You can adjust the Tonality parameter using two menus: the Key menu on the left sets the root note of the scale, and the Mode menu on the right selects its scale mode between Major and Minor. Click either menu to select the desired value.
Tonality Lock: When the Lock is active, the Tonality values remains untouched when you load another kit.
Edit page
The Edit page lets you adjust the settings of the sample in the selected slot in detail.
Click Edit at the top right of the instrument to display the Edit page.

The Edit page contains the following elements:
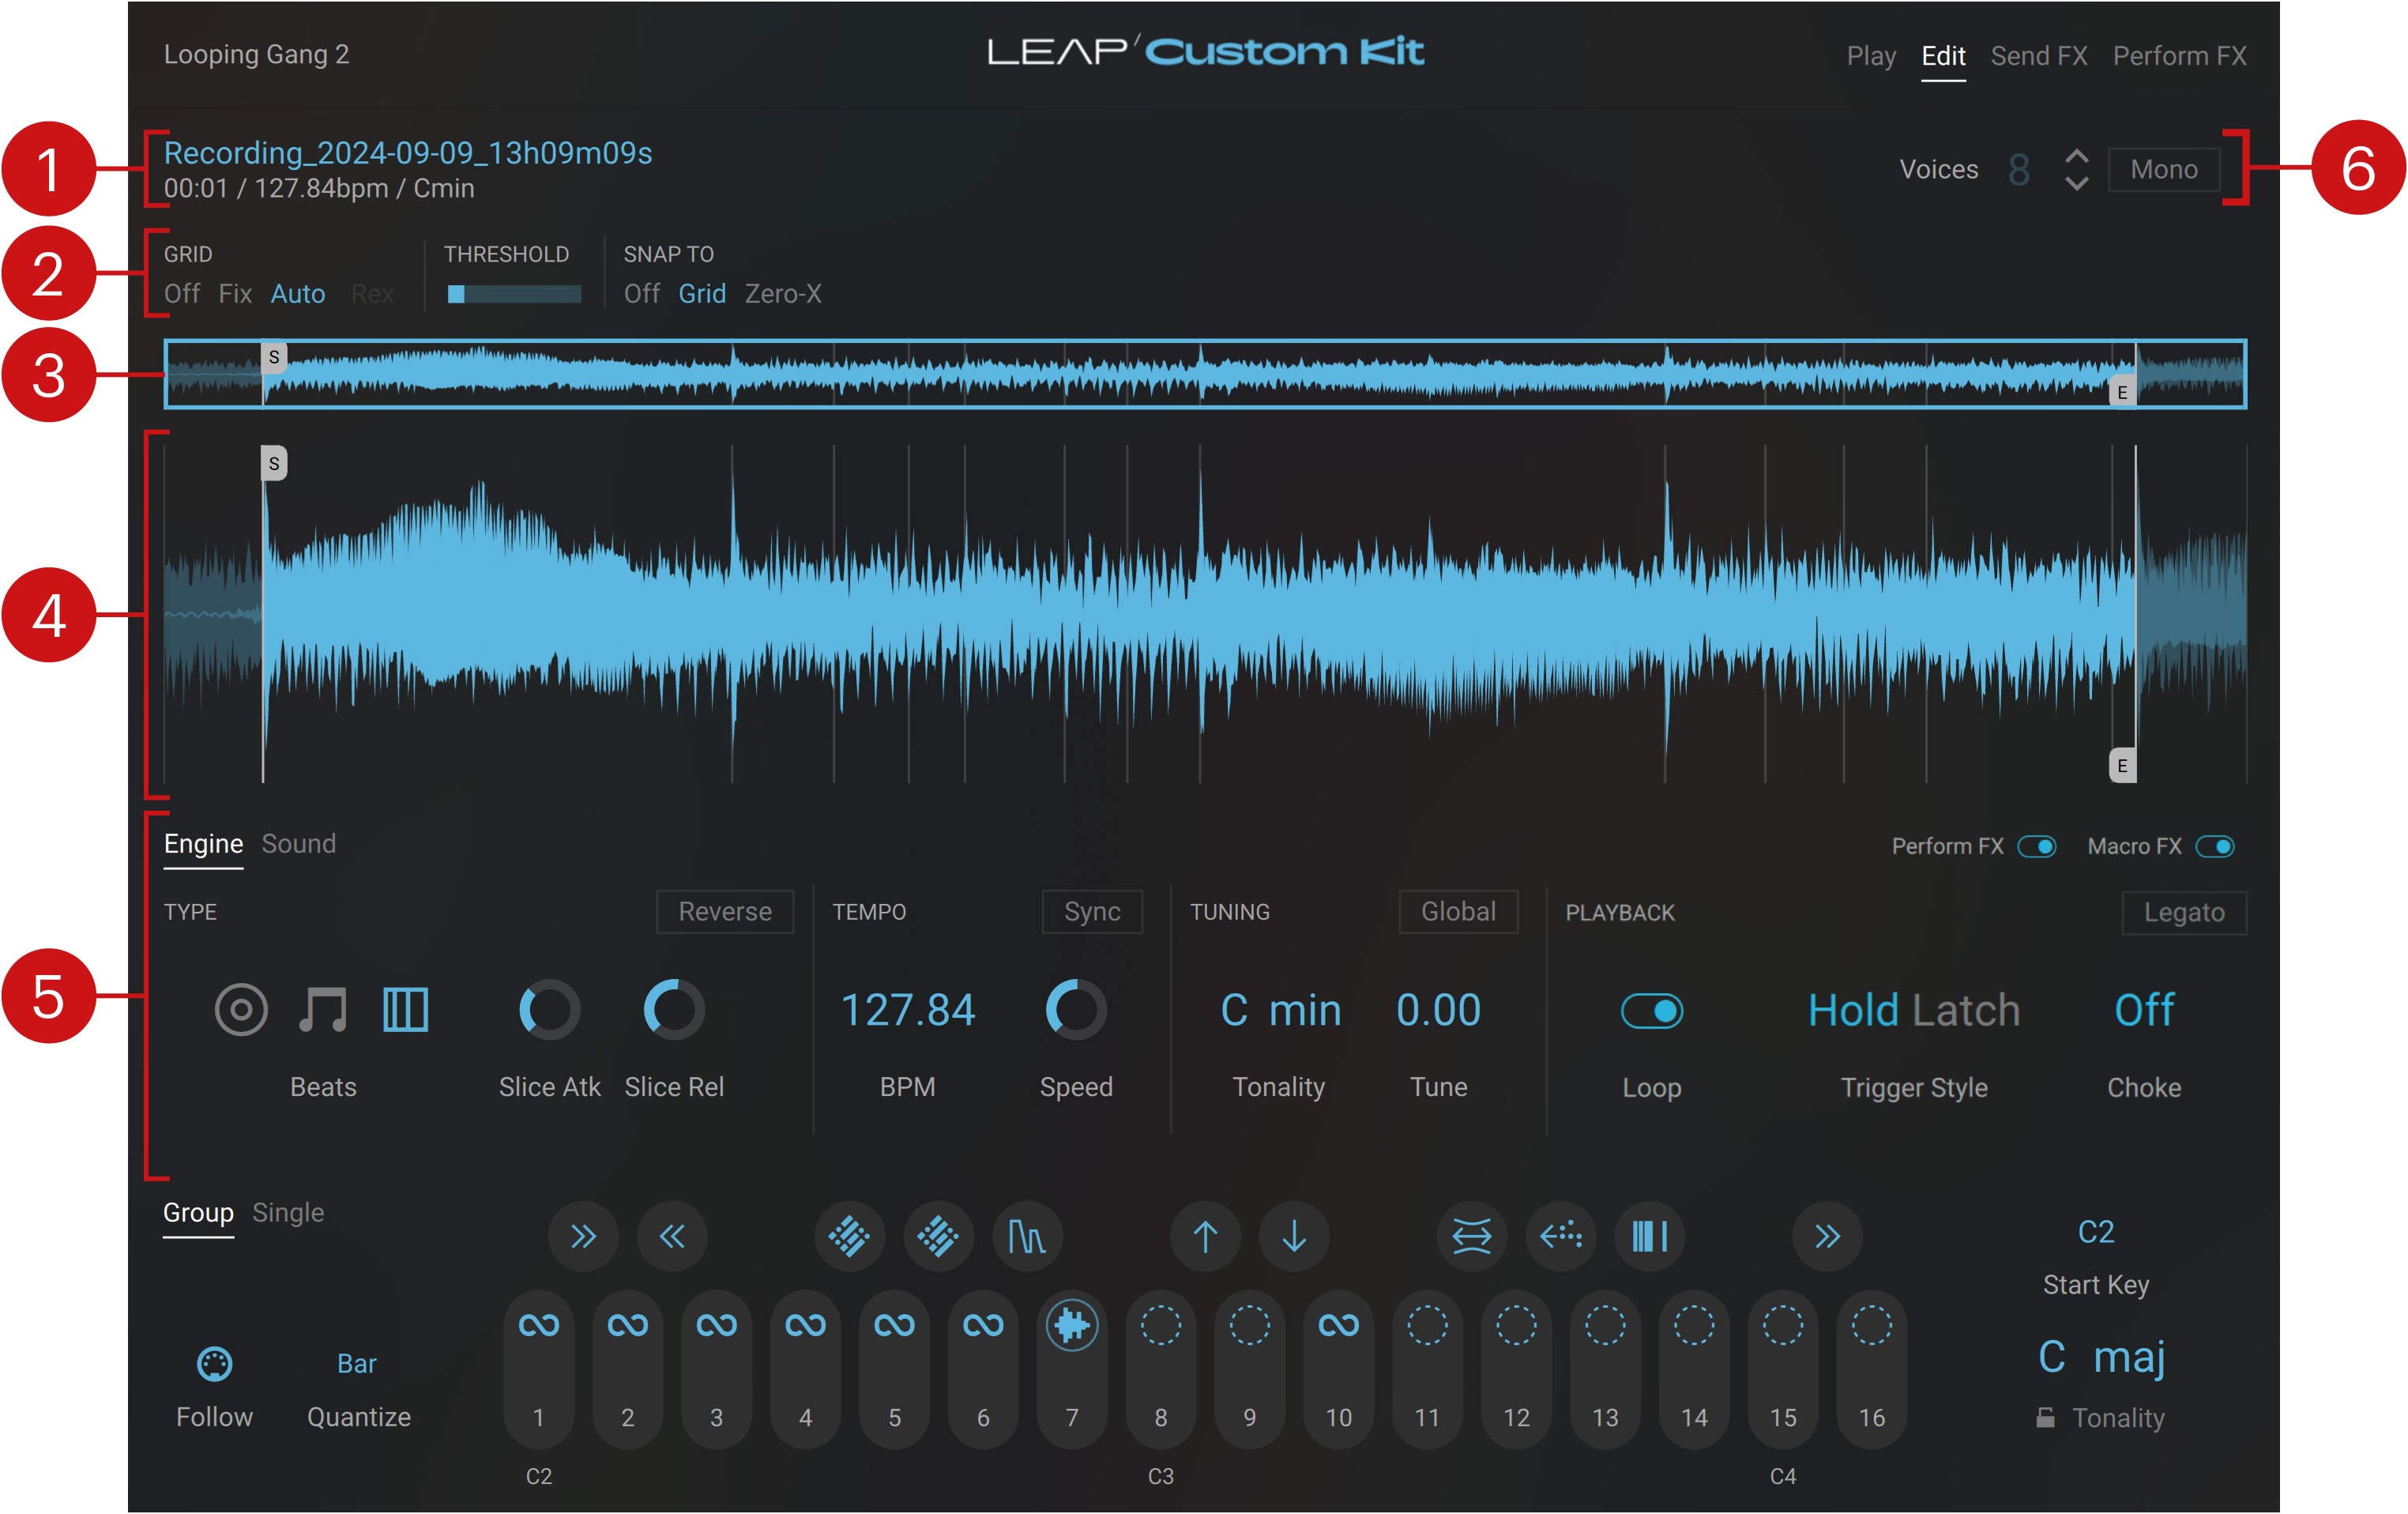
Sample info: Shows the sample name, length, tempo, and key.
Grid settings: Adjust the beat grid, which defines the position of the beats in the sample. The beat grid can be used, for example, to position the loop markers precisely on the beats. For more information, refer to Grid settings.
Stripe: Shows a minimized version of the sample waveform. The Stripe also indicates the position of the beat grid of the white start/end markers and green loop markers (if any). The Stripe provides a frame defining the part of the sample that is displayed in the Waveform below. You can click the left or right end of the frame and drag it horizontally to shrink or extend the displayed portion. You can also click inside the frame and drag your mouse horizontally to move the displayed portion across the timeline, or vertically to zoom in/out in the sample waveform. A double-click anywhere in the Stripe will reset the frame and show the entire sample.
Waveform: Shows a detailed version of the sample waveform. The time grid is indicated by vertical dark gray lines. A pair of white markers labeled S and E define the start and end points of the playback range, respectively. The portions of the waveform outside the playback range are grayed out. When the sample is triggered, the playback starts from the S marker. If the looped playback is off, the playback will stop on the E marker. If the looped playback is on, a pair of green markers define the loop range (the sample end marker is then ignored). You can move all these markers to the desired positions by clicking them and dragging the mouse horizontally.
Sample settings: Lets you adjust the settings of the sample in detail. The sample settings are split into two panels: the settings on the Engine panel affect the playback engine, while settings on the Sound panel control the sound character of the sample.
Voice settings: Adjust the polyphony of the selected sample. The Voice settings affect only the Single mode. In Single mode, the selected sample can be played back multiple times simultaneously, for example by pressing multiple keys at the same time on your keyboard. Each time that the sample is played, it uses one “voice.” The Voices selector specifies the maximum number of voices (from 1 to 16) available at any time for the sample playback, that is, it defines how many times the sample can be played back simultaneously. If this maximum number of simultaneous voices has been reached and the sample is triggered one more time, the oldest sounding voice will be cut to make room for the new one. You can adjust the Voices value by clicking the value and dragging your mouse vertically, or by clicking the little up and down arrows next to it. The Mono button lets you directly switch to a maximum of one single voice only. In Group mode, the Voice settings are grayed out and inactive.
Grid settings
The grid settings let you configure the beat grid, which defines the position of the beats on the timeline. Once the beat grid has been set, you can move the sample’s start, end, and loop markers precisely onto the beats. The beat grid is displayed in the Stripe and in the Waveform using vertical dark gray lines. As you change the grid settings, the beat grid is automatically updated in both displays.
The grid settings contain the following elements and controls:
 |
GRID: Selects the mode used to set the beat grid. Selecting Off deactivates the grid completely. In Fix mode the grid uses a fixed time duration between beats throughout the sample. In Auto mode Kontakt sets the beats automatically by detecting the transients in the sample. If you have loaded a REX file, an additional REX mode lets you use the grid information stored in the REX file.
WIDTH (grid in Fix mode only): Selects the duration between beats, measured in fractions of the sample duration according to its playback speed. The available values go from 1/1 to 1/64. For example, selecting 1/8 will create by default 8 beats across the sample.
THRESHOLD (grid in Auto mode only): Adjusts the sensitivity of the transient detection. Increasing THRESHOLD will result in detecting more beats.
SNAP TO: Selects what the start, end, and loop markers should snap to when you move them across the sample. Selecting Off deactivates snapping completely. Selecting Grid will let the markers snap to the beats, which allows rhythmic samples to start and loop perfectly on the beat. Selecting Zero-X will let the markers snap to the nearest position where the audio signal crosses the zero value, which reduces possible clicks between samples or at the looping transition.
Note
When Sync is on in the Tempo section of the Engine panel, the number of beats appearing in the Waveform will depend not only on the Width value but also on the Speed value (also in the Tempo section): For example, if Speed is set to x 2 the sample will play at double speed, effectively playing twice in the time of the original sample: As a result, the Width value of 1/8 will create 8 beats over two samples, which makes only four beats across one sample: The Waveform, which always shows one sample, will display only these four beats.
Engine panel
The Engine panel lets you choose a playback engine and configure the playback details for the selected sample.
Click Engine at the bottom left of the Waveform to display the Engine panel.
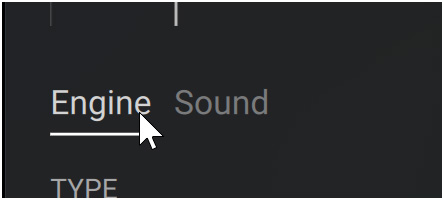
The Engine panel contains the following sections:

Type section: Selects a playback engine and configures its dedicated parameters. Refer to Type section for more information.
Tempo section: Adjusts the tempo-related settings of the sample. Refer to Tempo section for more information.
Tuning section: Adjusts the tonality of the sample. Refer to Tuning section for more information.
Playback section: Adjusts how the sample should be played. Refer to Playback section for more information.
In the top right corner, the Sound panel provides two additional switches:
 |
Perform FX switch: This switch is on by default. If you turn it off (switch to the left), the sample will not be processed by the Perform effects. For example, with this switch you can prevent a pad sound or texture from being processed by a time-synchronized Perform effect that might only be suitable for the drum samples of your kit.
Macro FX switch: This switch is on by default. If you turn it off (switch to the left), the sample will not be processed by the global effects controlled using the Macros.
Type section
The first control in the Type section of the Engine panel is the Engine selector, which lets you select the playback engine to use with the selected sample:
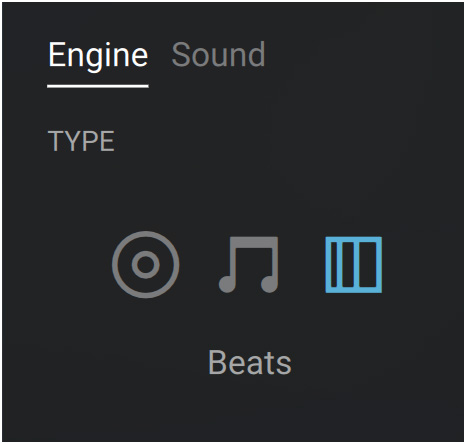 |
The remaining parameters in the Type section will vary depending on the selected engine: Classic, Melody, or Beats.
Classic engine
The Classic engine offers true old school polyphonic synth vibes. With this engine the sample cannot be synchronized with the tempo. Based on Kontakt’s original Sampler engine, the Classic engine provides the following controls:
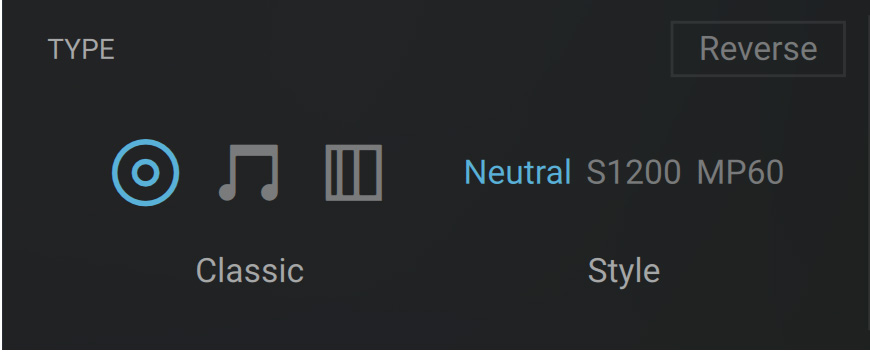 |
Reverse: Plays the sample in reverse. Note that when this button is activated, the playback will start at the end marker (E) of the sample, so if there are a few seconds of silence at the end of the sample, the sound will be delayed.
Style: Selects from three engine modes. The Neutral mode is the default, unaltered engine mode. The S1200 and MP60 are two “vintage machine” modes. They emulate two classic samplers of the 80s, degrading the playback quality of the sample and changing how Kontakt changes the pitch and basic handling of the sample playback engine.
Melody engine
The Melody engine is based on Kontakt’s Time Machine Pro engine. This engine allows a high quality real-time time-stretching of your sample without affecting its pitch. It provides the following controls:
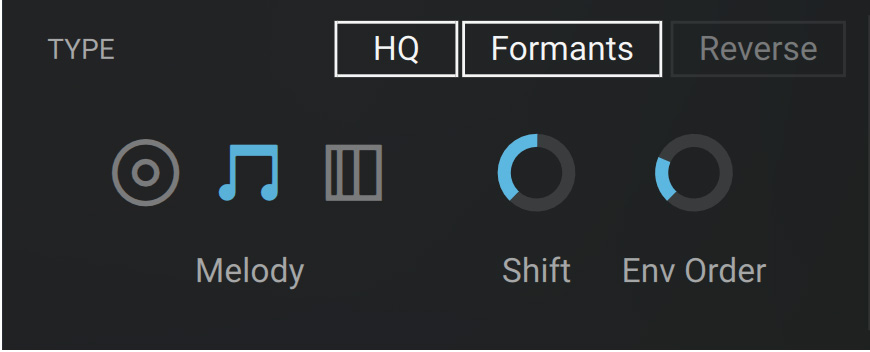 |
Reverse: Plays the sample in reverse. Note that when this button is activated, the playback will start at the end marker (E) of the sample, so if there are a few seconds of silence at the end of the sample, the sound will be delayed.
HQ: Turns the high quality mode on or off. When HQ is on, you can adjust the advanced parameters described below.
Formants: When this is on, the formants are preserved when pitch-shifting or time-stretching the sample.
Shift (Formant Shift): Sets the spectral envelope’s shift factor. The default is set to 100 %, which works fine for most material. This spectral shift is performed before the overall pitch shifting.
Env Order (Envelope Order): Sets the order of the spectral envelope (formant) estimation. The default is set to 128, which works fine for most material. If the input audio is really high pitched the order should be lowered, similarly, if the input audio is low pitched the value should be raised.
Note
The Melody engine uses more CPU resources than the other engines.
Beats engine
The Beats engine is based on Kontakt’s Beat Machine engine. This engine allows automatic slicing of your sample for tempo-synchronized playback, which makes it well-suited for rhythmic materials like drum loops. It provides the following controls:
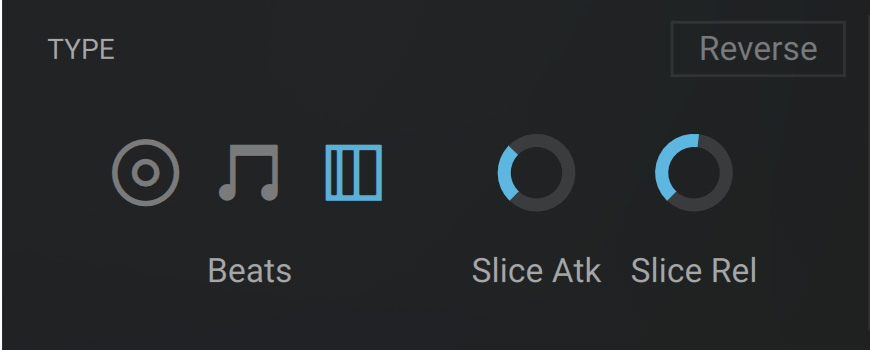 |
Reverse: Plays the sample in reverse. Note that when this button is activated, the playback will start at the end marker (E) of the sample, so if there are a few seconds of silence at the end of the sample, the sound will be delayed.
Slice Atk (Slice Attack): Since slicing can occur at spots in your sample that can cause clicks when played back in isolation, slices are being crossfaded into each other instead of just played back in succession. This control adjusts the attack time of the crossfade envelopes. As large values can weaken your transients, you should generally adjust this control to the lowest possible value that just avoids clicking.
Slice Rel (Slice Release): Adjusts the release time of the crossfade that occurs between slices.
Tempo section
When a sample is loaded into Leap, its tempo is automatically detected. This tempo is the foundation of the tempo synchronization. The Tempo section of the Engine panel lets you adjust the detected tempo and define how this tempo should be used. The section contains the following controls:
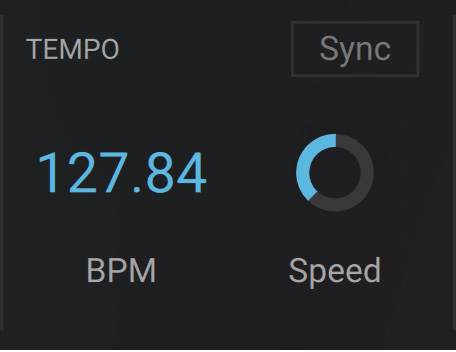 |
BPM: Lets you manually correct the tempo of the sample. Most of the time you will not have to use it, since the tempo is detected automatically. The BPM control rather serves as a backup if the tempo detection algorithm does not provide satisfying results. You can adjust the tempo by clicking the displayed value and dragging your mouse vertically. Holding [Shift] while dragging allows for finer adjustments. Alternatively you can double-click the value and enter a new value using your computer keyboard.
Sync (Melody and Beats engines only): When this is on, the sample’s playback speed is changed to match Kontakt’s global tempo (which is the tempo of your DAW if Kontakt is running as a plug-in).
Speed (Melody and Beats engines only): If Sync is on, the Speed control lets you double or halve the playback speed of the sample, which can help quickly correct the detected tempo. If Sync is off, the Speed control lets you freely adjust the playback speed of the sample relative to its original tempo as set by the BPM control.
Note
If the Classic playback engine is selected in the Type section on the left, the sample cannot be synchronized to the tempo of your DAW, and the Sync and Speed controls are grayed out and inactive. To make them available, first switch to another playback engine.
Tuning section
When a sample is loaded into Leap, its tonality is automatically detected. This tonality is the foundation of the tonality matching between samples. The Tuning section of the Engine panel lets you adjust the detected tonality. It contains different controls depending on whether Leap is in Group mode or in Single mode.
In Group mode the Tuning section contains the following controls:
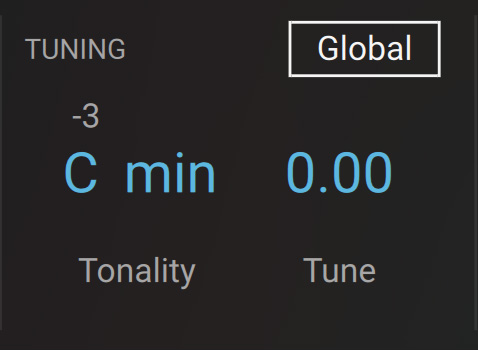 |
Tonality: Lets you manually correct the tonality of the sample. Most of the time you will not have to use it, since the tonality is detected automatically. The Tonality control rather serves as a backup if the tonality detection algorithm does not provide satisfying results. You can adjust the Tonality parameter using two menus: the Key menu on the left sets the root note of the scale, and the Mode menu on the right selects its scale mode between Major, Minor, and No Mode. Click either menu to select the desired value. If you select None from the left Key menu, no tonality is assigned to the sample, and no tonality matching can be applied.
Global: When this is on, the sample is transposed to match the global Tonality value defined in the Keyboard section. The amount of transposition is indicated by a number appearing above the sample’s own Tonality value.
Tune: Detunes the sample by the displayed value, measured in semitones. To change the value, click it and drag your mouse vertically, or click the little up/down arrows next to it. By holding [Shift] as you drag the mouse or click the arrows, you can adjust the value in much finer increments (cents).
In Single mode the Tuning section contains the following controls:
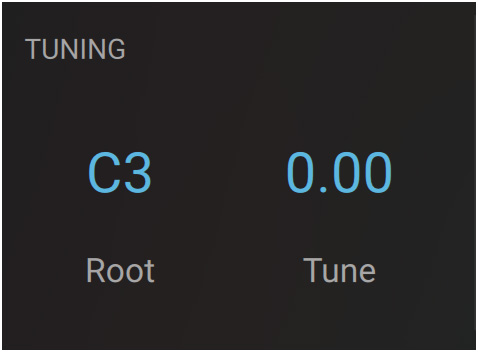 |
Root: Defines the key triggering the original, unpitched sample. All other keys will trigger a transposed version of the sample corresponding to their pitch relative to the root key.
Tune: Detunes the sample by the displayed value, measured in semitones. To change the value, click it and drag your mouse vertically, or click the little up/down arrows next to it. By holding [Shift] as you drag the mouse or click the arrows, you can adjust the value in much finer increments (cents).
Playback section
The Playback section of the Engine panel specifies the playback behavior of the sample. The section contains the following controls:
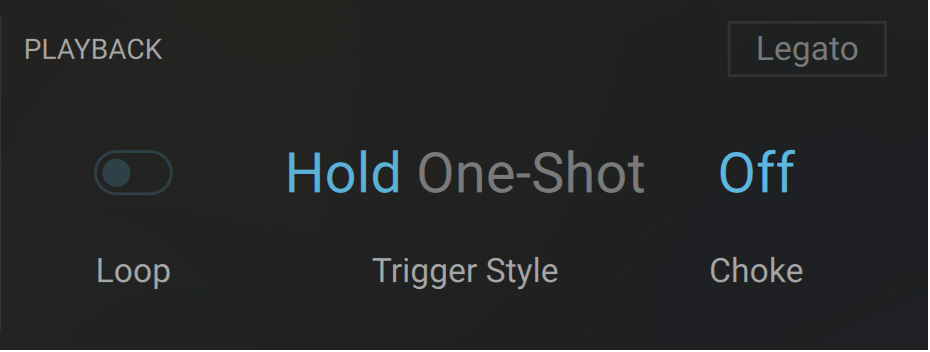 |
Loop: Turns the looped playback on or off. When Loop is on, the Waveform shows a pair of green loop markers that let you define which part in the sample should be played in loop. In Group mode, the looped state of each sample is indicated by a dedicated icon on its sample slots in the Keyboard section.
Trigger Style: Defines the playback behavior when you release the key. When Loop is off, you can select between Hold (the sample stops playing when you release the key) and One-Shot (the sample plays until its end marker even if you release the key). When Loop is on, you can select between Hold (the loop stops playing when you release the key) and Latch (the loop keeps playing until you press the key another time).
Choke (Group mode only): Assigns the sample to a particular choke group. A choke group is a set of “mutually exclusive” samples: Within a choke group, each newly triggered sample will cancel an older sample still playing, so that these samples would never play together. Four choke groups are available in each kit. You can assign the desired samples to a choke group by selecting the same Choke value for each of them. You can adjust the Choke value by clicking it and dragging your mouse vertically, or by using the little up and down arrows next to it.
Wrap / Ping Pong selector (Classic engine only): When Loop is on, a Wrap / Ping Pong selector appears and lets you choose between two looping variants. If you select Wrap (default setting), as the playback reaches the loop end it will jump back to the loop start and continue from there. If you select Ping Pong, the loop will play alternately back and forth.
Legato (Melody engine only): When Legato is on, if a previous sample is still playing the playback will not start from the sample’s start marker, but instead it will follow the play position of the previous sample. If no other sample is playing, the playback will start as usual from the sample’s start marker.
Sound panel
The Sound panel lets you configure the audio processing that will affect the sound of the selected sample.
Click Sound at the bottom left of the Waveform to display the Sound panel.
The Sound panel contains the following sections:

Filter section: Adjusts a filter applied to the sample. Refer to Filter section for more information.
Amp section: Adjusts the envelope of the amplification stage. Refer to Amp section for more information.
Output section: Adjust the output stage including global volume, pan, and effect levels. Refer to Output section for more information.
In the top right corner, the Sound panel provides two additional switches:
 |
Perform FX switch: This switch is on by default. If you turn it off (switch to the left), the sample will not be processed by the Perform effects. For example, with this switch you can prevent a pad sound or texture from being processed by a time-synchronized Perform effect that might only be suitable for the drum samples of your kit.
Macro FX switch: This switch is on by default. If you turn it off (switch to the left), the sample will not be processed by the global effects controlled using the Macros.
Filter section
The Filter section of the Sound panel contains the following controls:

FILTER On/Off: Turns the filtering of the sample on or off.
Filter Flavor selector: Selects from the following filter flavors:
Neutral: Clean characteristic that can be used for all kinds of audio signals. This flavor uses Kontakt’s State Variable (SV) filters in their 2-pole variant, which attenuates frequencies below/above the cutoff at a rate of -12 dB/octave.
Juicy: First choice for synthetic sounds, but can work well on any signal. This flavor uses Kontakt’s Ladder filters in their 4-pole variant, which attenuates frequencies below/above the cutoff at a rate of -24 dB/octave.
Mild: Works best on full loops or drums. This flavor uses Kontakt’s Adaptive Resonance (AR) filters, which follow the amplitude of the input signal and adjust the resonance accordingly. At higher input levels, the resonance will reduce, and at lower levels it will increase, this avoids unpleasant peaks.
Aggressive: More aggressive synthesizer filter design. This flavor uses Kontakt’s Daft filters, which have been adapted from Massive. These filters have a 2-pole response, which attenuates frequencies below/above the cutoff at a rate of -12 dB/octave.
Frequency Response display: Shows an overview of the frequency response resulting from your current filter settings.
Filter Type selector: Selects from the following filter types:
LP (Lowpass): Attenuates signals above the cutoff frequency, allowing low frequency signals to pass through.
HP (Highpass): Attenuates signals below the cutoff frequency, allowing high frequency signals to pass through.
BP (Bandpass, not available for the Aggressive filter flavor): Attenuates signals below and above the cutoff frequency.
Cutoff: Adjusts the frequency below or/and above which signals will be attenuated.
Reso (Resonance): With a value greater than 0, this control will boost a small frequency range around the cutoff frequency.
Keytrack: Modulates the Cutoff frequency value according to the played key.
Gain (Aggressive and Juicy filter flavors only): Controls the amplitude increase after the filter. This control can be used to compensate for amplitude reduction due to the filter, or to increase the soft saturation of the effect.
Amp section
The Amp section of the Sound panel contains the following controls:
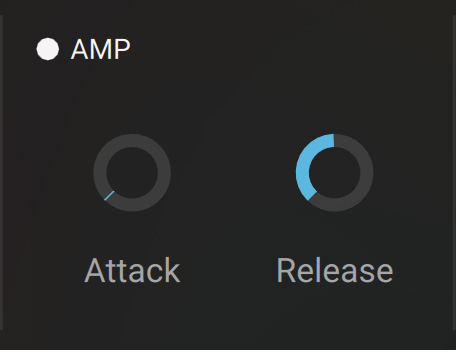 |
AMP On/Off: Turns the processing of the sample by the Amp stage on or off.
Attack: Adjusts the attack time of the sample, that is, the time it takes the sample to reach its full volume level after it has been triggered. Turning the knob to the right will result in a slower, more progressive attack phase.
Release: Adjusts the release time of the sample, that is, the time it takes the sample to fade out once you have release the key. Turning the knob to the right will result in a longer fade out.
Output section
The Output section of the Sound panel contains the following controls:
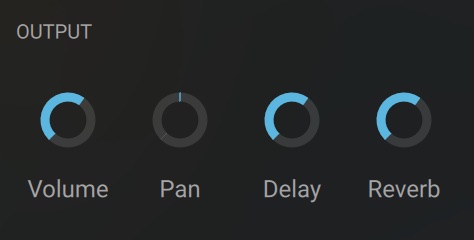 |
Volume: Adjusts the overall volume level of the sample, from -inf (no sound) to +12 dB (maximum amplification). The default value is 0 dB (no change in volume).
Pan: Adjusts the position of the sample in the stereo field. With the knob at full left or at full right, the sample is sent only to the left channel or right channel, respectively. By default it is sent to both channels equally (knob in the center position).
Delay and Reverb: Adjust the levels of the signal sent from this sample to the delay and reverb send effects, respectively. For example, this allows you to keep particular samples from being processed by a send effect when you raise the global send level available in the Macros.
Send FX page
The Send FX page lets you configure the two send effects available in Leap.
Click Send FX at the top right of the instrument to display the Send FX page.

The Send FX page contains two sections:
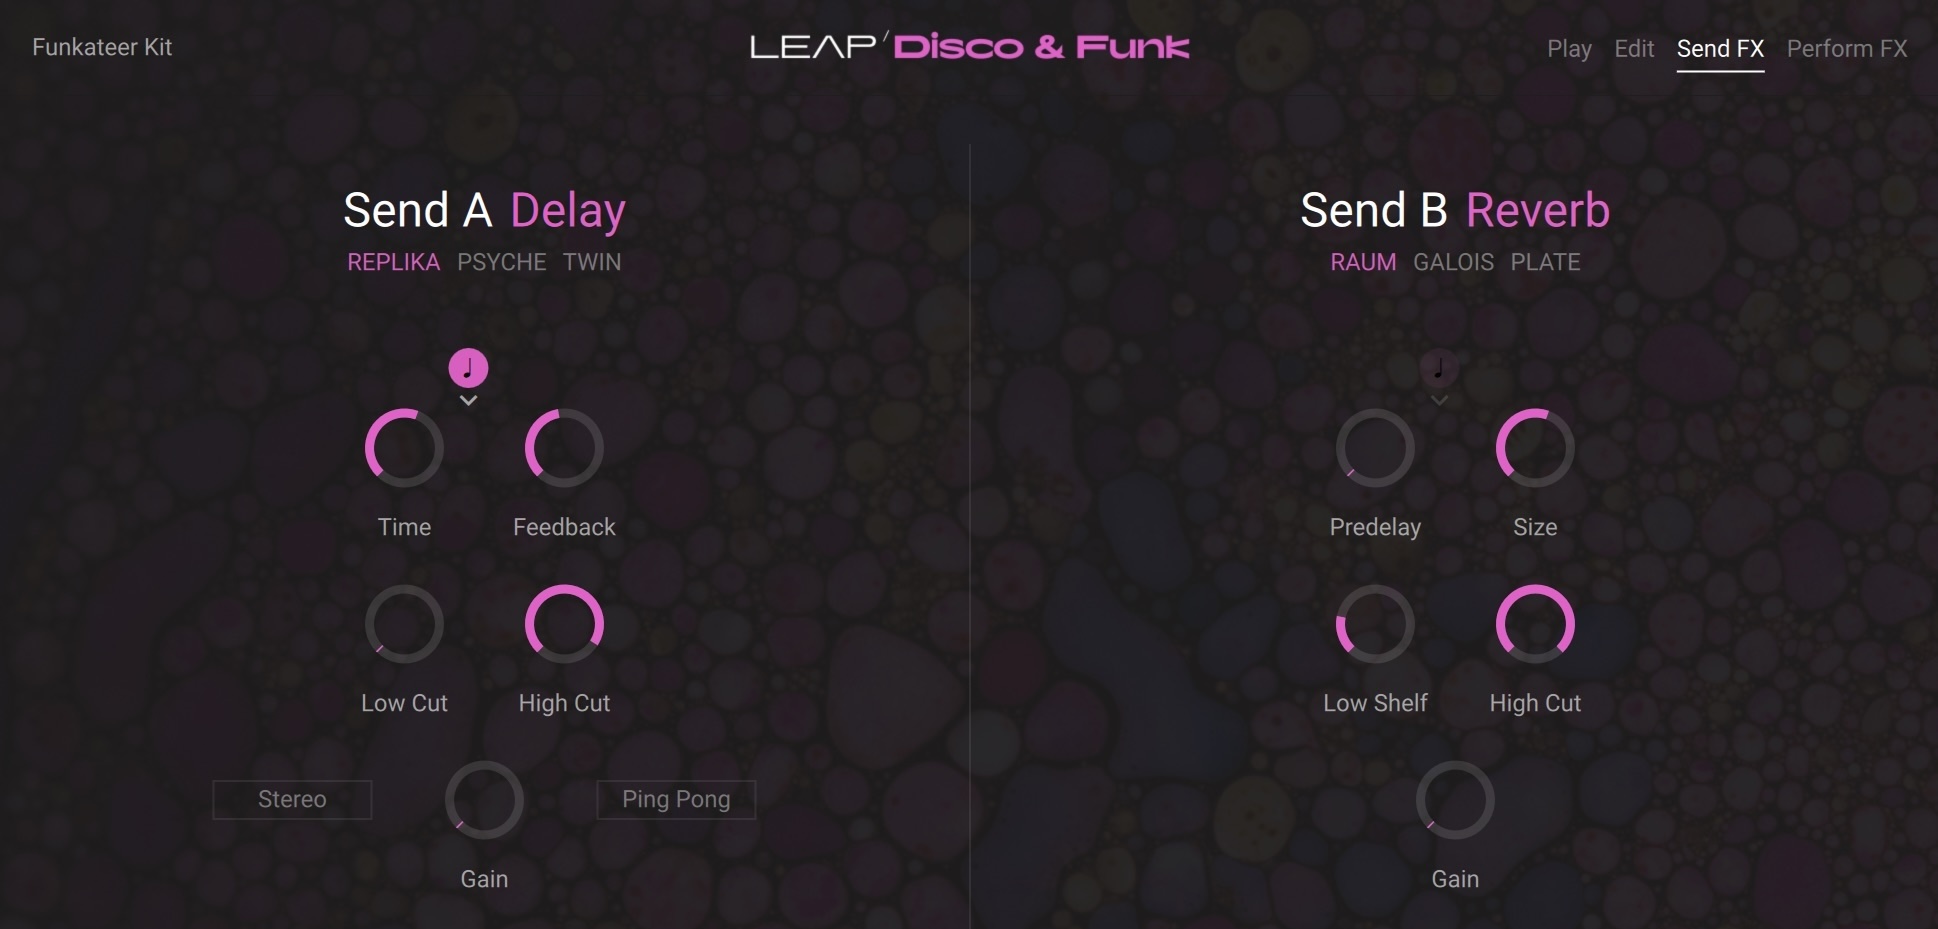
In the left half, the Send A section contains the parameters for the Delay effect.
In the right half, the Send B section contains the parameters for the Reverb effect.
Delay
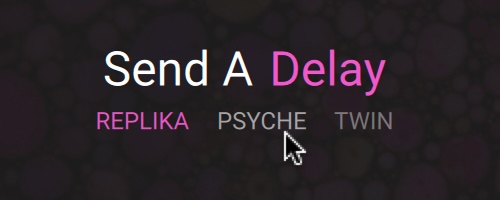
The Delay effect can be switched between three different modes, Replika, Psyche, and Twin.
To select a mode, click on the corresponding entry in the Delay selector at the top of the Send A section.
Replika
Replika mode provides the following controls:
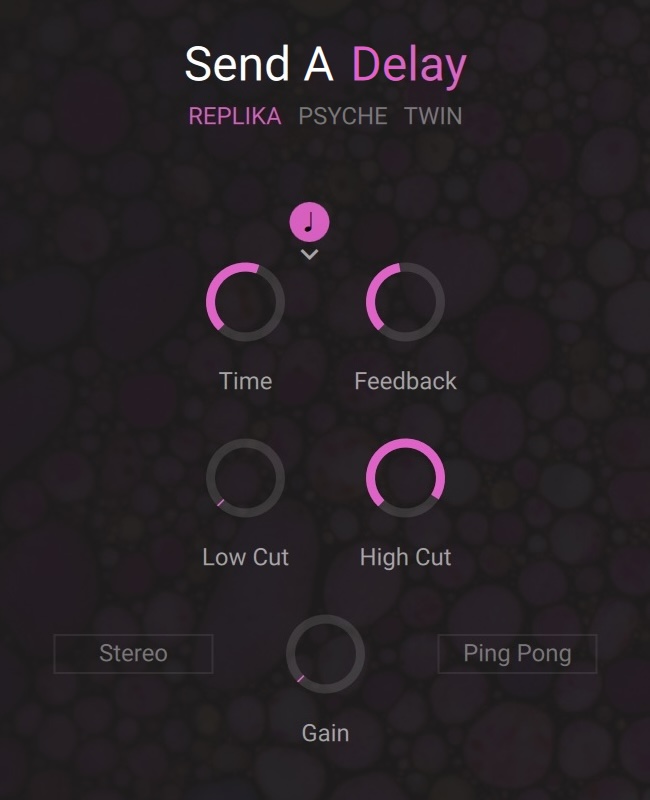 |
Sync (note icon): When Sync is on, the delay is synchronized with the main tempo of Kontakt (which is the tempo of your DAW if Kontakt is running as a plug-in). In that case the Time parameter is measured in note values.
Note Division menu (little down arrow): When the Sync button above is on, this selects whether the Time parameter should include straight, triplets, or dotted note values.
Time: Adjusts the delay time. The time is measured in milliseconds (if Sync is off) or in note values (if Sync is on).
Feedback: Adjusts the level of the signal that is fed back to the delay's input. Increasing Feedback adds delay repeats. Levels above 100% create swelling echo repeats up to self-oscillation.
Low Cut: Cuts low-frequency content in the feedback path of the delay with a non-resonant filter. Turned fully counter-clockwise, the filter is off.
High Cut: Cuts high-frequency content in the feedback path of the delay with a non-resonant filter. Turned fully clockwise, the filter is off.
Stereo: When activated, the modulation between the left and the right channel is offset in time, resulting in a wide stereo effect. When deactivated, the modulation affects both channels in the same way.
Gain: Adjusts the effect’s return level.
Ping Pong: Switches the Ping Pong effect on and off. When on, the delay repeats are panned hard left and right in an alternating pattern.
Psyche
Psyche mode provides the following controls:
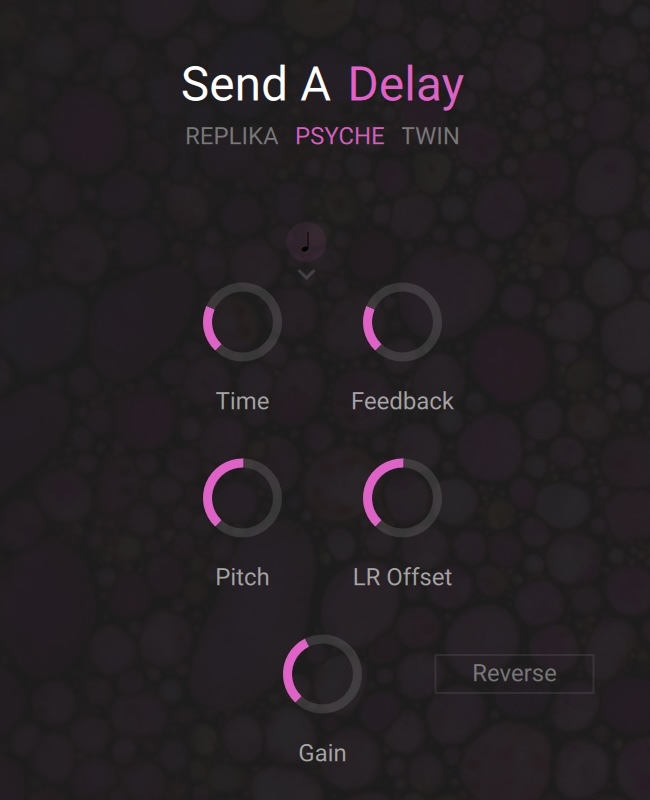 |
Sync (note icon): When Sync is on, the delay is synchronized with the main tempo of Kontakt (which is the tempo of your DAW if Kontakt is running as a plug-in). In that case the Time parameter is measured in note values.
Note Division menu (little down arrow): When the Sync button above is on, this selects whether the Time parameter should include straight, triplets, or dotted note values.
Time: Adjusts the delay time. The time is measured in milliseconds (if Sync is off) or in note values (if Sync is on).
Feedback: Adjusts the amount of feedback. Turning Feedback to the right increases the amount of delay repetitions.
Pitch: Adjusts the pitch of the echo repeats in the range of -12 to +12 semitones. Combined with feedback you can use this to create progressively harmonized echo cascades.
LR Offset: Adjusts the amount of time deviation between the two stereo channels, resulting in wide stereo echos.
Gain: Adjusts the effect’s return level.
Reverse: Reverses the playback of subsequent delay repeats.
Twin
Twin mode provides the following controls:
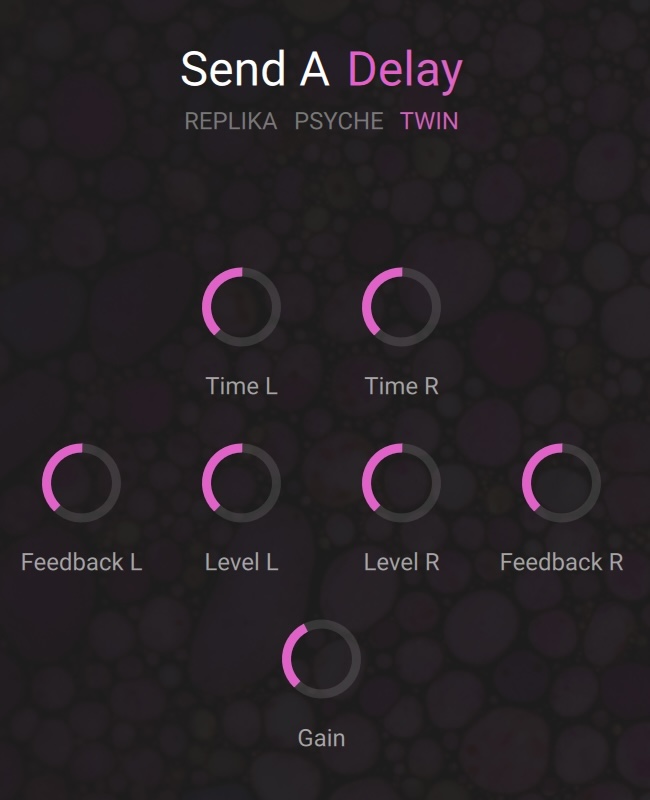 |
Time L/R: Adjusts the delay time in milliseconds. To synchronize the time to your host or master editor tempo, click the Time unit display (ms) and chose a note length value from the drop down menu.
Feedback L/R: Adjusts the amount of feedback. Turning Feed to the right increases the amount of delay repetitions.
Level L/R: Adjusts the output level of the delay channel.
Gain: Adjusts the effect’s return level.
Reverb
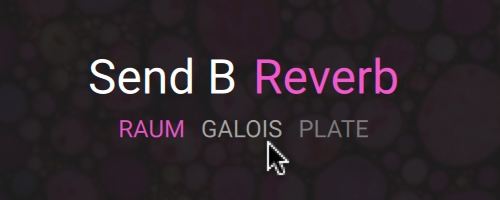
The Reverb effect can be switched between three different modes, Raum, Galois, and Plate.
To select a mode, click on the corresponding entry in the Reverb selector at the top of the Send B section.
Raum
Raum mode provides the following controls:
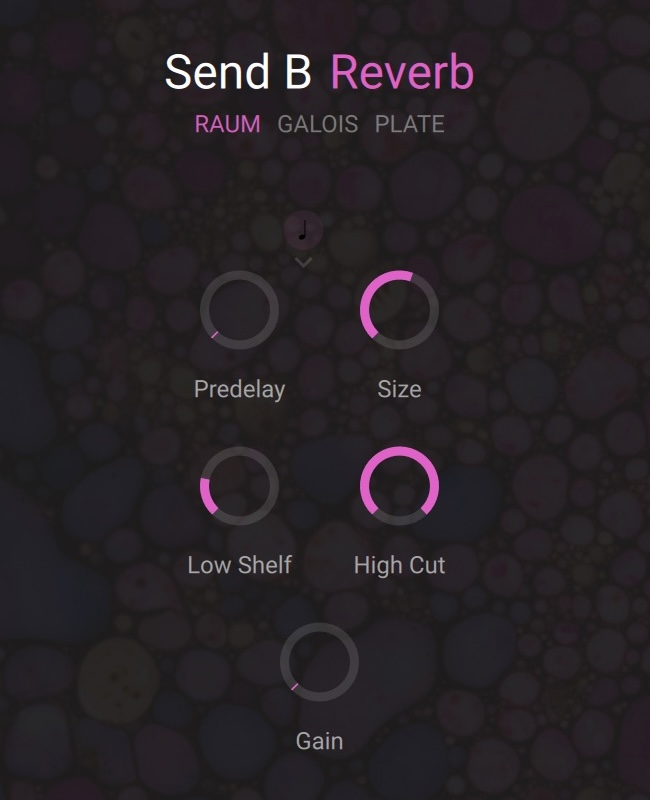 |
Sync button (note icon): When Sync is on, the predelay of the reverb is synchronized with the main tempo of Kontakt (which is the tempo of your DAW if Kontakt is running as a plug-in). In that case the Pre Delay parameter is measured in note values.
Note Division menu (little down arrow): When the Sync button above is on, this selects whether the Pre Delay parameter should include straight, triplets, or dotted note values.
Pre Delay: Adjusts the duration of the predelay, which is the time it takes for the reverb effect to set in. By increasing the predelay, you can add separation between the input signal and the reverb signal. The predelay is measured in milliseconds (if Sync is off) or in note values (if Sync is on).
Size: Adjusts the swell and reflection pattern of the reverb effect, creating the impression of differently sized spaces. Turning the control to the right changes the size from small to large.
Low Cut: Attenuates low-frequency content of the reverb effect and the predelay’s feedback signal by applying a low-shelf filter in the range of 0 to -24 dB. Turning the control to the left decreases the attenuation. Turning the control to the right increases the attenuation. Turning the control fully to the left switches the filter off.
High Cut: Attenuates high-frequency content of the reverb effect and the predelay's feedback signal by applying a high-cut filter in the range of 90 kHz to 1 kHz. Turning the control to the left increases the attenuation. Turning the control to the right decreases the attenuation. Turning the control fully to the right switches the filter off.
Gain: Adjusts the effect’s return level.
Galois
Galois mode provides the following controls:
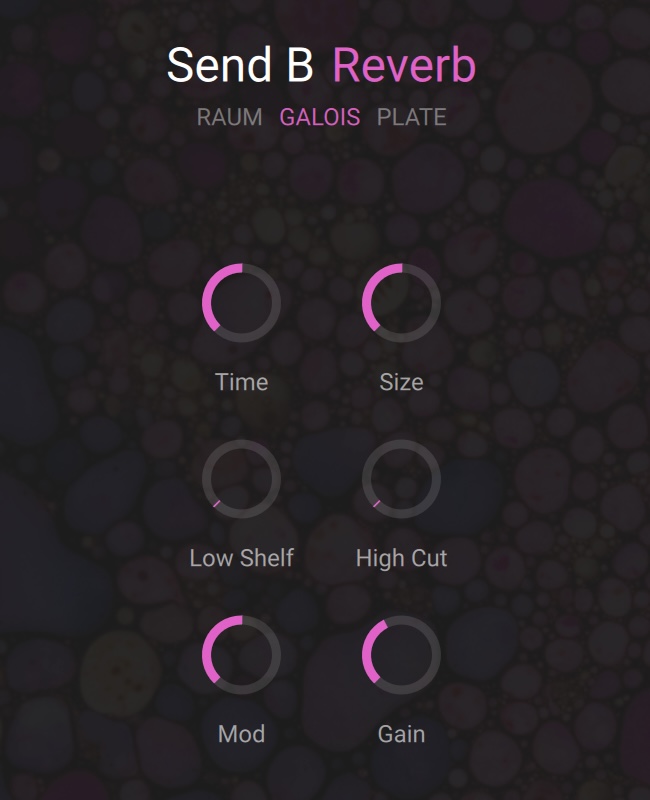 |
Time: Adjusts the duration of the reverb effect.
Size: Adjusts the size of the room simulated by the reverb effect. Higher values replicate larger rooms.
Low Shelf: Attenuates or amplifies the low-frequency content of the reverb signal.
High Cut:: Cuts the high-frequency content of the reverb signal.
Mod: Adjusts the amount of modulation applied to the reverb effect. Turned fully counter-clockwise, no modulation is applied.
Gain: Adjusts the effect’s return level.
Plate
Plate mode provides the following controls:
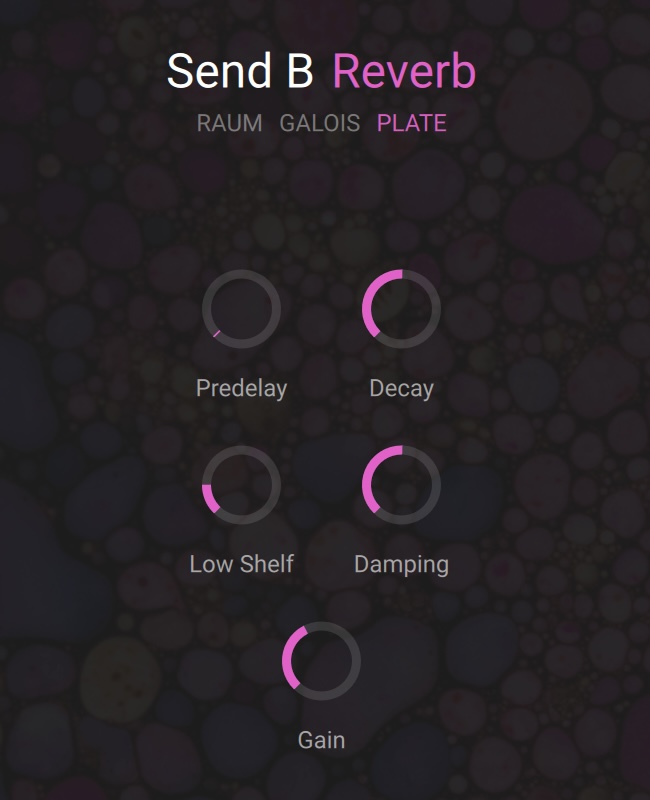 |
Predelay: Introduces a short amount of delay before the reverb takes effect.
Decay: Adjusts the duration of the reverb effect.
Low Shelf: Attenuates or amplifies the low-frequency content of the reverb signal.
Damping: Adjusts the damping of high-frequency content of the reverb signal.
Gain: Adjusts the effect’s return level.
Perform FX page
The Perform FX page lets you configure the Perform effects available on the black keys of your keyboard when Leap is in Group mode.
Note
When Leap is in Single mode, the black keys do not trigger any Perform FX but the pitched sample instead, like the white keys. In this chapter we assume that Leap is in Group mode. For more information on the Group and Single modes, refer to Keyboard section.
Click Perform FX at the top right of the instrument to display the Perform FX page.

The Perform FX page shows 11 columns corresponding to the 11 black keys used for triggering Perform FX:
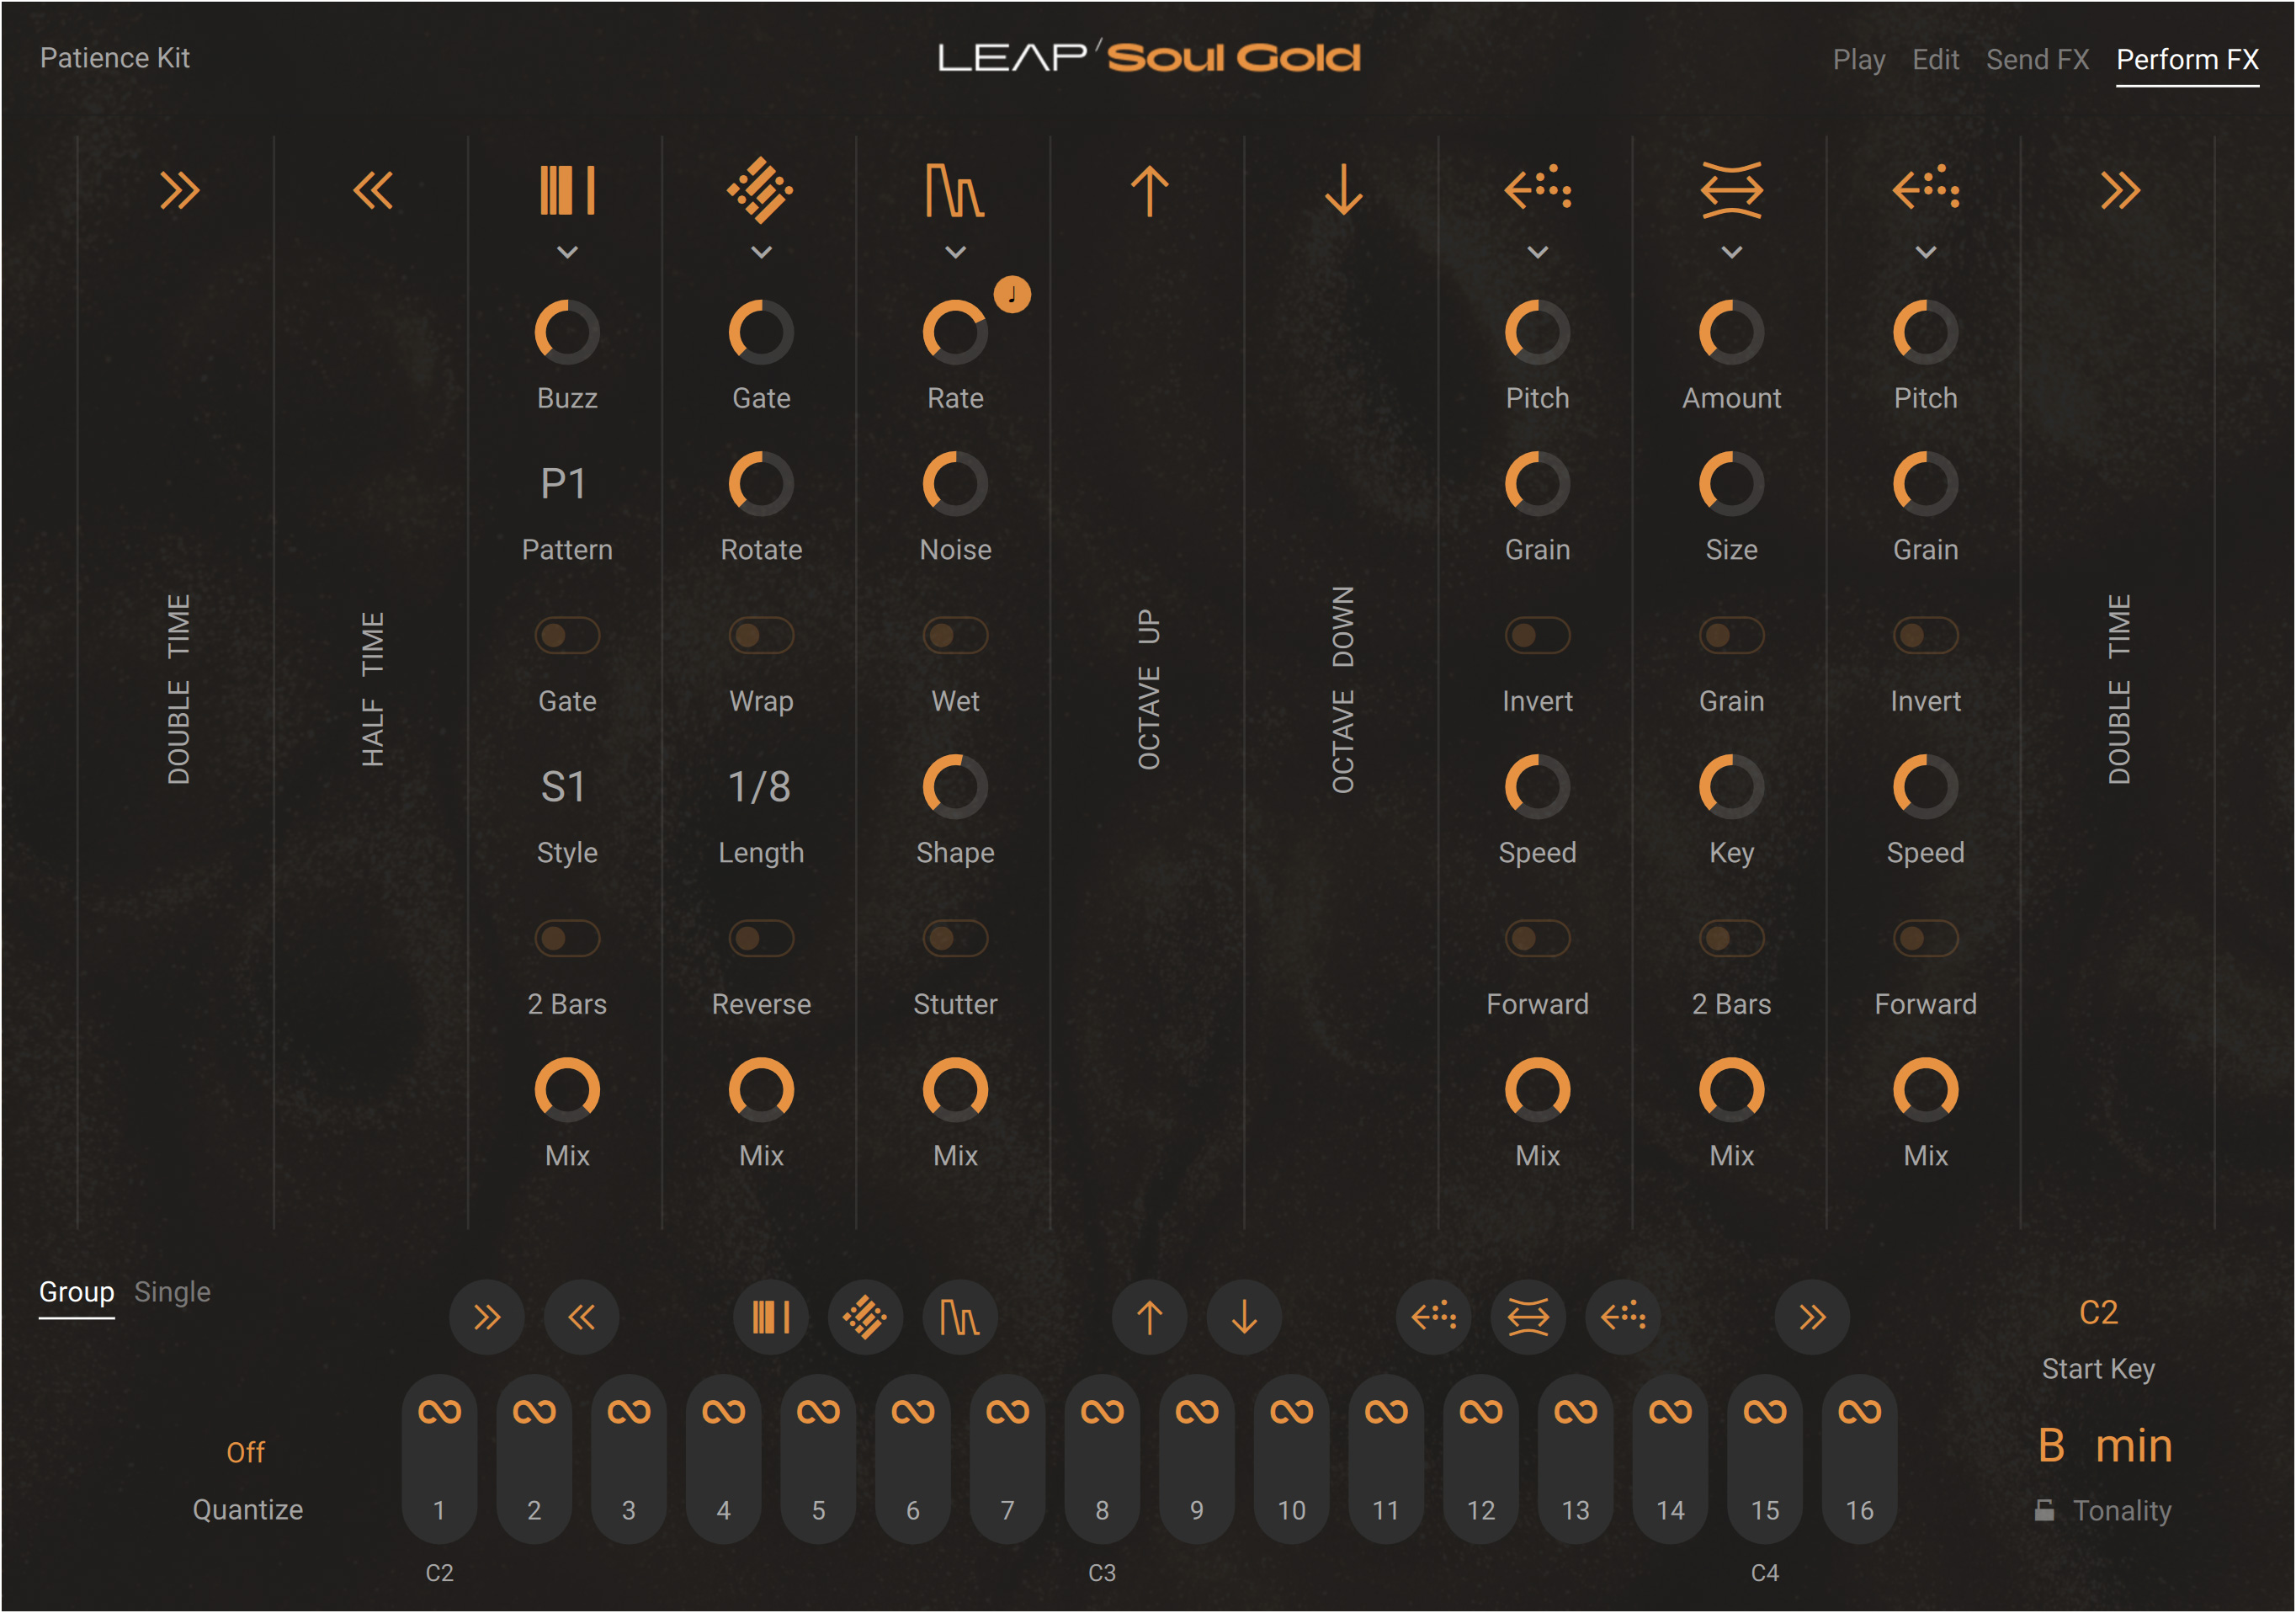
The columns are in the same order as the black keys in the Keyboard view below, each column controlling one particular black key:
Black keys in a group of two (C♯ and D♯) are assigned to either pair of Perform effects: Double Time / Half Time or Octave Up / Octave Down. This assignment is fixed and cannot be changed.
Black keys in a group of three (F♯, G♯, and A♯) can be assigned to any of the following five Perform effects: Gater, Beat Masher, Beat Slicer, Reverse Grain, Transpose Stretch. You can change these assignments to your liking.
The rightmost single black key is always assigned to the Double Time Perform effect.
You can activate or deactivate the Perform effect for any single key by clicking the topmost icon in the column:
Click the effect icon at the top of the desired column to activate or deactivate the Perform effect for the corresponding black key.
When a Perform effect is deactivated, its icon is grayed out at the top of the column and in the Keyboard view below, and the effect will not be triggered when you press the key.
Double Time and Half Time
The Double Time effect doubles the playback speed of the samples, whereas the Half Time effect halves it.
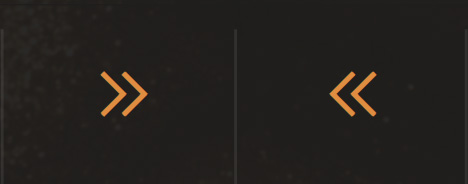 |
Effect icon: Switches the effect on or off for the corresponding key. When the effect is off, its icon is grayed out and the effect will not be triggered when you press the key.
Octave Up and Octave Down
The Octave Up and Octave Down effects transpose the samples one octave upward and downward, respectively.
 |
Effect icon: Switches the effect on or off for the corresponding key. When the effect is off, its icon is grayed out and the effect will not be triggered when you press the key.
Gater
Gater rhythmically mutes the incoming audio to create the classic gating effect. With the internal noise source, it can be used as a rhythmic sound generator.
Pressing and holding the black key turns the effect on until you release the key.
The effect contains the following controls:
 |
Effect icon: Switches the effect on or off for the corresponding key. When the effect is off, its icon is grayed out and the effect will not be triggered when you press the key.
Effect menu (down arrow): Selects a Perform effect for that key. You can choose from the following effects: Gater, Beat Masher, Beat Slicer, Reverse Grain, and Transpose Stretch. If you select None, no effect will be assigned to the key.
Rate: Adjusts the rate of the gating effect.
Sync (note icon): Synchronizes Rate to Kontakt’s main tempo. When Sync is on, Rate can be set in note values relative to the main tempo of Kontakt (which is the tempo of your DAW if Kontakt is running as a plug-in). In that case Rate is measured in note values and can be set to Off, 1/4, 1/8, 1/16, and 1/32.
Noise: Adjusts the amount of hissing noise added to the signal.
Wet: Mutes the input signal so that only the effect signal can be heard. When combined with the Noise control, the Gater can be used as a rhythmically gated noise source .
Shape: Adjusts the hold and decay times of the gating effect’s contour.
Turned fully left: 1% hold, 0% decay
Center position: 50% hold, 0% decay
Turned fully right: 0% hold, 100% decay
Stutter: Sets the gating time to a 3/16 note, producing a stuttering effect.
Mix: Blends between the input signal and the effect signal.
Beat Masher
Beat Masher captures a loop from the incoming audio and manipulates it by applying rhythmic stutter, gating, repeater, and reverse effects in real time.
Pressing the black key starts the effect by recording the input signal into the internal buffer.
The effect contains the following controls:
 |
Effect icon: Switches the effect on or off for the corresponding key. When the effect is off, its icon is grayed out and the effect will not be triggered when you press the key.
Effect menu (down arrow): Selects a Perform effect for that key. You can choose from the following effects: Gater, Beat Masher, Beat Slicer, Reverse Grain, and Transpose Stretch. If you select None, no effect will be assigned to the key.
Gate: Grabs and plays slices of audio from the internal buffer. When turned fully to the left, the effect is bypassed. When turned right towards center position, increasingly longer slices are played. When set to center position, the full buffer is played. When turned right from the center position, increasingly longer slices of audio are cut, creating a gating effect.
Rotate: Shifts the audio from the buffer relative to its original position in steps of 1/8 notes.
Wrap: Restarts the effect from the start of each bar independently from the Length setting.
Length: Adjusts the length of the audio from the internal buffer, measured in note values.
Reverse: Reverses the playback direction of the audio from the internal buffer.
Mix: Blends between the input signal and the effect signal.
Beat Slicer
Beat Slicer captures a loop from the incoming audio and manipulates it by rearranging slices into a variety of rhythmic patterns in real time.
Pressing the black key starts the effect by recording the input signal into the internal buffer.
The effect contains the following controls:
 |
Effect icon: Switches the effect on or off for the corresponding key. When the effect is off, its icon is grayed out and the effect will not be triggered when you press the key.
Effect menu (down arrow): Selects a Perform effect for that key. You can choose from the following effects: Gater, Beat Masher, Beat Slicer, Reverse Grain, and Transpose Stretch. If you select None, no effect will be assigned to the key.
Buzz: Creates a rolling beat effect by repeating beats from the current pattern. Turning the control to the right increases the rate of repetition.
Pattern: Selects a pattern from the group set using Style. The first pattern in each group plays back the unaltered audio from the buffer.
Gate: Gates the audio based on a rhythm derived from another pattern, creating infinite variations through combination of the playback and gating patterns. When activated, the Buzz control is inactive.
Style: Selects one of five groups of patterns.
2 Bars: Extends the audio used from the buffer to two bars. Otherwise only the first bar of audio is used.
Mix: Blends between the input signal and the effect signal.
Reverse Grain
Reverse Grain captures a loop from the incoming audio and applies granular processing to it, including control over playback direction, pitch, and grain size.
Pressing the black key starts the effect by recording the input signal into the internal buffer.
Note
This effect needs a few seconds of audio input to work, if it stays silent, make sure to play a loop and trigger it again.
The effect contains the following controls:
 |
Effect icon: Switches the effect on or off for the corresponding key. When the effect is off, its icon is grayed out and the effect will not be triggered when you press the key.
Effect menu (down arrow): Selects a Perform effect for that key. You can choose from the following effects: Gater, Beat Masher, Beat Slicer, Reverse Grain, and Transpose Stretch. If you select None, no effect will be assigned to the key.
Pitch: Adjusts the pitch of the audio from the internal buffer. When turned fully to the right, the pitch is unaltered. Turning Pitch to the left pitches the audio down.
Grain: Adjusts the size of the grains used to process audio from the internal buffer. Interesting effects can be achieved when combined with the Speed control.
Invert: Plays the grains in reversed order.
Speed: Adjusts the playback speed of the grains used to process audio from the internal buffer. When turned fully to the right, the playback speed is unaltered. Turning Speed to the left reduces the playback speed.
Forward: Inverts the playback direction to forward.
Mix: Blends between the input signal and the effect signal.
Transpose Stretch
Transpose Stretch captures a loop from the incoming audio and manipulates it by means of granular pitch-shifting and time-stretching. You can use it to radically transform the sound.
Pressing the black key starts the effect by recording the input signal into the internal buffer.
The effect contains the following controls:
 |
Effect icon: Switches the effect on or off for the corresponding key. When the effect is off, its icon is grayed out and the effect will not be triggered when you press the key.
Effect menu (down arrow): Selects a Perform effect for that key. You can choose from the following effects: Gater, Beat Masher, Beat Slicer, Reverse Grain, and Transpose Stretch. If you select None, no effect will be assigned to the key.
Amount: Adjusts the amount of time-stretching. Turning Amount to the right slows the audio from the internal buffer down until it freezes using a single grain.
Size: Adjusts the size of the grains used to process audio from the internal buffer. When turned fully to the left, large grains of 333 ms length are produced. When turned fully to the right, small grains of 5 ms length are produced. The Size control only has an effect when Grain is activated.
Grain: Activates grain size adjustment using the Size control. When deactivated, the grain size is automatically optimized for best pitch-shifting results
Key: Adjusts the pitch of the grains used to process audio from the internal buffer in semitones. When turned fully to the left, the grains are pitched down by 60 semitones, or 5 octaves. In center position, the original pitch is maintained. When turned fully to the right, the grains are pitched up by 12 semitones, or 1 octave.
2 Bars: Extends the audio used from the buffer to two bars. Otherwise only the first bar of audio is used.
Mix: Blends between the input signal and the effect signal.
Arpeggiator
Arpeggiator transforms the notes you play into a rhythmic sequence.
The Arpeggiator Tool contains the following elements:
 |
Disable: Bypasses the Tool.
Latch: Holds all played keys.
Note Order: Sets the playback order of input notes.
Table Order: Sets how velocities are read from the pattern table. In Host Sync, playback aligns with the song position.
Steps : Sets the number of steps in the rhythmic pattern.
Rate: Sets the rate of the arpeggiator in fractions of a beat related to the host tempo.
Swing : Sets the amount of swing in the groove.
Duration : Sets the duration of the arpeggiated MIDI notes in percent. This will change the length of the MIDI notes and not the volume envelope.
Octave : Adjusts arpeggio pattern across octaves, cycling from the played octave up or down based on the set range.
Repeats : Sets how many times each note is repeated in the pattern.
Scale by Velocity : Scales input velocity by grid values, or uses the pattern table when off.
Chord Builder
Chord Builder adds additional harmonies to MIDI notes in relation to a specified key and scale. Up to 5 notes can play with each incoming MIDI note.
The Chord Builder Tool contains the following elements:
 |
Preset menu: Selects a preset from a variety of different chord structures.
Disable: Bypasses the Tool.
Voice 1–8: Selects the harmonized interval for each note. If the knob is set to Off, no additional note will play.
Octave 1–8: Adds or subtracts up to 10 octaves to the interval (the note cannot exceed the boundaries of MIDI note values, however).
Velocity 1–8: This control sets the velocity of harmonized tones as a percentage of the incoming velocity. Knobs function between -100% and 100%. If the knob is set to -100% or below, it switches to fixed velocity mode.
Chords Tool
The Chords Tool allows you to play chords on your Kontakt Instruments by pressing a single key. The Tool provides a vast collection of chords judiciously grouped into chord sets. Each chord set includes seven chords. You can browse the available chord sets and select the desired musical characteristics to find the matching sets. When you load a chord set into the Tool, its seven chords are directly available on dedicated keys of your MIDI keyboard. You can quickly adjust various characteristics of the played chords, for example their playback behavior, the keyboard mapping, the scale, the velocities, pitches, and timings of the individual notes, etc. You can also replace single chords with ones from other sets, or record your own chords.
Note
For more information on saving your custom sets, refer to Saving a User preset.
Chords overview
The Chords Tool contains the following elements:
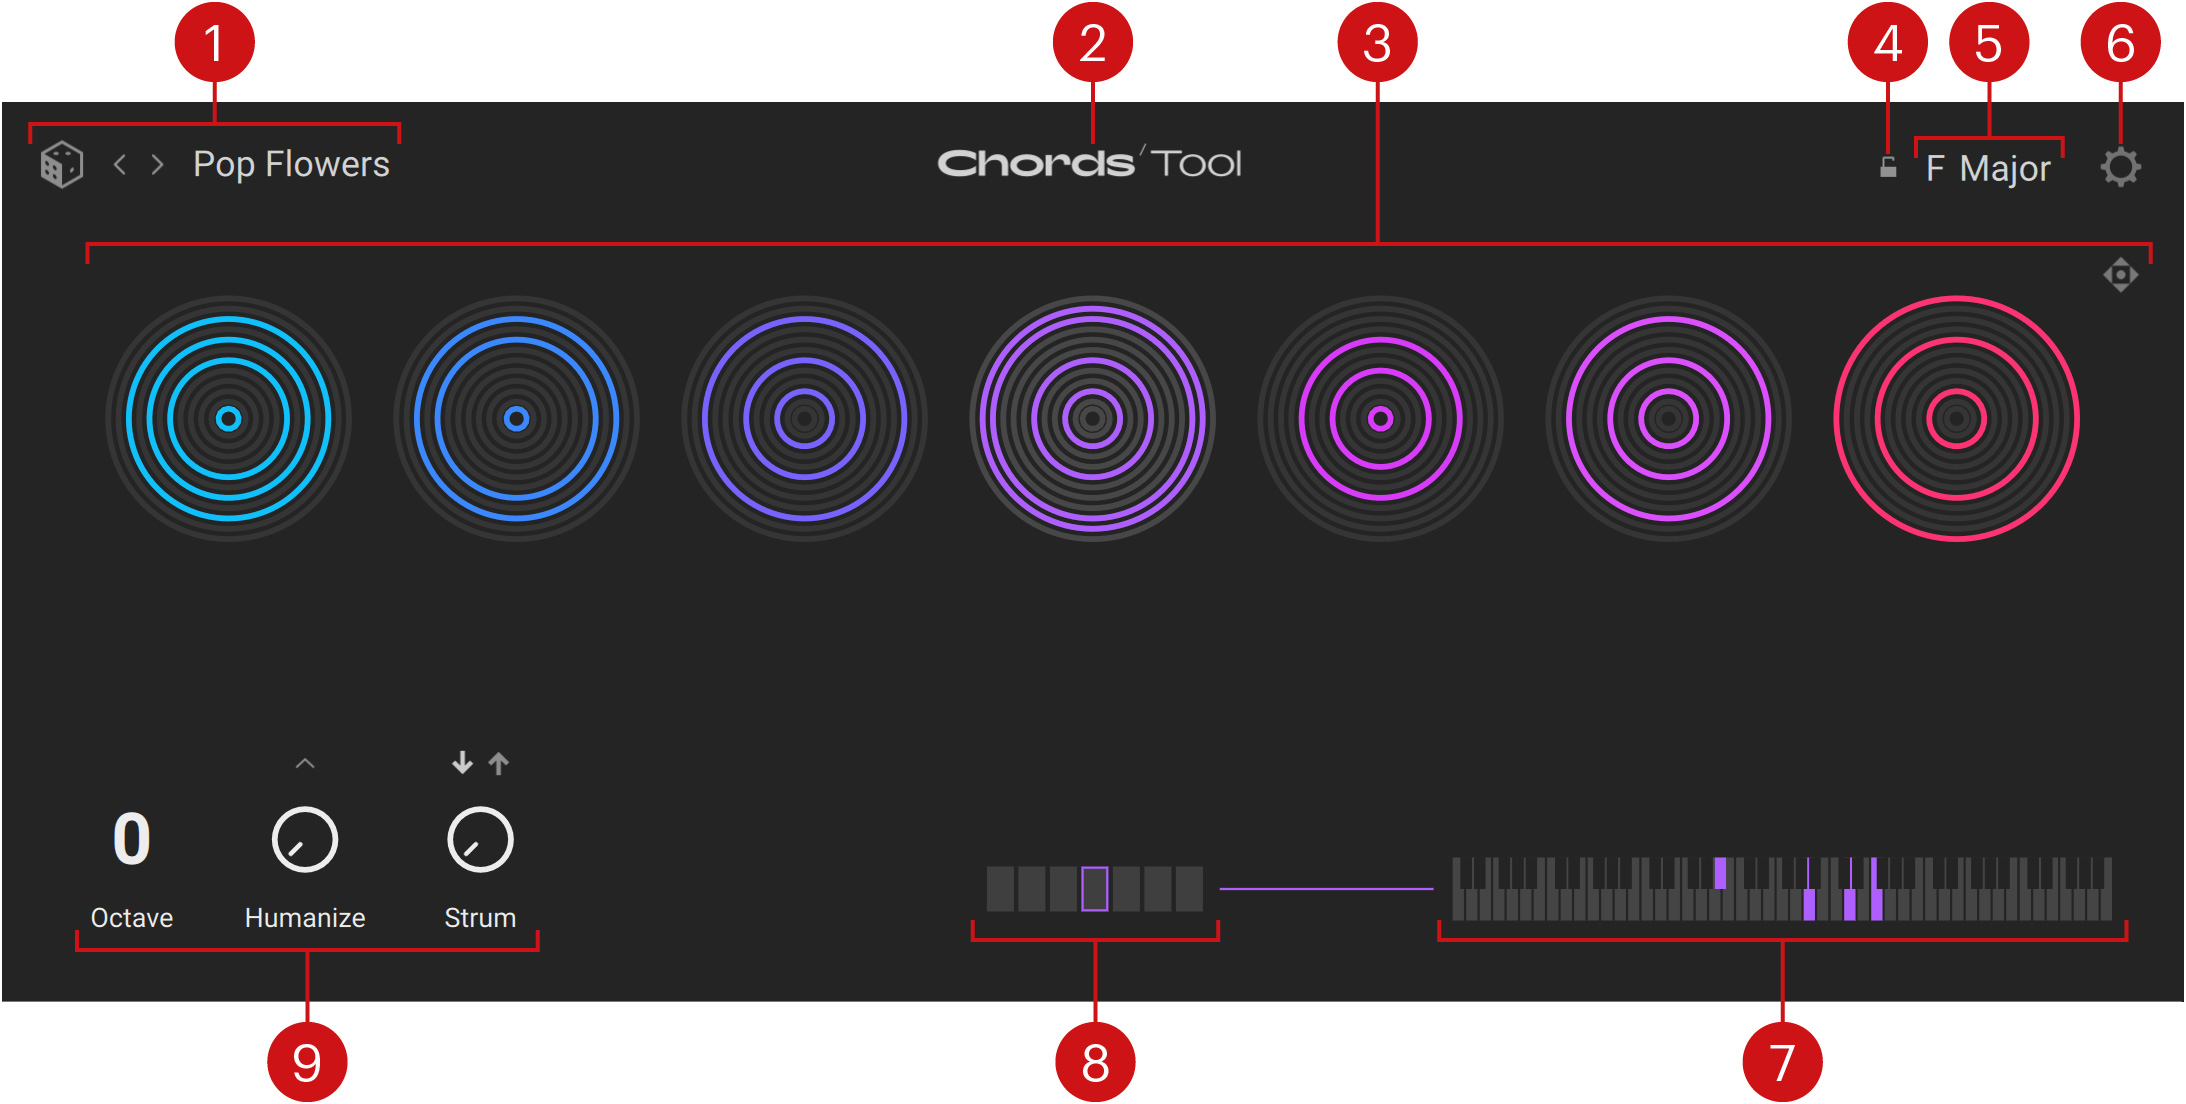
Chord Set selector: Shows the name of the loaded set of chords. You can click the name to open the Chord Set browser and select another set, click the left/right arrows to load the previous/next set from the current result list, or click the dice to load a random set from the current result list. Each chord set contains seven chords and a particular scale. By default, when you load the chord set its chords and scale will replace the current chords and current scale.
About: Click the Tool label to open the credits.
Chord Circles: Visually represent the seven chords in the set and provides a few chord-related controls. Refer to Chord Circles for more information.
Scale Lock: Keeps the current scale when loading another chord set. This only works when loading chord sets from the Chord Set selector or the Chord Set browser, not from Kontakt’s side pane nor Library Browser.
Scale selector: Shows the current scale. You can select another scale by clicking the selector and choosing a root note and a scale mode from the menu. The seven available chords will automatically adapt to match the keys in the selected scale.
Settings: Opens the Settings page page.
Keybed: Shows a little keybed on which the keys of the selected chord are lit using the chord color.
Chord Slot selector: Selects a chord slot from the current set. This is equivalent to clicking the Chord Circles except that the chord is not triggered. Upon your selection, the keybed on the right shows the keys used in that chord. Each chord slot has its own color, which is mirrored in various places to indicate the controls affecting that chord specifically.
Tool Playback controls: Adjust the global playback behavior of the Chords Tool. Refer to Tool Playback controls for more information.
Chord Set browser
The Chord Set browser lets you replace the seven loaded chords at once with a fresh chord set from the factory library.
The Chord Set browser contains the following elements:
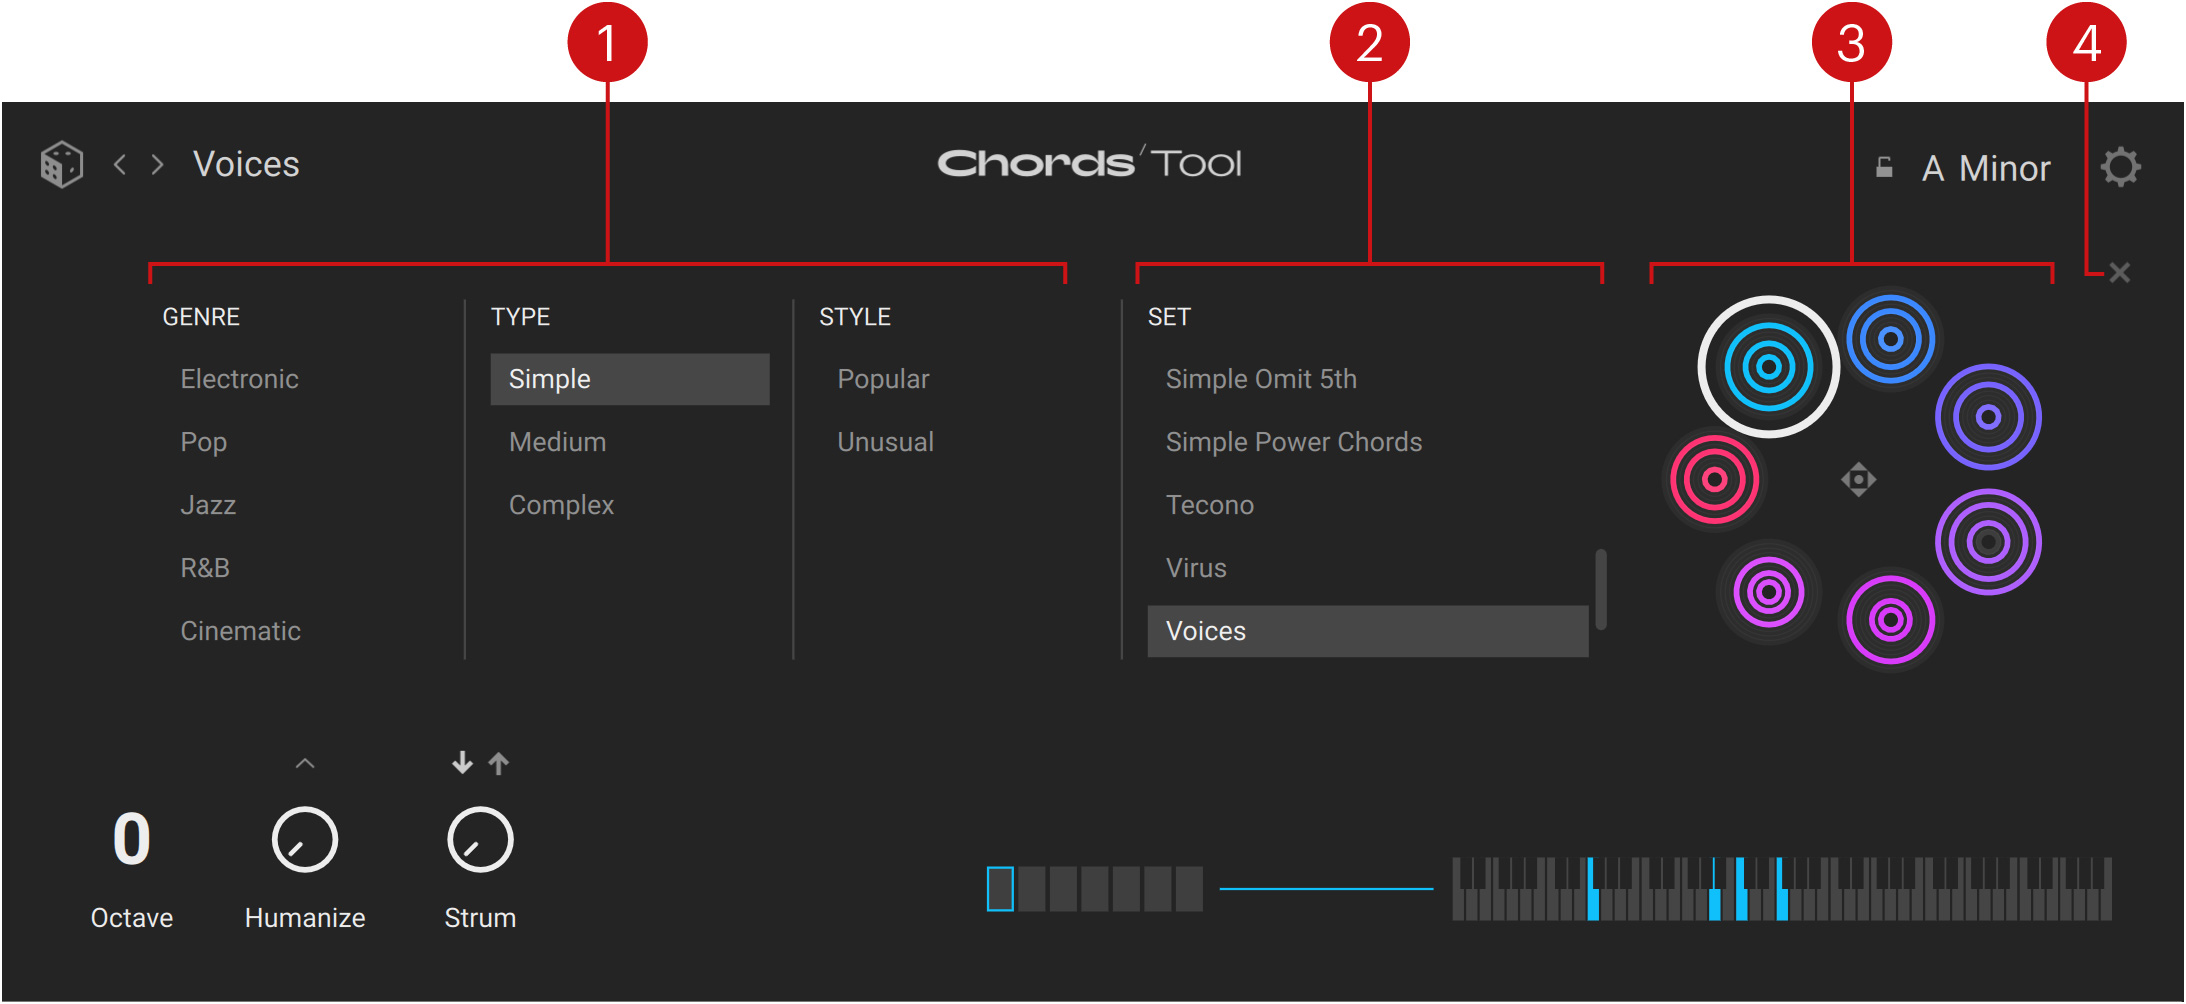
Tag filter: You can click the desired tags from the Genre, Type, and Style columns to select or deselect them. The Set list on the right is updated accordingly.
Set list: Shows the sets matching your selections in the Tag filter. You can click a set in the list to load it and replace the current set.
Chord Set Preview: Displays previews of the seven chords in the selected set. The previews are inspired by the Chord Circles displayed in the middle of the Tool interface. The preview with a white frame indicates the chord currently selected. The Chord Set Preview includes an Export handle in the middle: You can click it and drag it to export the entire set into your DAW.
Close (cross symbol): Closes the browser.
Chord Circles
The Chord Circles let you quickly see and compare the shapes of the loaded chords.
 |
Each chord sits on a slot showing 12 concentric circles, which represent the 12 semitones of the ascending chromatic scale from C to B (C–C♯–D–D♯–E–F–F♯–G–G♯–A–A♯–B), where the smallest circle in the center represents the C and the biggest circle the B. The lit circles indicate the notes used in the chord.
Note
This visualization does not distinguish between different chord positions or voicings: all the positions, inversions, and doubling of the notes in the chord will be represented by the same circles. To know the particular pitches used in the chord, take a look at the keybed in the bottom right corner.
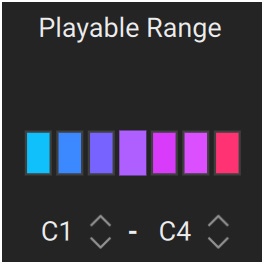
By default, you can trigger the seven slots by pressing the white keys of the middle three octaves (C1 to C4) on your MIDI keyboard, from left to right: C–D–E–F–G–A–B. You can change this behavior by adjusting the key range triggering the chords, or by switching from Simple to Advanced keyboard mode. Both are done in the Settings page.
At any time, the keys of Kontakt’s on-screen keyboard and the Light Guide of the Kontrol MK3 keyboards mirror the colors of the chords that they trigger.
Note
To see the Chords’ key mappings on the on-screen keyboard and on your Kontrol MK3 keyboard, make sure that the slot of the Chords Tool is selected at the top of Kontakt’s side pane.
You can export the complete chord set into your DAW by clicking and dragging the Export handle in the top right corner and drop it onto the desired location.
When you hover over a chord slot with the mouse, additional controls appear below:
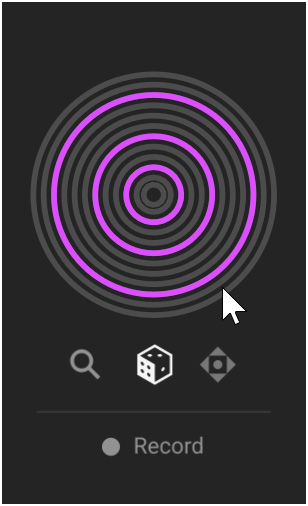 |
Magnifying glass: Opens the Chord browser, which lets you choose another chord for loading into that slot.
Dice: Loads a random chord from the current result list.
Export handle: Click and drag to export this single chord into your DAW.
Record: Lets you create a chord manually for that slot: Click Record, press the desired keys on your MIDI keyboard, and click Record again.
Chord browser
The Chord browser lets you replace the selected chord with a fresh one from the factory library.
The Chord browser contains the following elements:
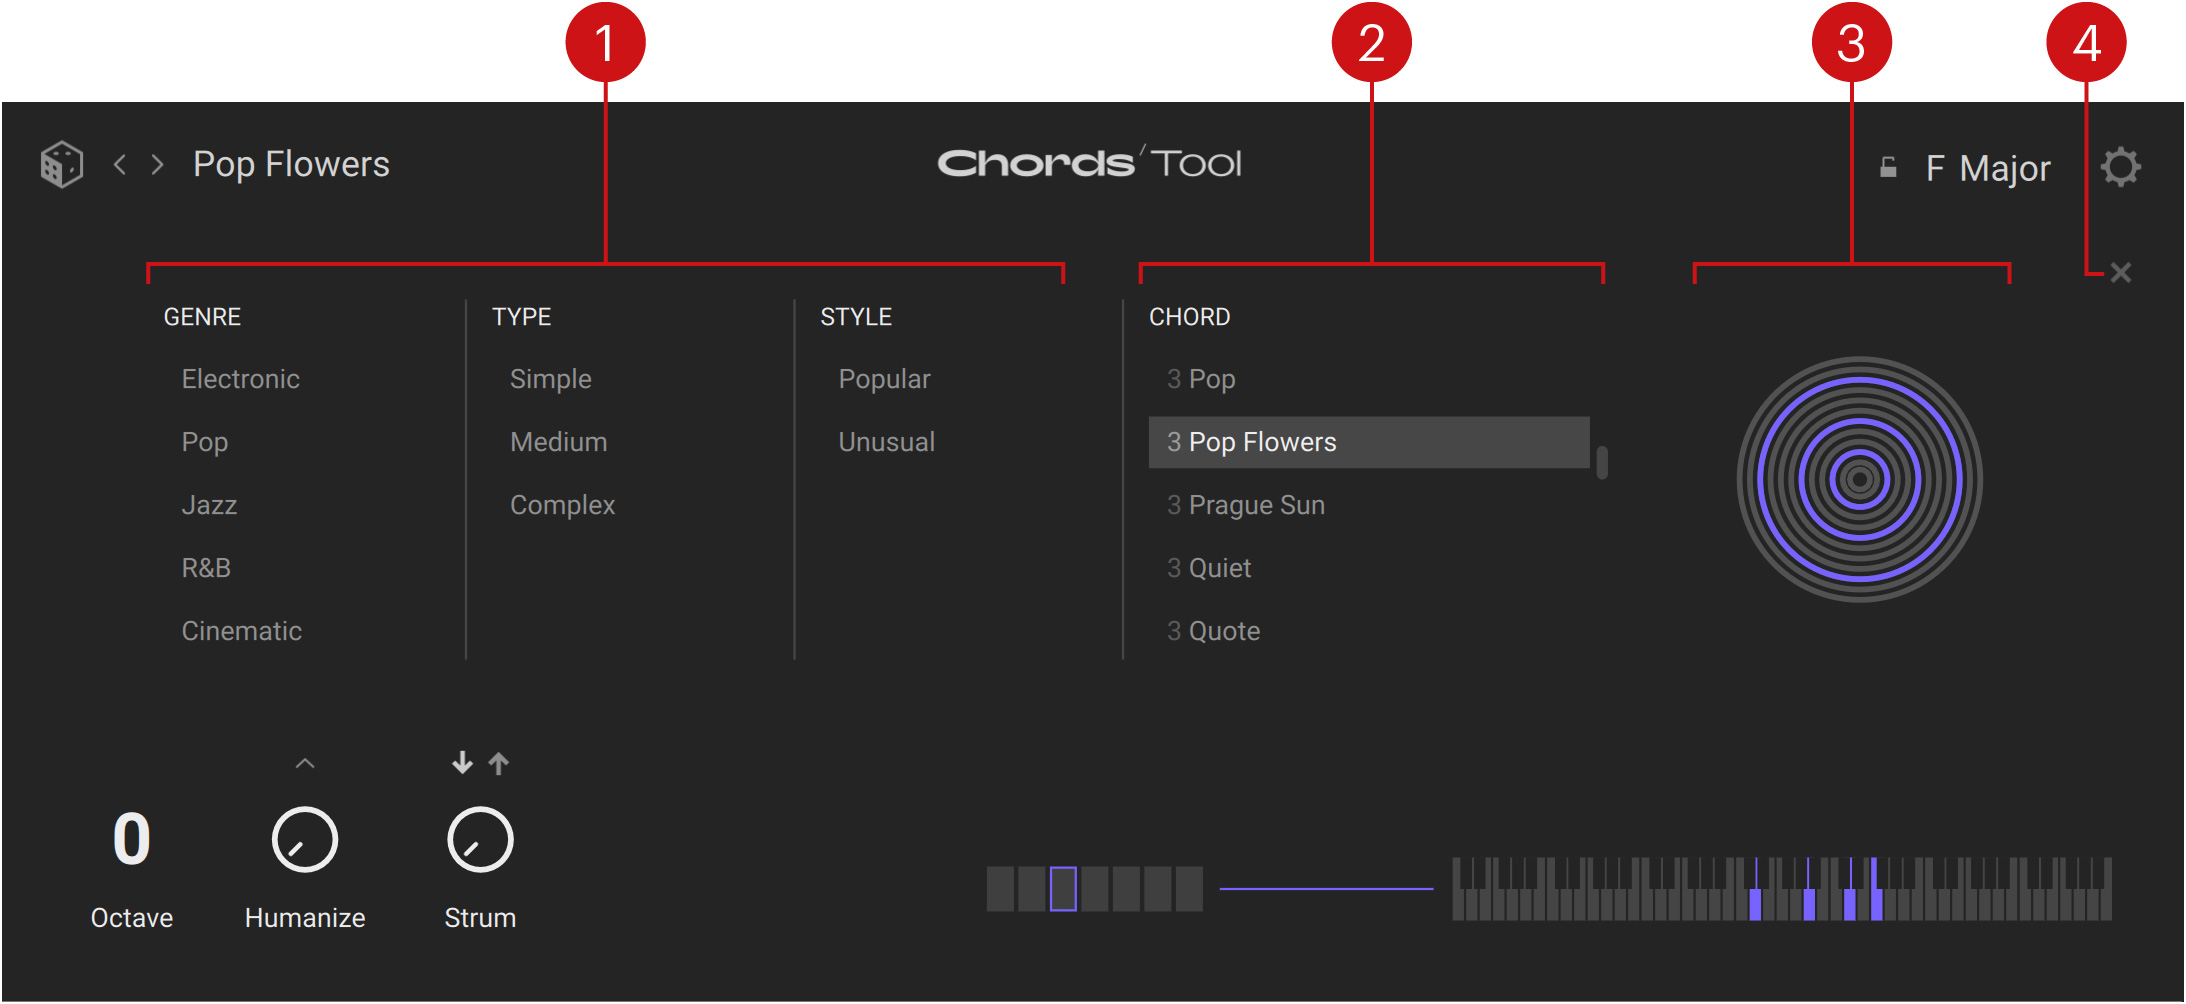
Tag filter: You can click the desired tags from the Genre, Type, and Style columns to select or deselect them. The Chord list on the right is updated accordingly.
Chord list: Shows the chords matching your selections in the Tag filter. In the list, the chords are named after the chord set they are belonging to, preceded by a number from 1 to 7 indicating their order of appearance in the set. You can click a chord in the list to load it and replace the selected chord.
Chord Preview: Displays a preview of the selected chord. The preview is inspired by the Chord Circles displayed in the middle of the Tool interface.
Close (cross symbol): Closes the browser.
Tool Playback controls
The Tool Playback controls adjust the global playback behavior of the Chords Tool. The values for these controls are not stored in the sets. Hence, your custom settings stay valid when switching between sets.
The following controls are available:
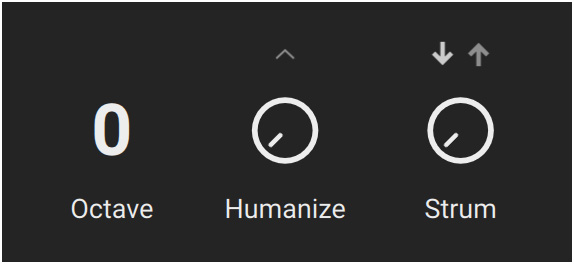 |
Octave: Transposes all chords to a lower/higher octave.
Humanize: Adds a variable amount of random imprecision when triggering the chord, which makes it sound more human. Turning the knob to the right increases the likelihood of such inaccuracies. Clicking the little up arrow above the knob opens the Humanize settings, where you can adjust how various characteristics of the chord should be humanized.
Strum: Adds a short delay between each note start, as if the chord was played by strumming the strings on a real instrument. Turning the knob to the right increases the delay between the notes. Clicking the up or down arrow above the knob will select upward or downward strumming, respectively. The Chord Circles indicate the strumming by progressively shifting the note starts clockwise from their original position at the top of the circles.
Humanize settings
The Humanize settings let you specify different amounts of random inaccuracies for various characteristics of the triggered chords.
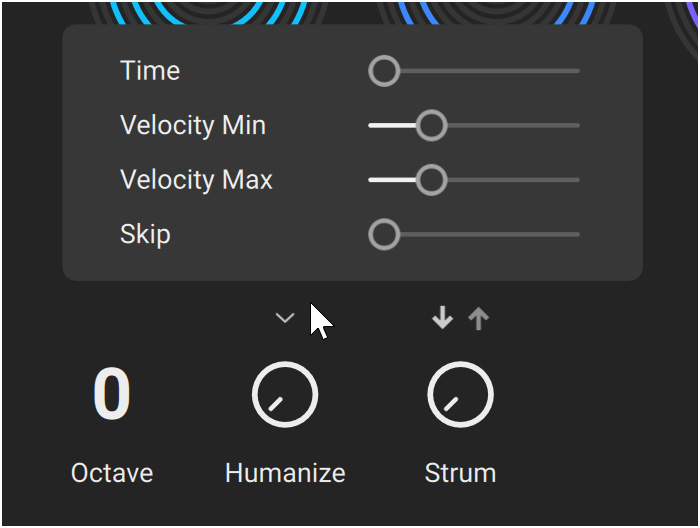 |
Time: Inaccuracies in the timing of the notes. As you drag the slider to the right, the individual notes of the chord tend to be triggered out of time.
Velocity Max: Inaccuracies in the maximum velocity of the notes. As you drag the slider to the right, the individual notes can get louder as their original velocity.
Velocity Min: Inaccuracies in the minimum velocity of the notes. As you drag the slider to the right, the individual notes can get softer as their original velocity.
Skip: Inaccuracies in the note trigger. As you drag the slider to the right, more notes tend to be skipped.
Note
The influence of the Humanize features cannot be represented in the Chord Circles since they occur randomly when the notes are triggered.
Settings page
The Settings page provides global options affecting the behavior of the Tool and its response to your actions on the keyboard.
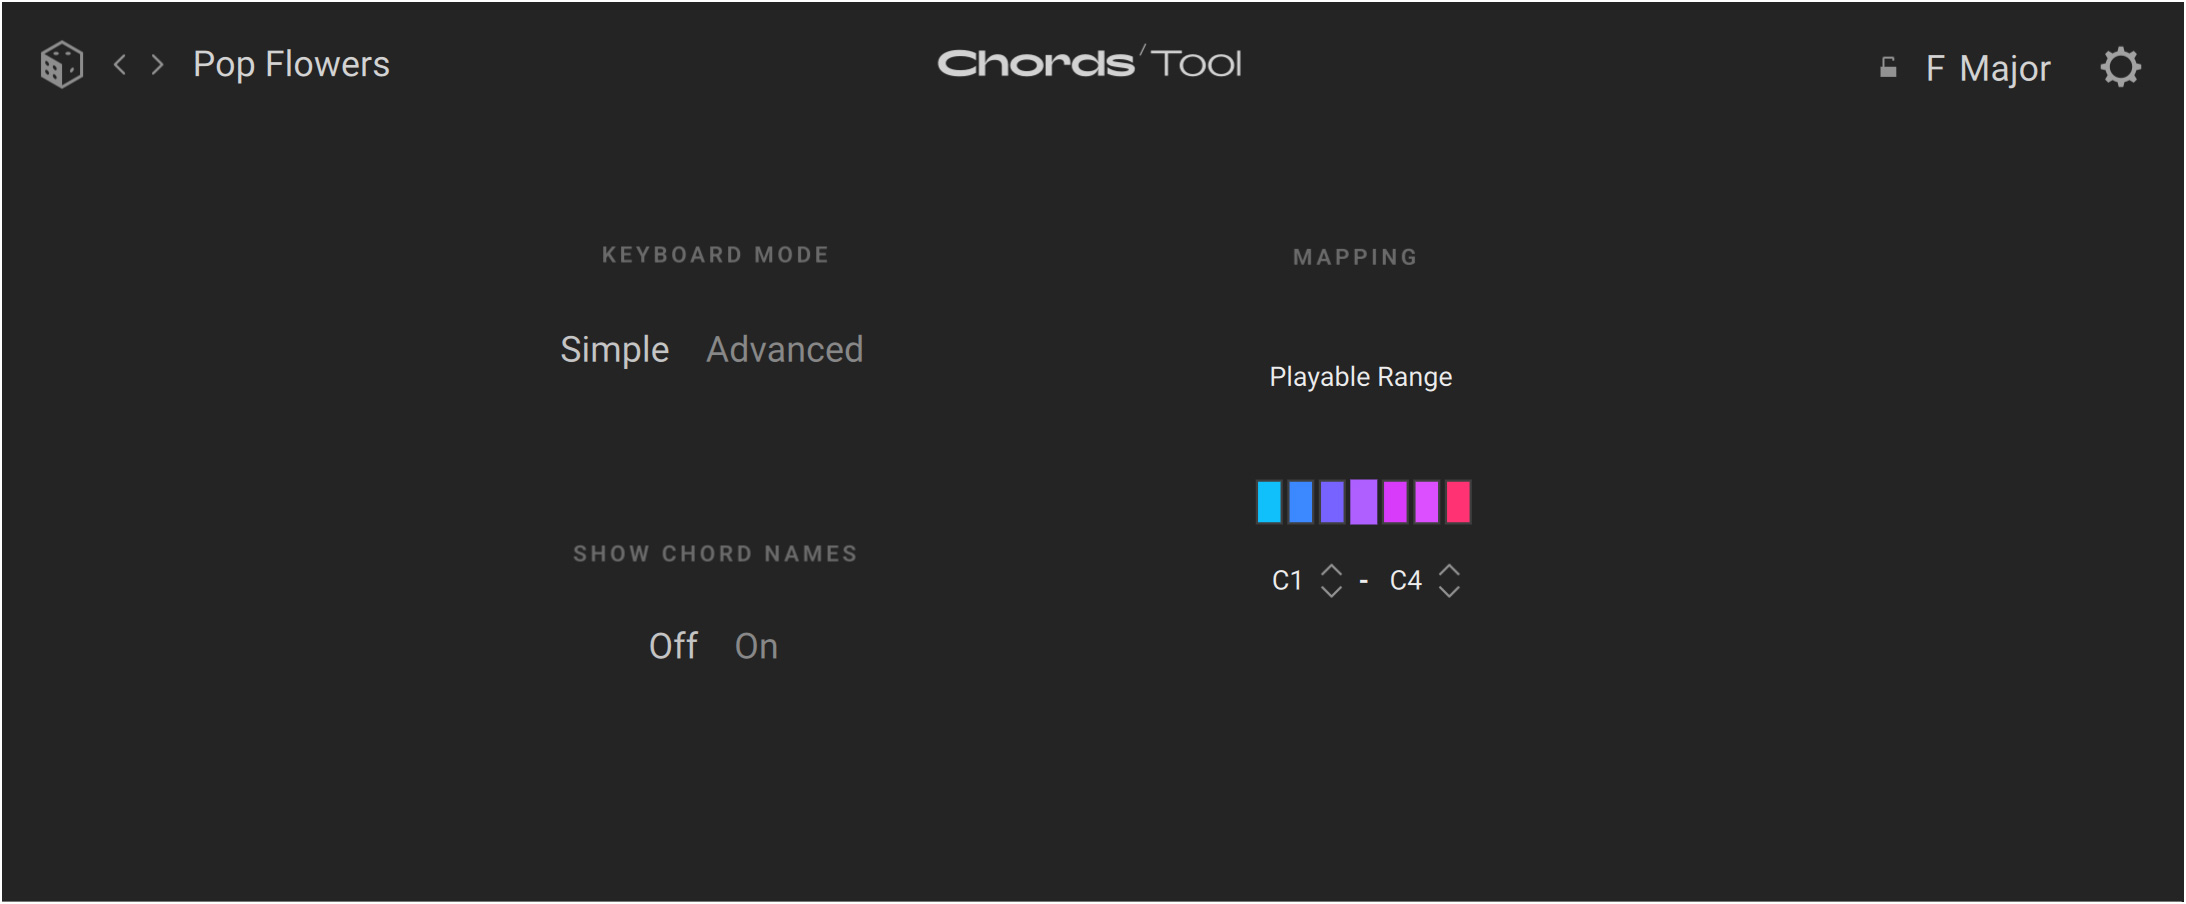
The following controls are available:
Keyboard Mode: Selects between two modes for triggering the chords from your MIDI keyboard:
In Simple mode (default mode), within the range of playable keys, each white key triggers a different chord from the set according to the key degree in the C scale: For example, the C keys trigger the first chord of the set, the D keys trigger the second chord, etc. The chord pitch is set to the current root note (as specified in the Scale selector) in the octave of the pressed key. You can adjust the range of playable keys in the Mapping section.
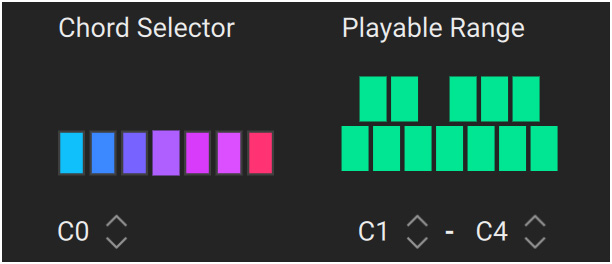
In Advanced mode, distinct key ranges are used for selecting and triggering chords. A one-octave range lets you select chords (without triggering them) by pressing the white keys, using the same logic as in Simple mode: The degree of the pressed key in the C scale determines which chord will be selected. A second key range lets you trigger the selected chord at the desired pitch by pressing the corresponding black or white key. You can adjust both ranges in the Mapping section.
Mapping: Lets you adjust the range(s) used to control your chords. The available parameters depend on the current keyboard mode:
In Simple mode, the Playable Range defines the keys that will trigger chords. Keys outside this range will be inactive. You can adjust the lower or upper end of the range by clicking the corresponding note field and dragging your mouse vertically, or by clicking the little up and down arrows next to it. Above the fields, the slots mirror the colors of the triggered chords.
In Advanced mode, the Selection Range defines the one-octave range used for selecting the chords (the range is defined by its base C key), and the Playable Range defines the keys used for triggering the selected chord. You can adjust either range by clicking the note fields and dragging your mouse vertically, or by clicking the little up and down arrows next to the fields.
Show Chord Names: When this option is on, the name of the selected chord shows up above the Chord Slot selector. In addition, when you hover over the keybed with your mouse, the name of each note in the chord appears above.
Humanizer
Humanizer adds slight randomization to the timing, velocity, and pitch of the notes you play.
The Humanizer Tool contains the following elements:
 |
Disable: Bypasses the Tool.
Seed: Sets the seed number used to generate pseudo-random values for the randomization of the parameters. The sequence for each seed number is predictable, which is useful for automation,
Delay: Randomly delays the note on time of each note with a selectable range of 0 to 100 milliseconds.
Velocity: Randomly adds or subtracts velocity values with a selectable range of -64 to +64.
Pitch: Randomly adds a value to the pitch with a selectable range from range.
Range: Sets the range of pitches for the randomization.
Patterns Tool
The Patterns Tool combines the features of a polyphonic step sequencer and an arpeggiator. Like an arpeggiator it generates repeated sequences of notes based on the keys that you hold, while providing the flexibility of a step sequencer regarding the order, duration, layering, and rhythm of the notes. You can load patterns from the factory library, modify them, or create your own patterns from scratch, and complement them in real time with inspiring randomization options. The generated sequences will always include only the keys that you hold and their octaves, which makes the Patterns Tool harmonically transparent and lets you blend it easily into any harmonic context.
Note
As with any other Tool or instrument loaded in Kontakt, you can save your custom patterns as User presets: For example, you can do this by right-clicking the Patterns slot in the Navigator at the top of Kontakt’s side pane, and selecting Save Preset…. For more information, refer to Saving a User preset.
Patterns overview
The Patterns Tool contains the following elements:
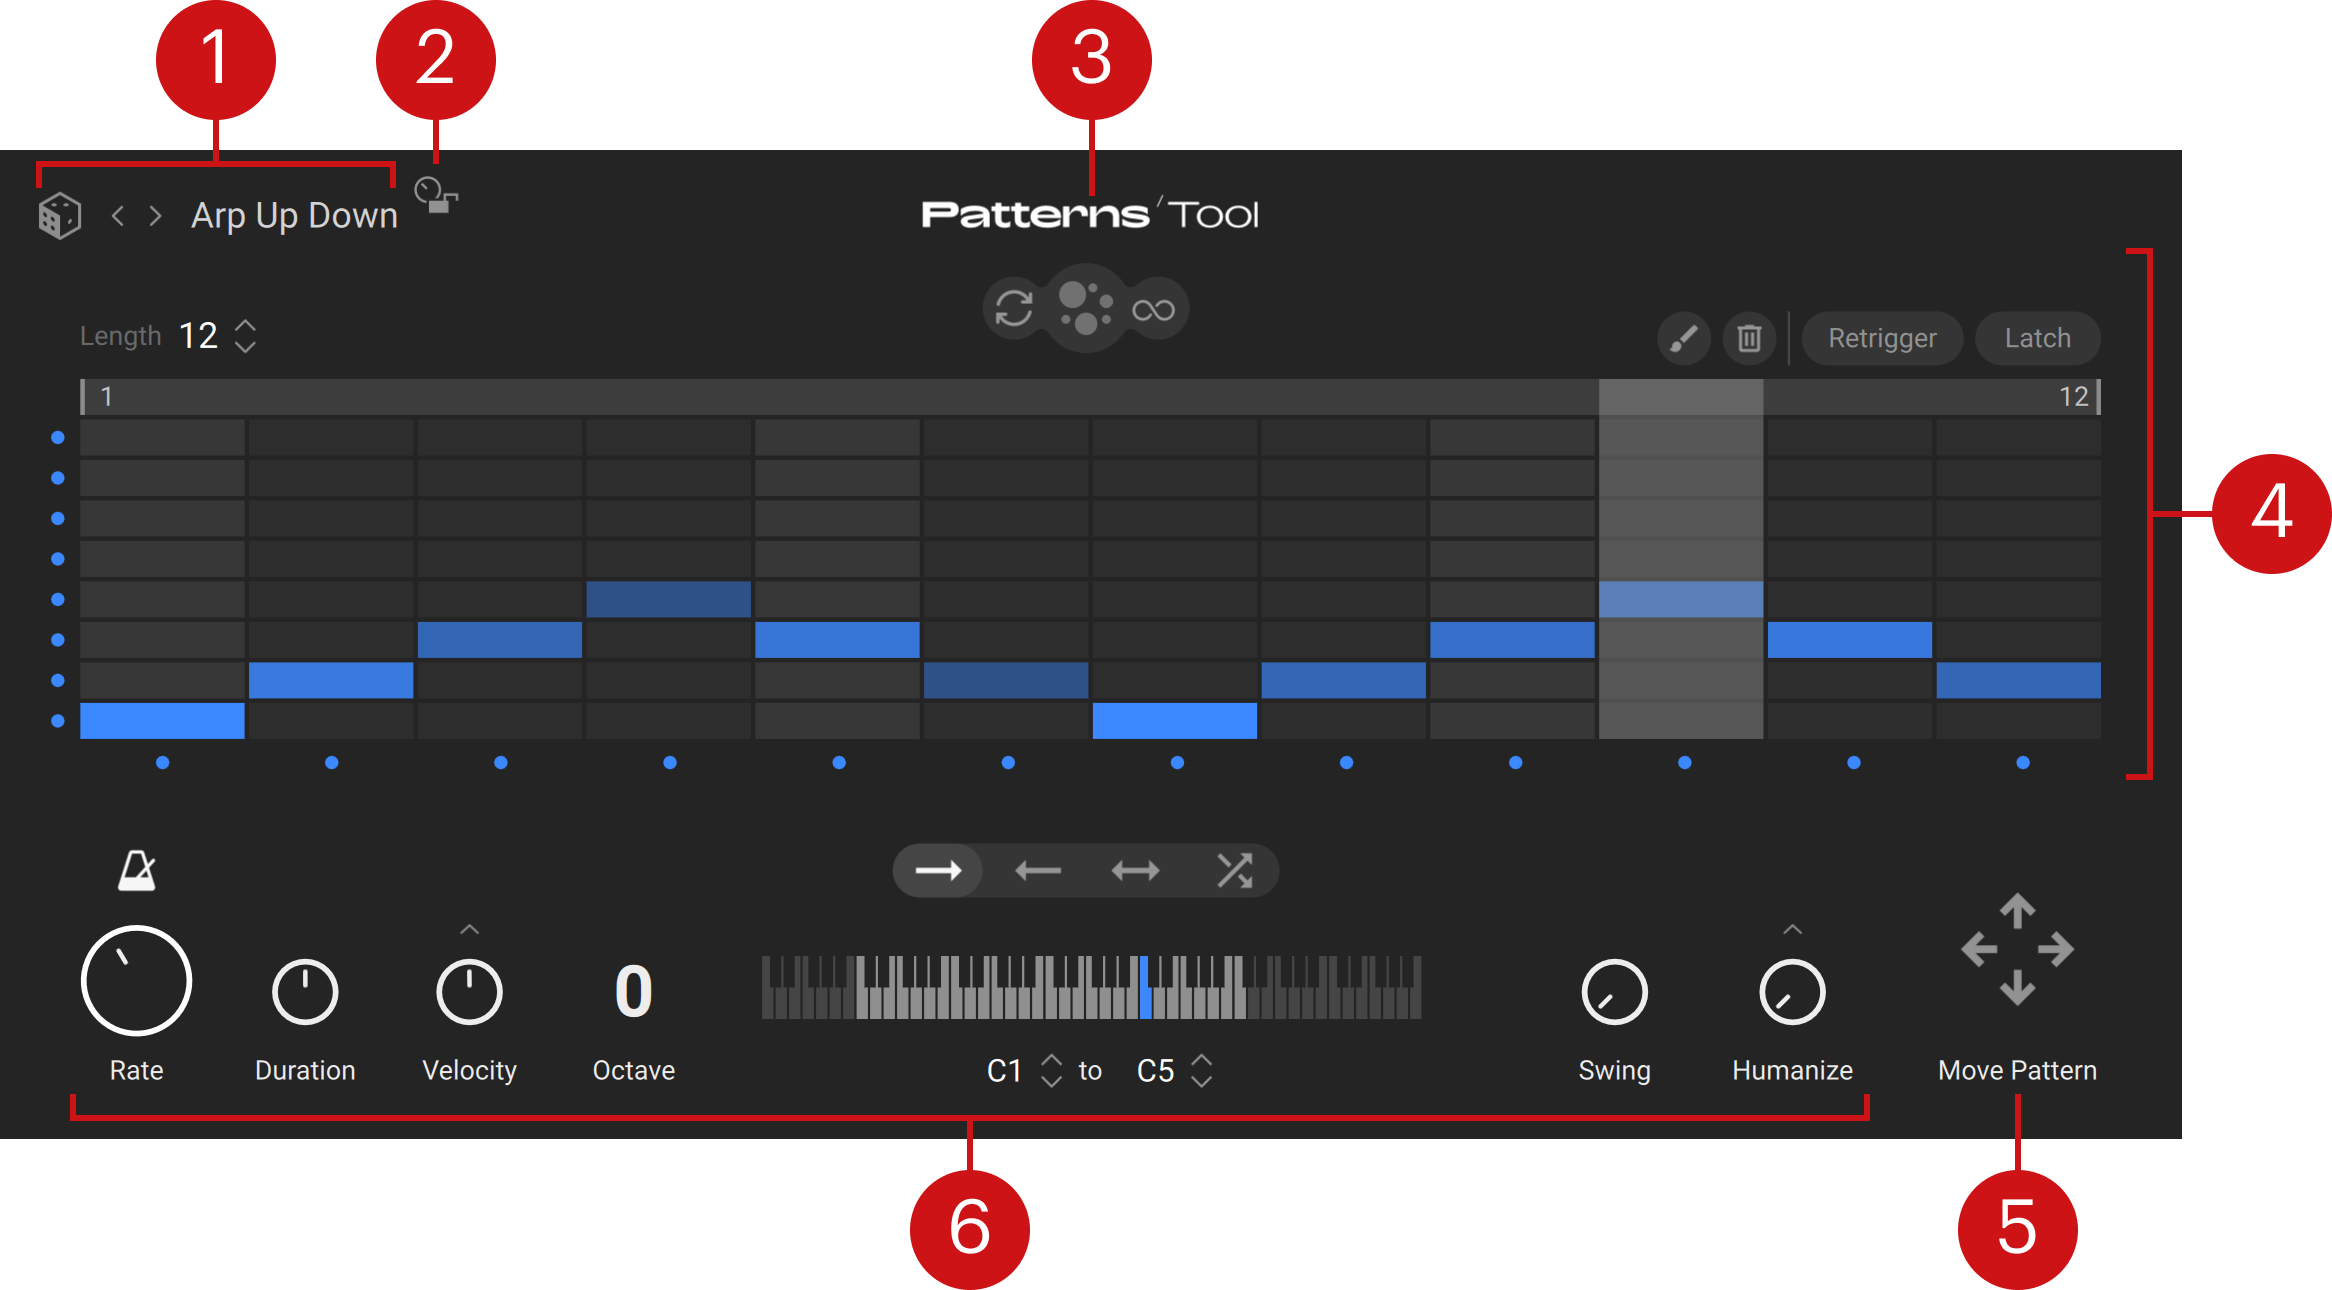
Pattern selector: Shows the name of the loaded pattern. You can click the name to open the Pattern browser and select another pattern, click the left/right arrows to load the previous/next pattern from the current result list, or click the dice to load a random pattern from the current result list.
Parameter Lock: Keeps the current values of the pattern parameters (the row of controls at the bottom of the Tool) when loading another pattern from the Pattern selector. The lock only works when loading patterns using the Pattern selector/browser within the Patterns Tool, not when using the side pane nor the Library Browser of Kontakt.
About: Clicking the Tool name opens the credits.
Pattern Editor: Shows the content of the current pattern and provides multiple tools to modify it: You can add or remove single notes with your mouse, mute specific steps and pitches, drop additional random notes, adjust the pattern’s length and play range, and specify how the pattern should be triggered. For more information, refer to Pattern Editor.
Move Pattern control: Moves all the notes of the pattern one step in the direction of the clicked arrow. Notes that end up outside the grid are reinserted on the other end, the total number of notes staying unchanged. The movements also affect the drops randomly added to the pattern. For more information on the drops, refer to Pattern Editor.
Pattern parameters: Adjust various aspects of the pattern playback, including its tempo, the timing, velocity, and pitch range of the generated notes, the playback direction, as well as the groove and human-like inaccuracies. For more information, refer to Pattern parameters.
Which keys are included?
The Patterns Tool collects a set of eight pitches (or keys) that will be used for all the notes in the patterns. The particular pitches included in the set are based on the keys that you hold. From the lowest to the highest pitch, the set includes:
The pitches of the held keys.
If there are free slots left, the set takes the pitches of the same keys one octave above, then two octaves above, and so on until it contains eight different pitches.
For example:
If you hold C2 and F2 on your keyboard, the eight pitches available in the patterns will be: C2, F2 (original pitches), C3, F3 (one octave above), C4, F4 (two octaves above), and C5, F5 (three octaves above).
If you hold instead C2, E2 and G2 on your keyboard, the eight pitches available in the patterns will be: C2, E2, G2 (original pitches), C3, E3, G3 (one octave above), and C4, E4 (two octaves above).
Note
Once the eight available pitches have been set, the notes in the patterns will still be filtered by the Key Output Range and also influenced by the Octave and Duration controls before getting triggered. For more information, refer to Pattern parameters.
Pattern browser
The Pattern browser lets you replace the current pattern with a fresh one from the factory library.
The Pattern browser contains the following elements:
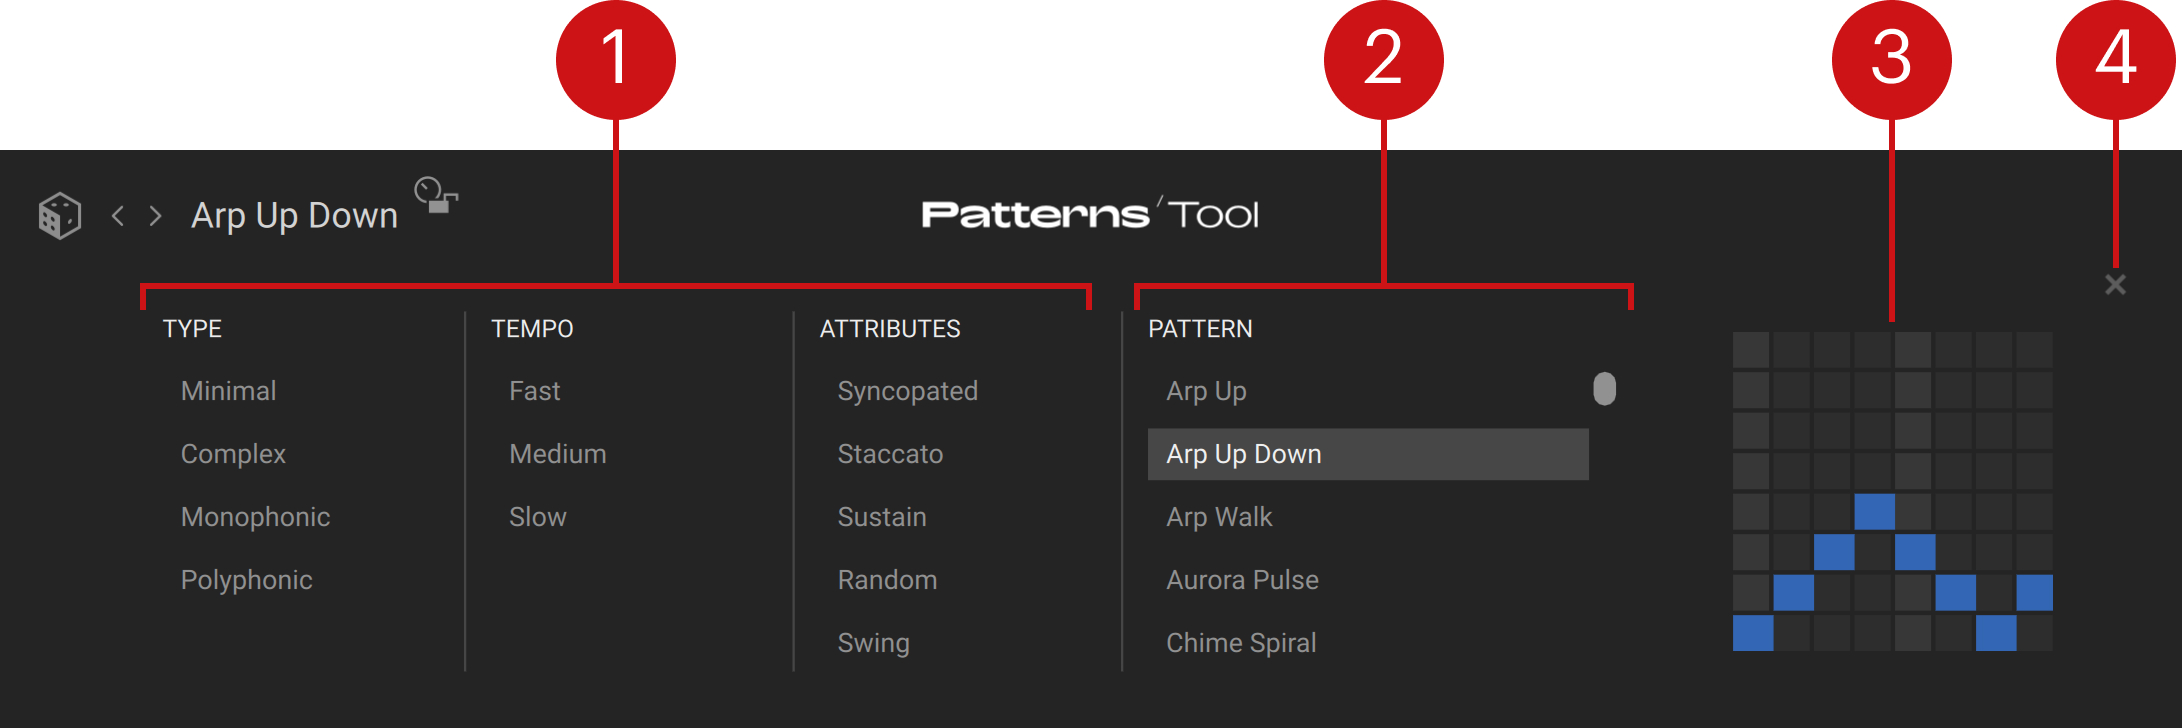
Tag filter: You can click the desired tags from the Type, Tempo, and Attributes columns to select or deselect them. The Pattern list on the right is updated accordingly.
Pattern list: Shows the patterns matching your selections in the Tag filter. You can click a pattern in the list to load it and replace the current pattern.
Pattern Preview: Shows a preview of the selected pattern. The preview is inspired by the step grid content in the Pattern Editor.
Close (cross symbol): Closes the browser.
Note
The Pattern browser lets you access the factory presets included in the Patterns Tool. To access your own user patterns, you can use instead the side pane browser or the Library browser of Kontakt.
Pattern Editor
The Pattern Editor lets you modify the content of the current pattern. You can create, modify, and delete single notes, adjust the length, the play range, and the trigger behavior of the pattern, mute or unmute specific steps or keys, and drop additional random notes.
The Pattern Editor contains the following elements:
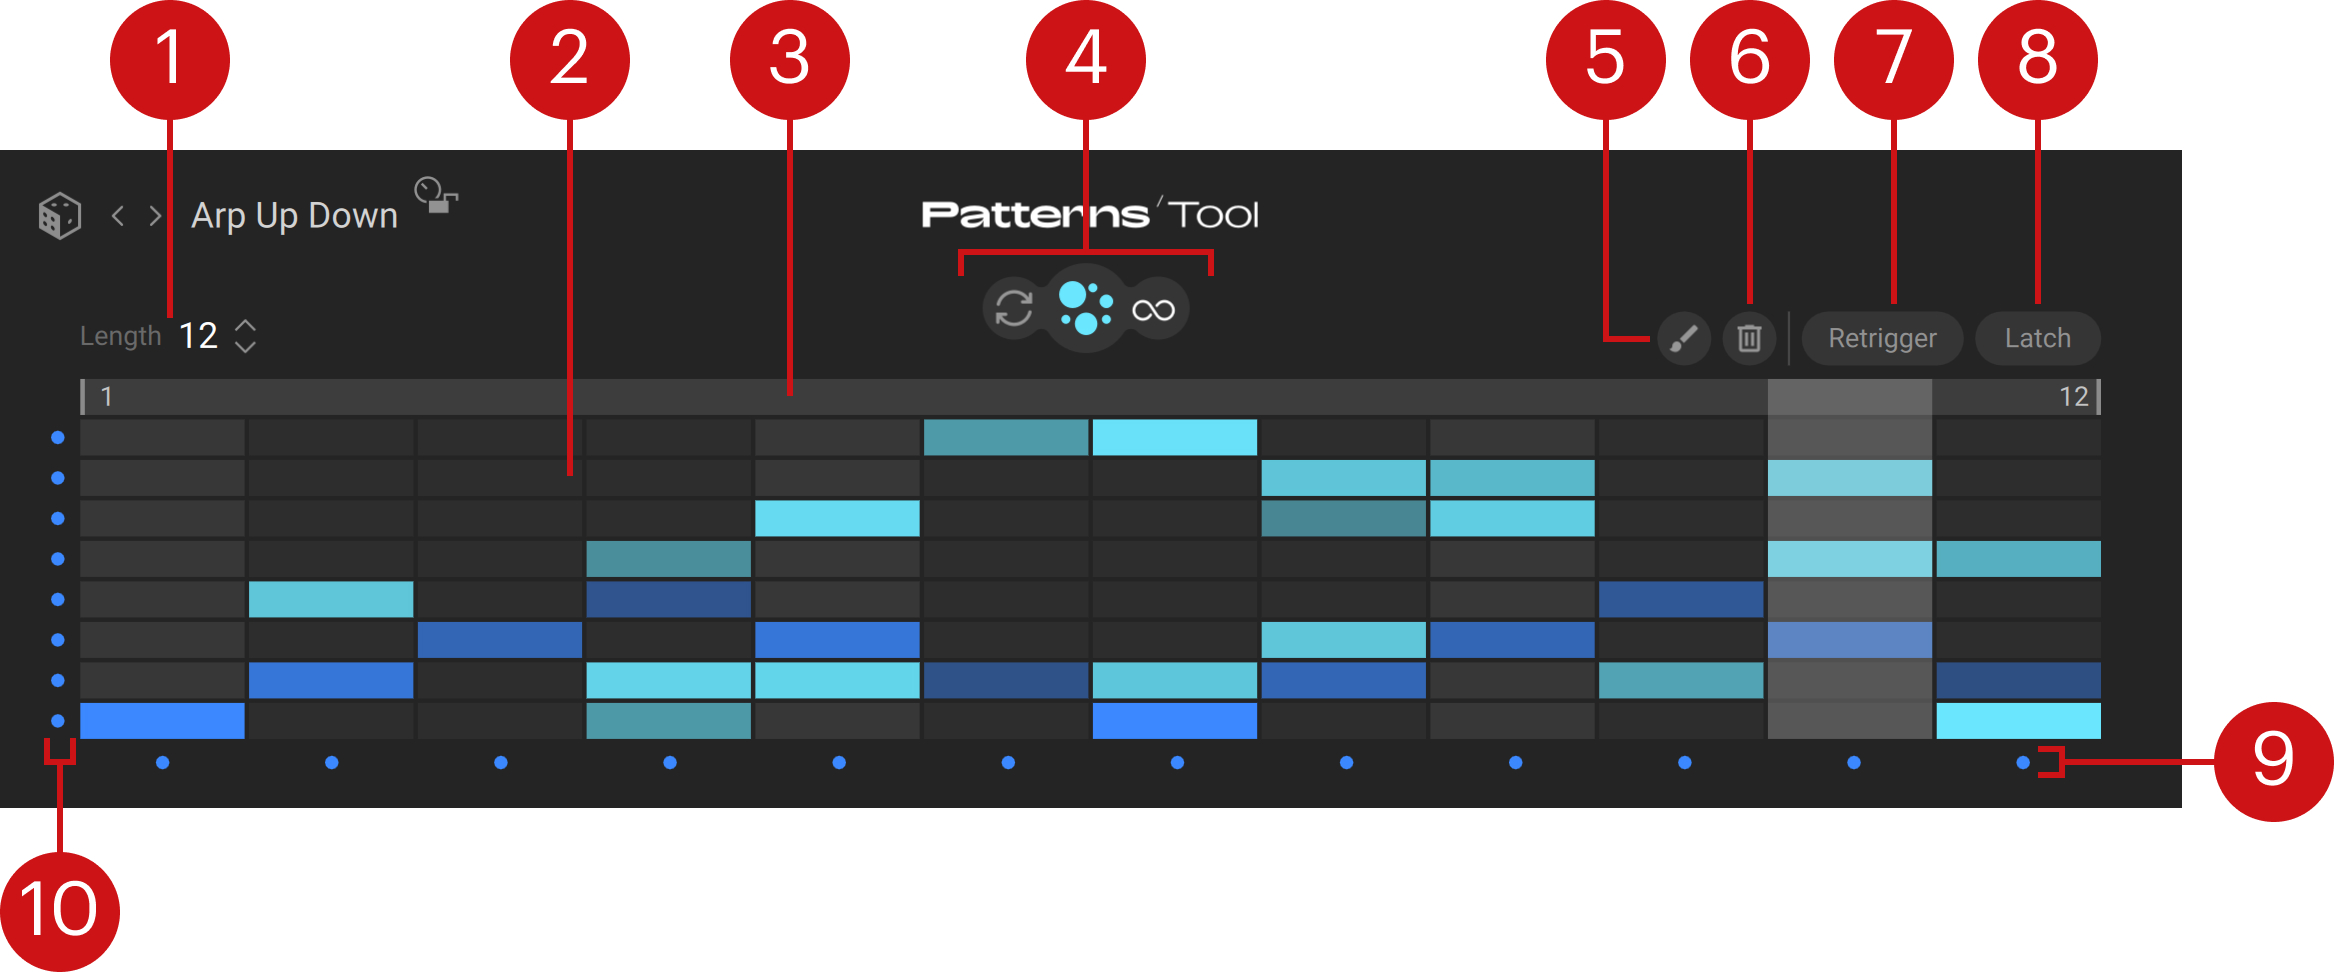
Length: Adjusts the number of steps in the pattern, from 1 to 32. You can click the up/down arrows to select the next/previous value, or click the value and drag your mouse vertically to adjust it in greater jumps. As you modify the pattern length, the step grid below is updated accordingly. Changing the pattern length does not delete any notes: If some notes disappear from the step grid as you shorten the pattern, they will reappear as soon as you lengthen it again.
Step grid: Shows the pattern’s notes on a grid. The horizontal axis represents the time flowing from left to right, each division corresponding to one step of the pattern. The downbeats have a lighter background for easier reference. The vertical axis represents the eight pitches available, in ascending order from the bottom to the top. The notes are represented by cells on the grid: The blue cells represent the standard notes (whether loaded with the pattern or created by you), and the turquoise cells represent the additional, random drops. The cell length indicates the note duration and its color intensity indicates the note velocity (pale colors for lower velocities, intense colors for higher velocities). The current play position is indicated by a lighter vertical segment traveling from left to right during playback. You can create, modify, and delete notes with your mouse as described in Mouse actions in the step grid.
Play Range: Indicates the portion of the pattern selected for playback. The Patterns Tool will play this range in loop, while areas of the step grid outside this range are grayed out and ignored. You can adjust the Play Range’s start or end by clicking and dragging its left or right border horizontally. You can also move the entire range by clicking anywhere between its borders and dragging your mouse horizontally. The start step and end step are indicated next to the corresponding border.
Drops buttons: Control the drops, which are optional, random notes dropped onto your pattern. Drops appear in turquoise in the step grid. The following buttons are available: In the middle, the bigger Drops on/off button activates or deactivates the drops. When you activate the drops for the first time, they are automatically generated. On the left, the Renew button (showing two cycling arrows) lets you manually generate a new set of drops that will immediately replace the current drops in the pattern. On the right, if you activate the Auto Renew button (showing an infinite icon) the drops will be automatically renewed each time the pattern is looped.
Paint Mode button (paintbrush icon): Activates or deactivates the Paint mode for the mouse actions in the step grid.
Clear button (recycle bin icon): Removes all the notes from the pattern and resets all the Step and Pitch switches to their default active state, leaving an empty pattern where you can build a new sequence from scratch.
Retrigger: When Retrigger is off (default setting), the pattern starts from the beginning as you press the first key and goes on looping until you release the last held key. When Retrigger is on, the pattern restarts from the beginning for every new key that you press.
Latch: When Latch is off (default setting), the pattern is played in loop as long as you hold some keys. When Latch is on, the pattern goes on looping even if you release all the keys. You can stop the pattern by clicking the active Latch button.
Step on/off switches: Each little dot below the step grid lets you activate or deactivate the notes triggered on the step directly above. By default, all the dots are blue, indicating that all the steps are active. Clicking any dot will turn it off and deactivate the step above it, muting all the notes that start on that step (the column will turn gray). Deactivating a step only affects the note triggers: Notes that were triggered at earlier steps will not be affected, even if they might still produce a sound.
Pitch on/off switches: Each little dot left of the step grid lets you activate or deactivate the notes at the pitch directly on the right. By default, all the dots are blue, indicating that all the pitches are active. Clicking any dot will turn it off and deactivate the pitch right of it, muting all the notes at that pitch (the row will turn gray). Deactivating a pitch only affects the note triggers: Notes at that pitch that were triggered before you deactivate the pitch will not be affected, even if they might still produce a sound.
Mouse actions in the step grid
The available mouse actions in the step grid depend on the current editing mode, which is set by the Paint Mode button (showing a paintbrush icon) above the step grid:
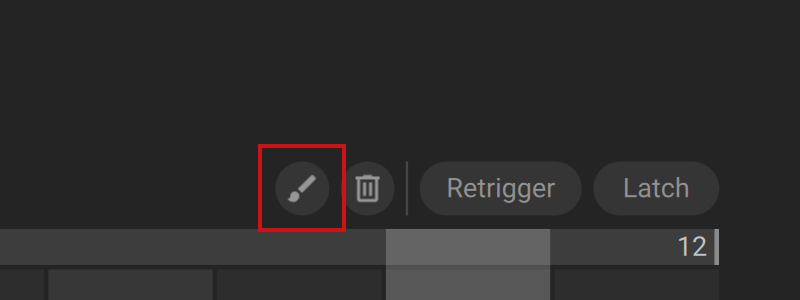 |
In default mode (Paint Mode button off), you can:
Click in the first step of a note to delete it. If the note is longer than one step, clicking at a later position in the note will cut off its tail and create a new note on that step.
Click in the first step of a note and drag your mouse horizontally to adjust the note length, and vertically to adjust the note velocity.
Click an empty division to create a note on that step. You can hold the mouse button depressed and drag your mouse to the right to adjust the note length and vertically to adjust the note velocity.
In Paint mode (Paint Mode button on), you can:
Click an empty division to create a note on that step. You can hold the mouse button depressed and drag your mouse in any direction to quickly create multiple notes at once (the mouse cursor then shows an additional paintbrush icon).
Click a note to delete it. You can hold the mouse button depressed and drag your mouse in any direction to quickly delete multiple notes at once (the mouse cursor then shows an additional trash bin icon).
Note
You cannot edit the turquoise notes, which are the additional, random drops.
Pattern parameters
The row of controls at the bottom of the Patterns Tool lets you adjust various aspects of the pattern. It contains the following elements:

Sync button (metronome icon): When Sync is on, the pattern’s tempo and play position are in sync with Kontakt’s main tempo (which is the tempo of your DAW if Kontakt is running as a plug-in). When Sync is off, the pattern is played independently from any external clock.
Rate: Adjusts the size of the steps in the grid, which directly affects the playback speed: the shorter the steps, the faster the playback. When Sync is off, the Rate values are measured in milliseconds and range from 100 ms to 1000 ms. When Sync is on, the Rate values are measured in note values from 1/32 (1/32nd note) to 1/1 (whole note) relatively to Kontakt’s main tempo. Within this range, the values with a D refer to dotted notes and the values with a T refer to triplets.
Duration: Globally adjusts the lengths of all notes relatively to their original lengths. The available values range from 50 % (half of the original lengths) to 150 % (1.5 x the original lengths). For values above 100 %, the notes continue playing onto the next step: If the next step also contains a note at the same pitch, this note will not be triggered, which can radically (but still musically) change the playback.
Velocity: Globally adjusts the velocities of all notes relatively to their original velocities. The available values range from 1 % to 200 %. Clicking the little up arrow above the knob opens the Velocity settings, where you can configure the note velocities more in detail.
Octave: Transposes the notes by 1, 2, or 3 octaves downward or upward. Since the transposed notes will be processed by the Key Output Range afterwards, moving the Octave knob further away from its middle position will tend to accumulate the notes near the lower or upper limit of the Key Output Range.
Key Output Range: Defines the key range in which notes can be triggered. If a note of the pattern has a pitch outside this range, its closest octave equivalent inside the range will be played instead. The keyboard visualization indicates in blue the notes that are effectively played. You can adjust the Key Output Range in various ways: You can adjust its lower or upper limit by clicking and dragging its left or right border horizontally, you can move the entire range by clicking anywhere between its borders and dragging your mouse horizontally, or you can adjust its lower and upper limits using the two key fields below: In these fields, you can click the up/down arrows to select the next/previous key value, or click the value and drag your mouse vertically to adjust it in greater jumps.
Playback Direction selector: Selects the direction in which the pattern will be played. From left to right, the four available settings are Forward (default setting), Backward, Ping-pong (forward and backward), and Shuffle (the playhead randomly jumps through the pattern).
Swing: Adjusts the swing amount. The swing adds a variable delay to every second note (or every second and third notes if Sync is on and Rate is set to a triplet value), which produces the shuffle effect commonly used in jazz music, for example.
Humanize: Adds some random imprecision when triggering the notes, which makes the pattern sound more human. Turning the knob to the right increases the likelihood of the inaccuracies. Clicking the little up arrow above the knob opens the Humanize settings, where you can adjust how various characteristics of the notes should be humanized.
Note
The Move Pattern control at the far right is not a pattern parameter. Instead, if shifts all the notes in the pattern. For more information on this control, refer to Patterns overview.
Velocity settings
The velocity settings let you adjust additional velocity details.
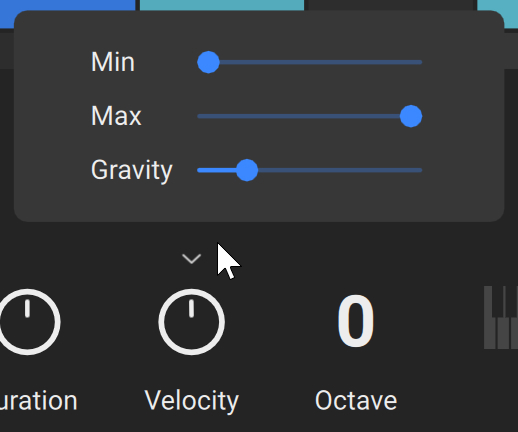 |
Min: Adjusts the minimum velocity of the notes.
Max: Adjusts the maximum velocity of the notes.
Gravity: Adjusts an extra velocity accent applied to the notes on the downbeats (the columns with a lighter background in the step grid). Higher Gravity values will additionally decrease the velocities of the remaining, non-accented notes.
Humanize settings
The Humanize settings let you specify different amounts of random inaccuracies for various characteristics of the triggered notes.
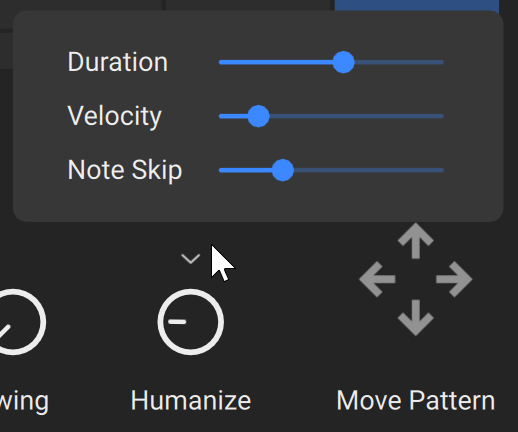 |
Duration: Adjusts the amount of inaccuracies in the length of the notes. As you drag the slider to the right, the individual notes in the pattern tend to last longer or shorter as their original length.
Velocity: Adjusts the amount of inaccuracies in the velocity of the notes. As you drag the slider to the right, the individual notes can get louder or softer as their original velocity.
Note Skip: Adjusts the amount of inaccuracies in the note trigger. As you drag the slider to the right, more notes tend not be skipped.
Phrases Tool
The Phrases Tool allows you to play musical phrases on your Kontakt Instruments by pressing a single key. The Tool provides you with a vast collection of phrases judiciously grouped into phrase sets. Each phrase set includes seven phrases. You can browse the available phrase sets and select the desired musical characteristics to find the matching sets. When you load a phrase set into the Tool, its seven phrases are directly available on dedicated keys of your MIDI keyboard. You can quickly adjust various characteristics of the played phrases, for example their playback behavior, the keyboard mapping, the scale, the velocities, pitches, and timings of the individual notes, etc. You can also replace single phrases with ones from other sets to create your own custom sets.
Note
For more information on saving your custom sets, refer to Saving a User preset.
Phrases overview
The Phrases Tool contains the following elements:
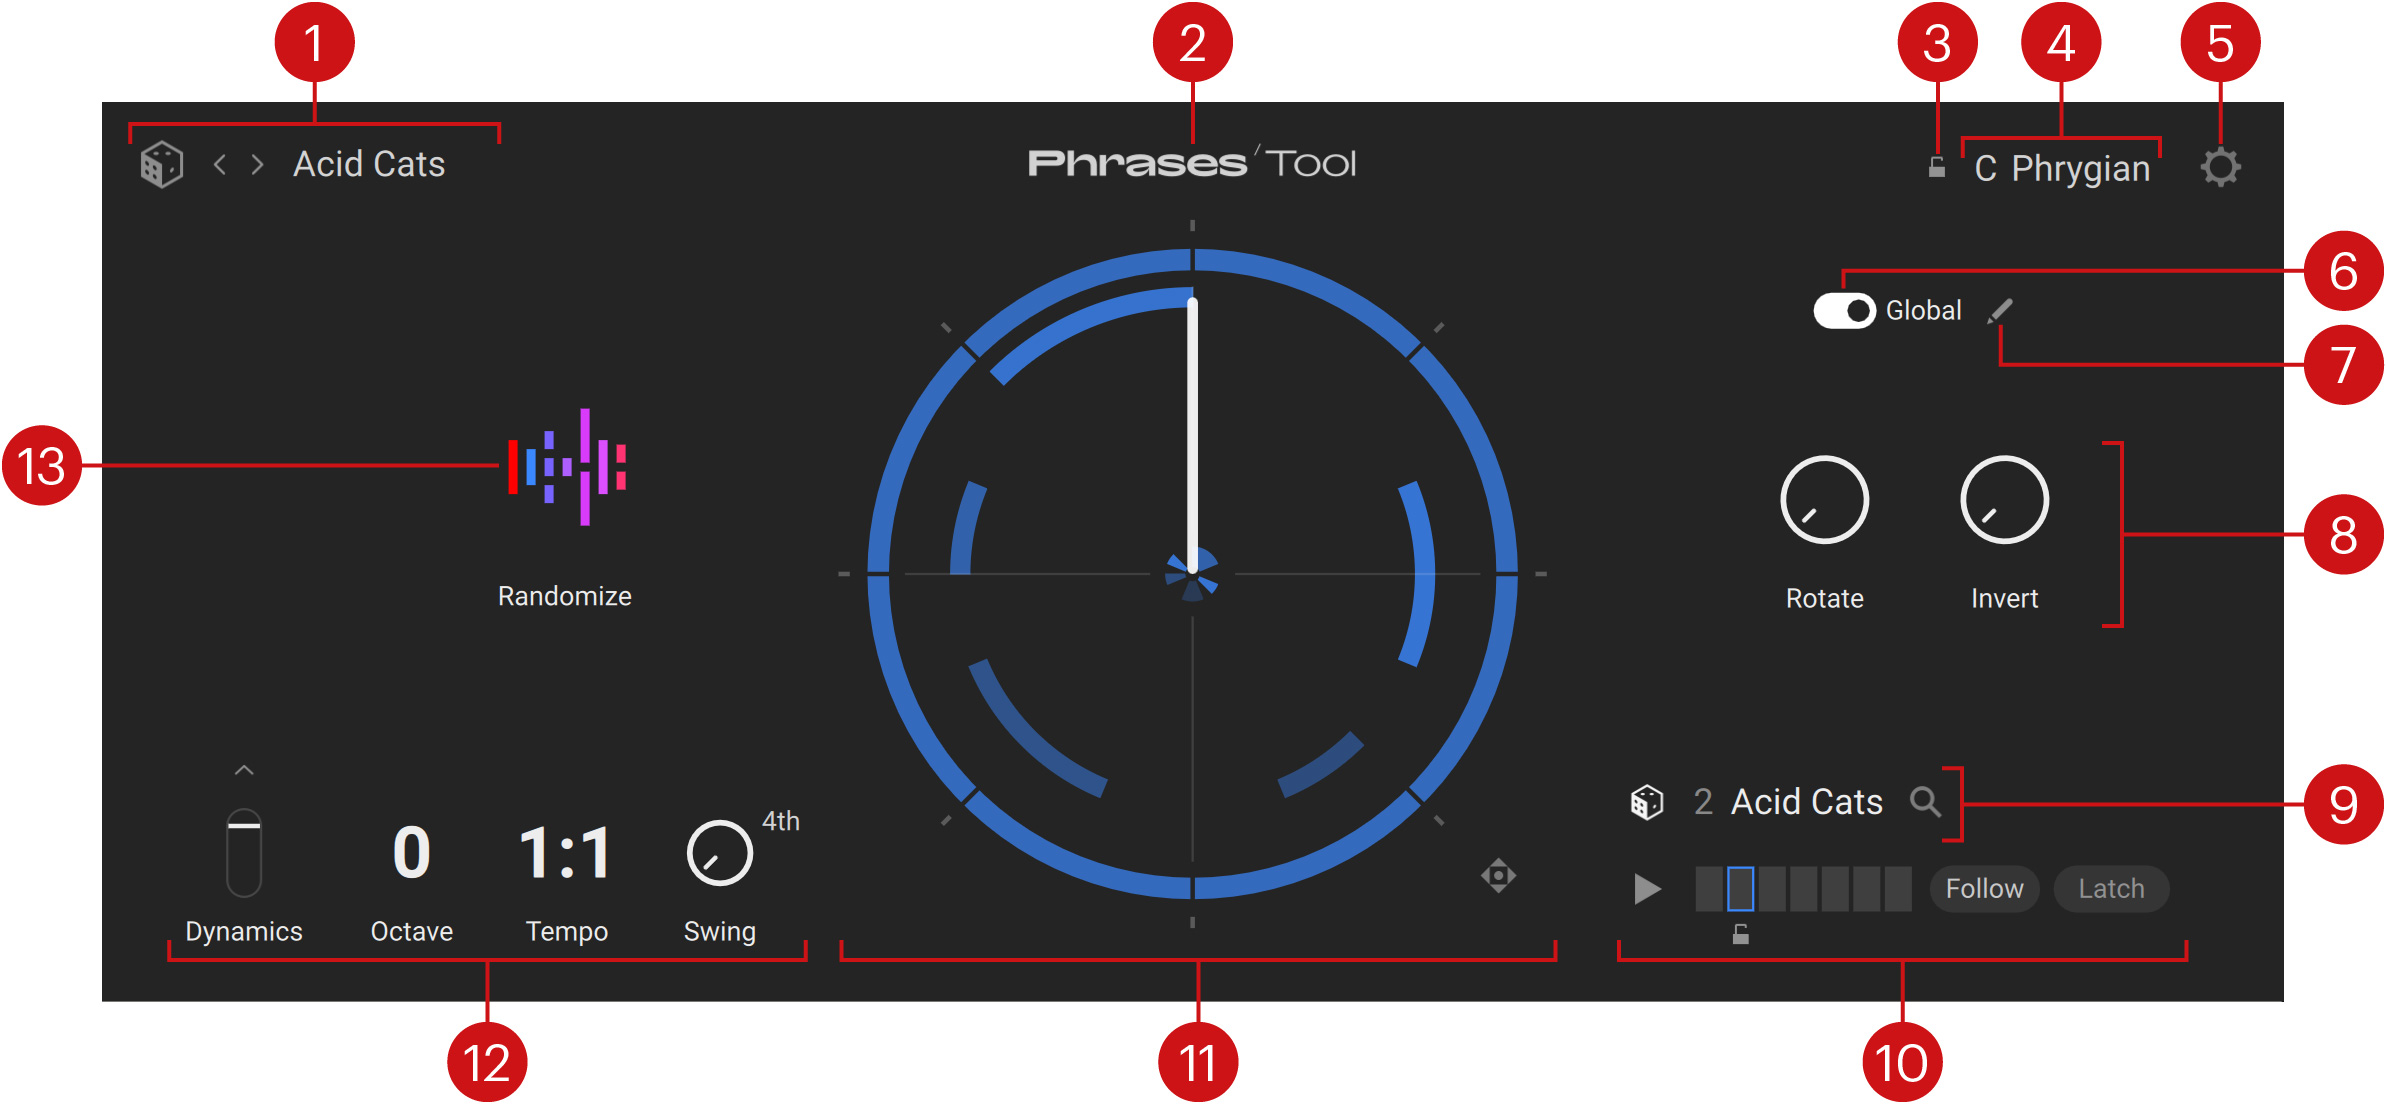
Phrase Set selector: Shows the name of the loaded set of phrases. You can click the name to open the Phrase Set browser and select another set, click the left/right arrows to load the previous/next set from the current result list, or click the dice to load a random set from the current result list. Each phrase set contains seven phrases and a particular scale. By default, when you load the phrase set its phrases and scale will replace the current phrases and current scale.
About: Click the Tool name to open the credits.
Scale Lock: Keeps the current scale when loading another phrase set. This only works when loading phrase sets using the Phrase Set selector or the Phrase Set browser, not from Kontakt’s side pane nor Library Browser.
Scale selector: Shows the current scale. You can select another scale by clicking the selector and choosing a root note and a scale mode from the menu. The seven available phrases will automatically adapt to match the keys in the selected scale.
Settings: Opens the Settings page.
Global: Defines the scope of your adjustments on certain parameters. When Global is on (switch to the right), the concerned parameters have no color and your edits apply globally to all the phrases in the set. When Global is off (switch to the left), these parameters mirror the color of the selected phrase and your edits apply only to that phrase.
Edit (pen icon): Switches to the Phrase Edit mode. The Phrase Edit mode lets you adjust the phrase characteristics in detail: playback, timings, pitches, and velocities.
Quick Edit controls: Shortcuts for two controls from the Phrase Edit mode:
Rotate: Delays the entire phrase by an adjustable amount. The circular score of the Phrase Wheel shows the delay by rotating all the notes.
Invert: Switches the pitches between the notes used in the phrase. For example, the first inversion will transpose the lowest pitch to the 2nd-lowest pitch, the 2nd-lowest to the 3rd-lowest, … , the 2nd-highest pitch to the highest, and the highest pitch to the lowest. When turning the knob to the right from its default position at full left (no inversion), you will successively activate every inversion possible. The more pitches are used in the phrase, the more inversions will be available.
Phrase selector: Shows the name of the phrase loaded in the selected slot. Clicking the name or the magnifying glass opens the Phrase browser, which lets you select and load another phrase into that slot. You can also click the dice to load a random phrase from the current result list.
Phrase Slot selector: Selects a slot from the set and provides additional controls affecting the phrase selection. Refer to Phrase Slot selector for more information.
Phrase Wheel: Visually represents the note sequence in the selected phrase. Refer to Phrase Wheel for more information.
Tool Playback controls: Adjust the global playback behavior of the Phrases Tool. Refer to Tool Playback controls for more information.
Randomize: Set random values to most time, pitch, and velocity parameters of the phrase(s). These include the Rotate and Invert knobs in the Quick Edit controls on the right. The remaining parameters are available in the Phrase Edit mode.
Phrase Set browser
The Phrase Set browser lets you replace the seven loaded phrases at once with a fresh phrase set from the factory library.
The Phrase Set browser contains the following elements:
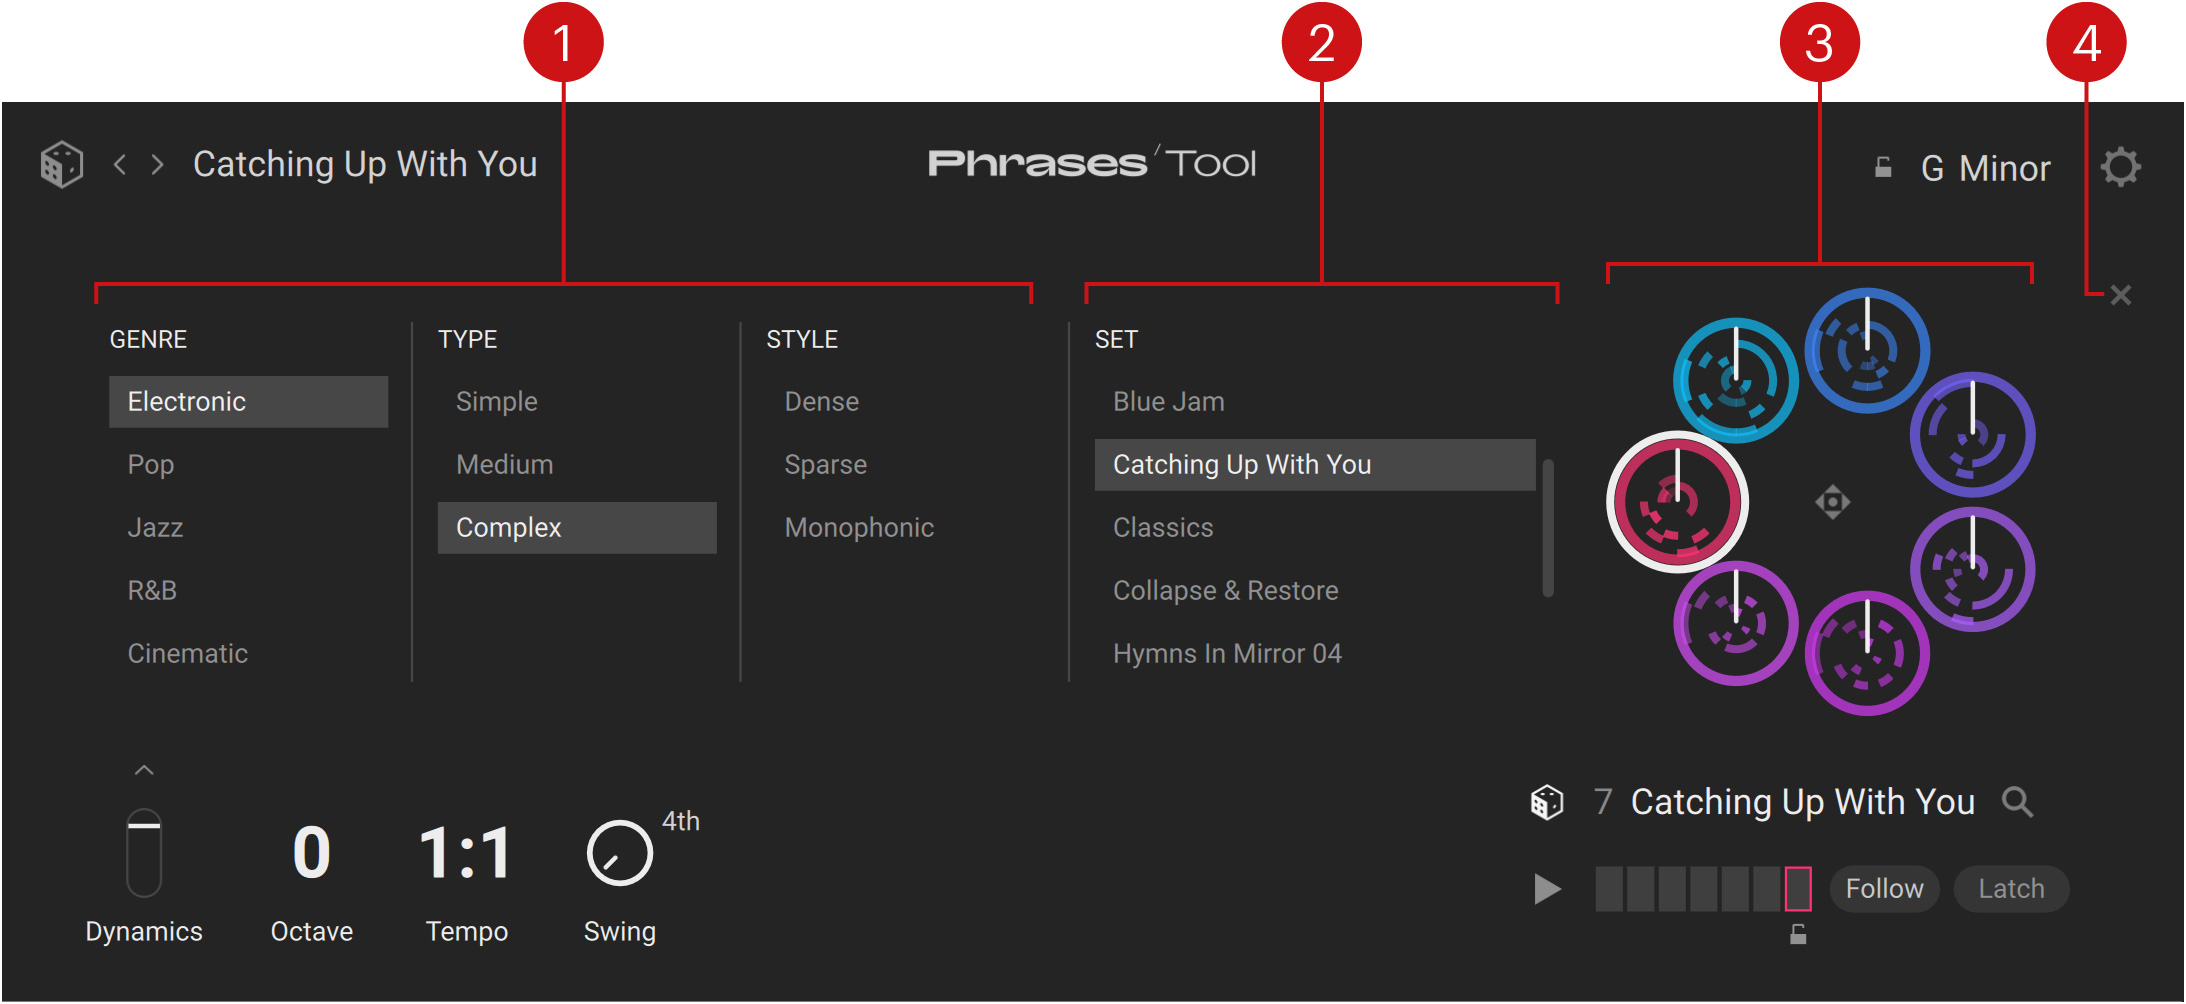
Tag filter: You can click the desired tags from the Genre, Type, and Style columns to select or deselect them. The Set list on the right is updated accordingly.
Set list: Shows the sets matching your selections in the Tag filter. You can click a set in the list to load it and replace the current set.
Phrase Set Preview: Displays previews of the seven phrases in the selected set. The previews are inspired by the Phrase Wheel displayed in the middle of the Tool interface. The preview with a white frame indicates the phrase currently selected. The Phrase Set Preview includes an Export handle in the middle: You can click it and drag it to export the entire set into your DAW.
Close (cross symbol): Closes the browser.
Phrase Wheel
The phrase is shown as a sequence of notes (or pattern) on a circular score:
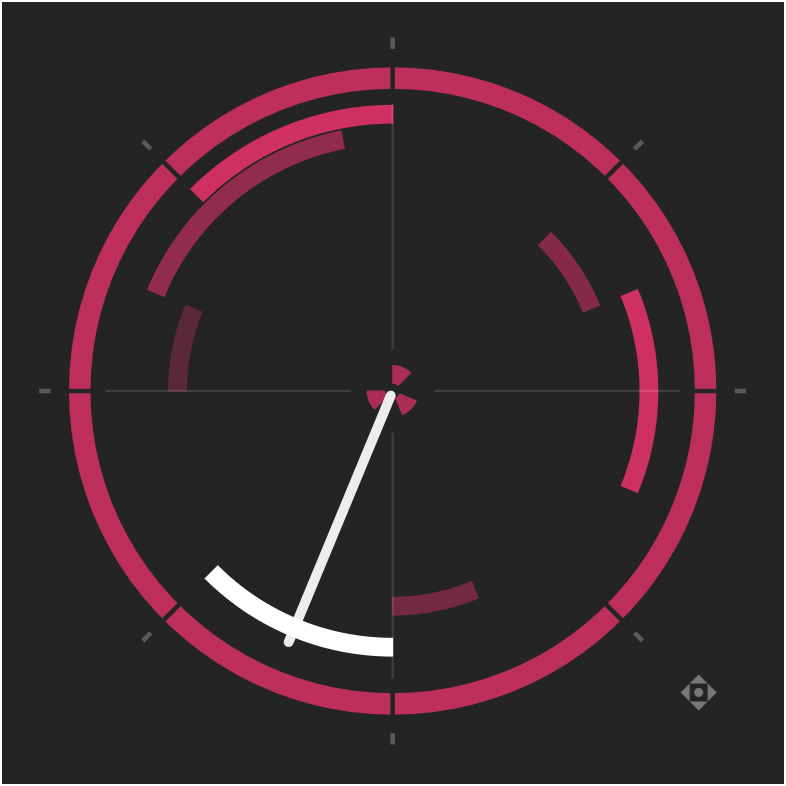 |
Each note appears as a curved segment with the following properties:
Its color intensity indicates the note velocity.
Its distance to the center indicates the note pitch.
Its angular position indicates the note timings (note start and end).
The playback starts at the top and progresses clockwise up to one full circle, corresponding to one bar. The white hand represents the playhead: As it reaches a segment, that note is triggered and plays until the playhead reaches the segment end.
By default, a phrase plays from the beginning to the end of the sequence (one full circle). By clicking anywhere on the wheel and dragging your mouse vertically, you can adjust the end point of the phrase: In the sequence, the notes starting after the end point are grayed out and will not play. However, earlier notes that are still sounding will continue to play until their end.
The Phrase Wheel provides two additional controls:
Reset (top left of the Phrase Wheel): Cancels any changes that you have made to the phrase(s) and returns to the factory version. The Reset button appears only if you have modified the phrase.
Export handle (bottom right of the Phrase Wheel): Click and drag to export the phrase into your DAW.
Phrase browser
The Phrase browser lets you replace the selected phrase with a fresh one from the factory library.
The Phrase browser contains the following elements:
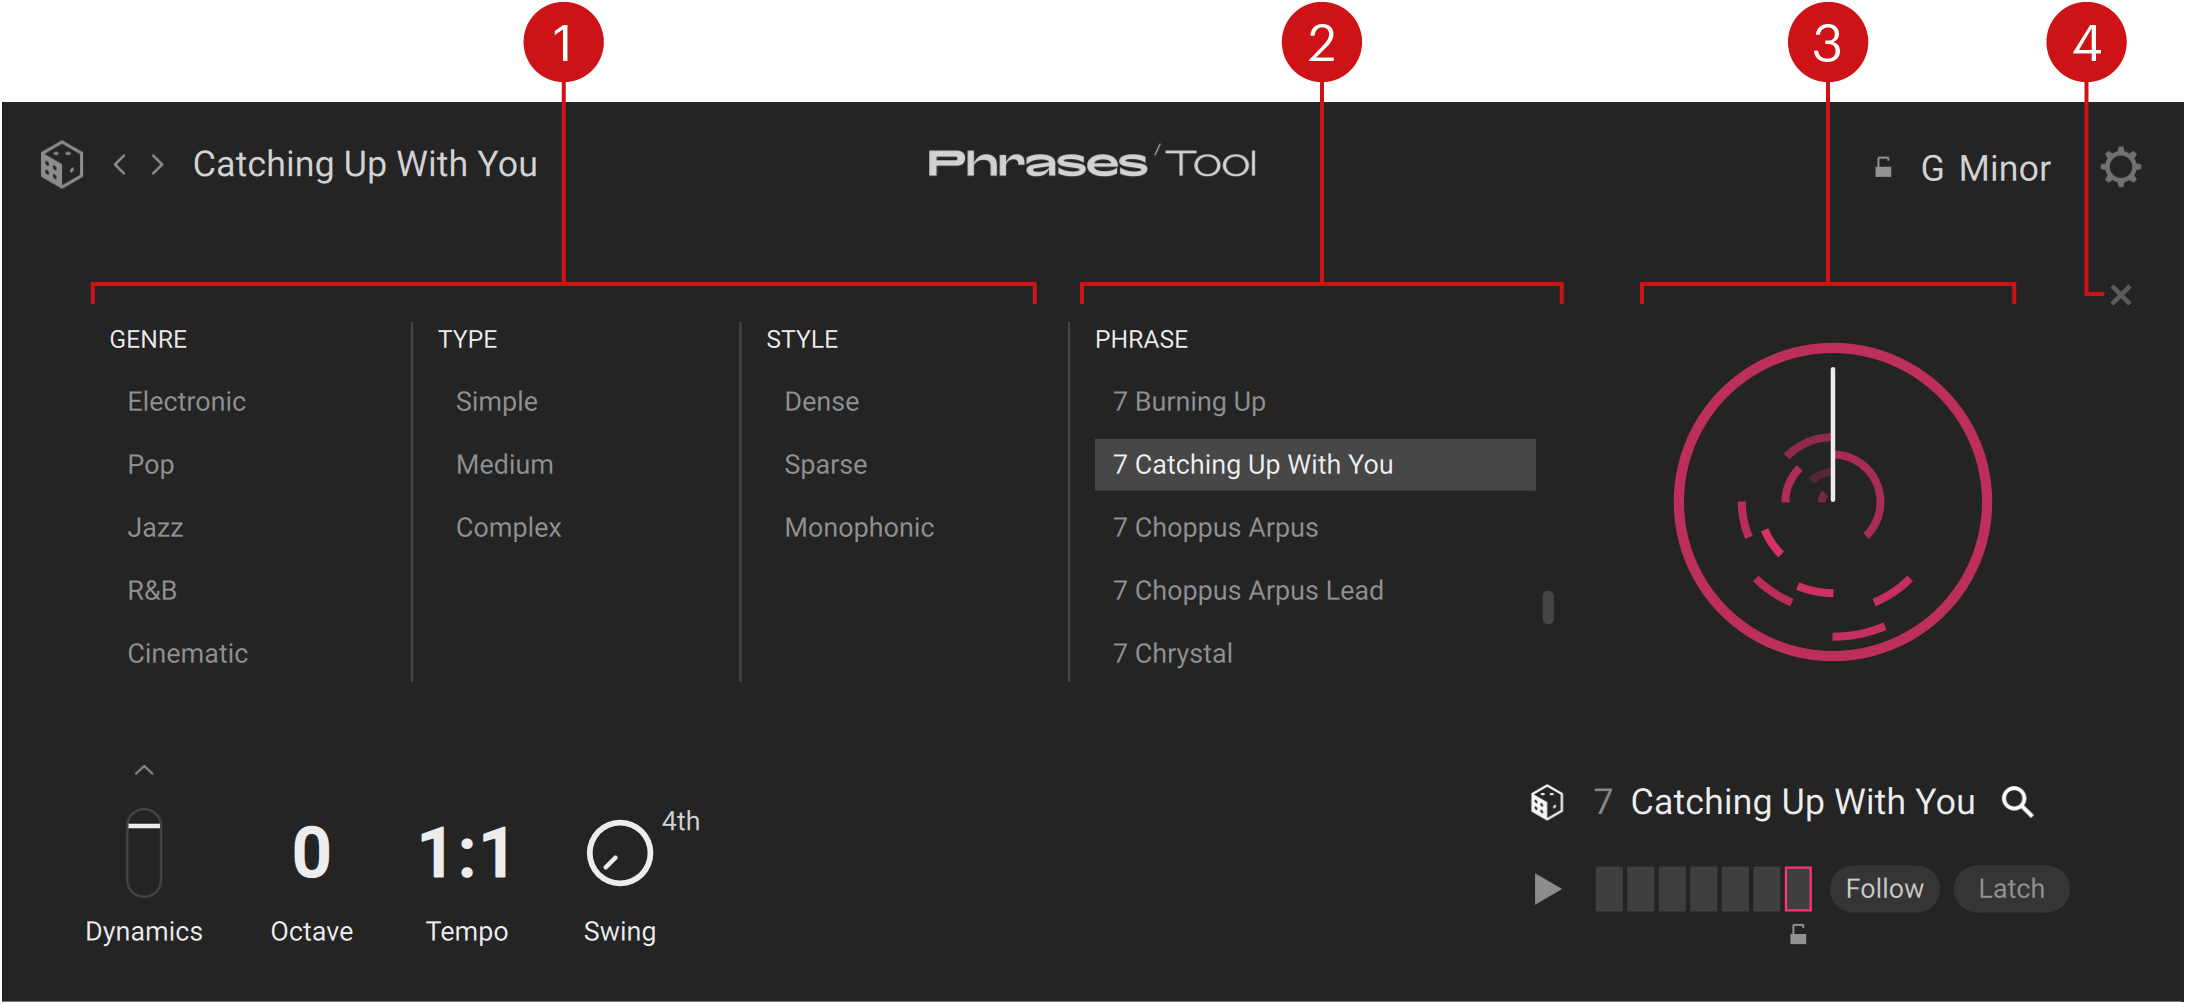
Tag filter: You can click the desired tags from the Genre, Type, and Style columns to select or deselect them. The Phrase list on the right is updated accordingly.
Phrase list: Shows the phrases matching your selections in the Tag filter. You can click a phrase in the list to load it and replace the selected phrase.
Phrase Preview: Displays a preview of the selected phrase. The preview is inspired by the Phrase Wheel displayed in the middle of the Tool interface.
Close (cross symbol): Closes the browser.
Phrase Slot selector
The Phrase Slot selector contains the following elements:
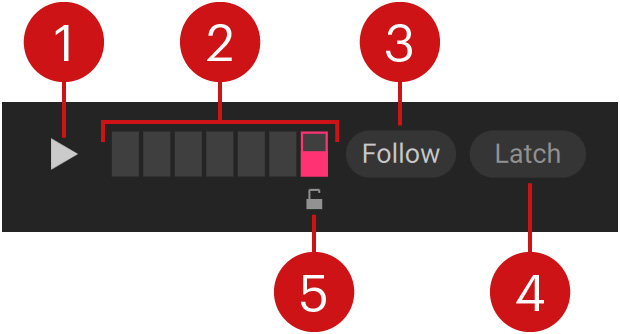 |
Play: Toggles the playback of the selected phrase on or off. When Play is on, selecting another slot automatically triggers its phrase.
Phrase slots: Selects a phrase from the current set. The selected slot is highlighted, its phrase is displayed in the Phrase Wheel, and you can edit its settings. Each phrase slot has its own color, which is mirrored in various places of the Tool to indicate the controls affecting that phrase specifically. When the phrase is playing, a vertical progress bar runs on the slot to indicate the play position in the phrase.
Follow: If this is on, you can select phrases by pressing their key on your MIDI keyboard. If this is off, the keys trigger the phrases without selecting them.
Latch: Selects between two playback behaviors when triggering phrases via MIDI. If Latch is off, the triggered phrase will play as long as you hold the key depressed and stop when you release the key. If Latch is on, the phrase will go on playing until the end even if you have released the key.
Lock (below the selected slot): Keeps the current phrase in that slot when you load another phrase set. You can lock several slots in your set. You can use the lock to keep interesting phrases as you browse the available phrase sets, progressively composing your own set of phrases.
Tool Playback controls
The Tool Playback controls adjust the global playback behavior of the Phrases Tool. The values for these controls are not stored in the sets. Hence, your custom settings stay valid when switching between sets.
The following controls are available:
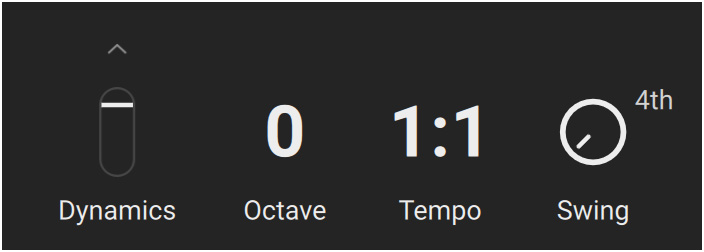 |
Dynamics: Adjusts the overall velocity of the phrases.
Dynamics Source menu (little up arrow above the Dynamics knob): Selects the source used to control the dynamics. You can select Velocity to use the velocity at which you press the keys, Modwheel (CC1) to use the modulation wheel on your MIDI keyboard, or Velocity + Modwheel to use both simultaneously.
Octave: Transposes the playback by octaves up to three octaves downward or upward.
Tempo: Sets the playback tempo to the double value (2x), the same value (1:1), or half the value (1/2) of Kontakt’s main tempo. If Kontakt is running as a plug-in in your DAW, its main tempo is defined in your DAW. If Kontakt is running as a standalone application, its main tempo is defined in the Master Editor.
Swing: Adjusts the swing amount. The swing adds a variable delay to the notes in the second half of a chosen time division (usually the quarter note), which creates the shuffle effect commonly used in jazz music, for example.
Step Size menu: Selects the time division used for the Swing. The default value (4th) corresponds to the quarter note. The available values range from 1/1 (whole note) to 16th (sixteenth note).
Phrase Edit mode
By activating the pen icon, you switch the Phrases Tool to Phrase Edit mode. In Phrase Edit mode you can modify the current phrase or the entire set more in detail. For this purpose, additional sections of parameters show up on either side of the Phrase Wheel:
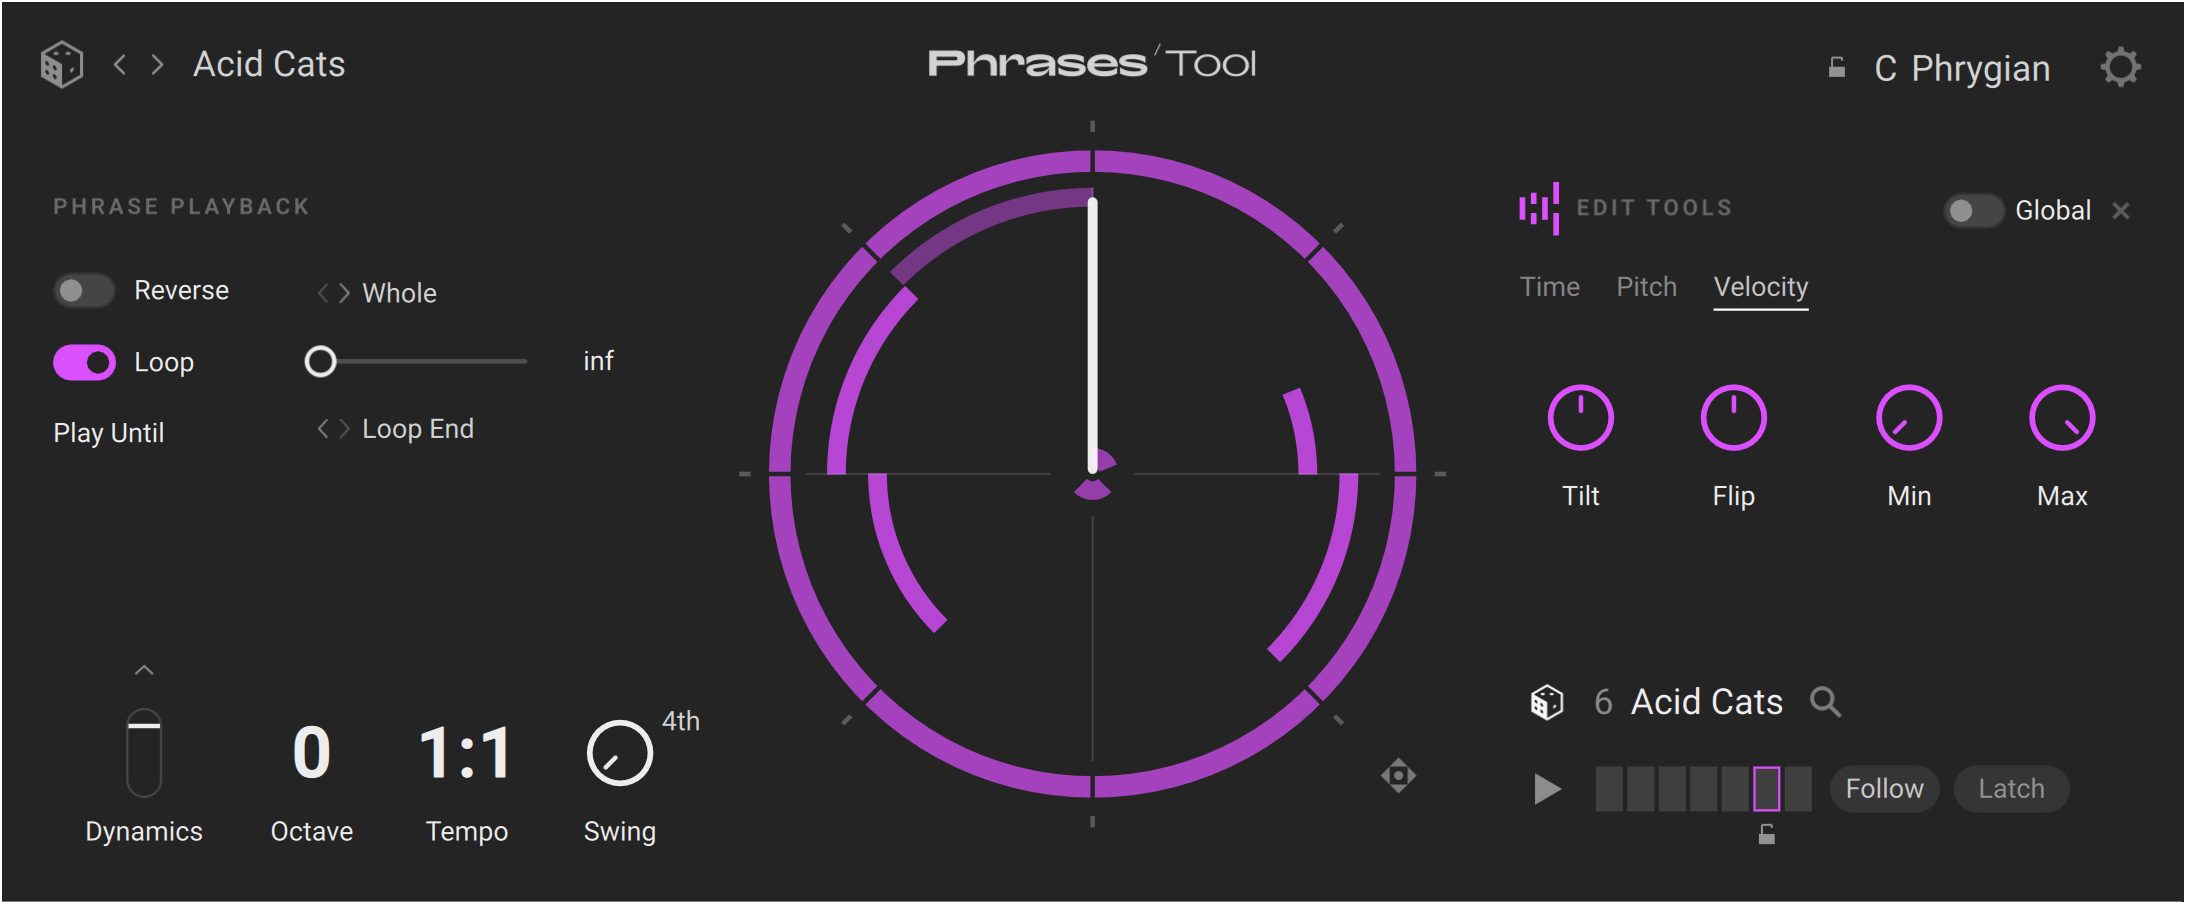
On the left, the Phrase Playback section lets you configure the playback behavior of the phrase(s).
On the right, the Edit section lets you adjust the timings, pitches, and velocities of the notes in the phrase(s).
Phrase Playback section
In the Phrase Playback section you can configure the playback behavior of the selected phrase or of the entire set.
The Phrase Playback section contains the following controls:
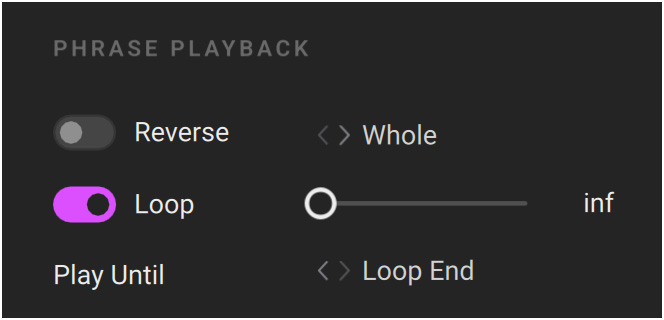 |
Reverse switch: Turns the reverse playback on or off.
Reverse Range menu: Selects the part of the phrase(s) that should play in the reverse direction, the remaining part playing forward. This control affects the playback only if the Reverse switch is on. The available entries are Whole (the whole phrase plays reverse), First Half (first half reverse, second half forward), Second Half (first half forward, second half reverse), and Both Halves (first half reverse, then second half reverse).
Loop switch: Turns the looped playback on or off.
Repetitions slider: Specifies how many times the phrase(s) should be looped. This control affects the playback only if the Loop switch is on. With the slider at full left (inf, default value), the playback is looped forever. The remaining values range from 1 to 99.
Play Until menu: Selects where the loop should end and jump back to the beginning. This control affects the playback only if the Loop switch is on and if the phrase’s play range is shorter than a full cycle (see Phrase Wheel). Two entries are available from the menu:
Pattern End: The whole sequence (full circle) is looped, including any grayed out notes and the resulting silent part. For example, this setting is useful to preserve the loop length and keep the Tool in sync with other instruments in your DAW.
Loop End: Only the audible phrase is looped. If the phrase is shorter than a full circle, the loop will be shorter as well.
Edit section
In the Edit section you can change the timings, pitches, and velocities of the notes in the selected phrase or in the entire set.
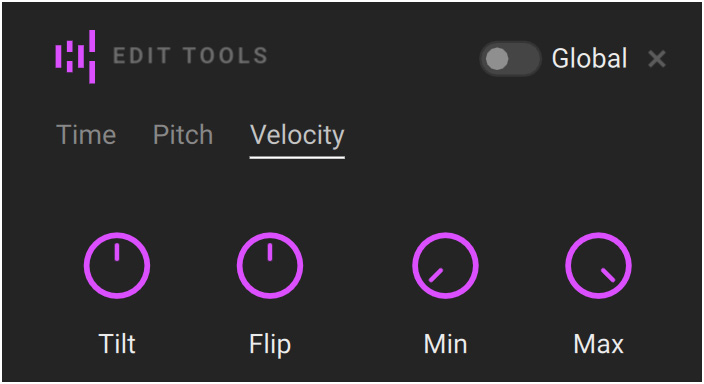 |
In the top row, the Edit section contains three elements, from left to right:
 |
Randomize button: Sets random values to all the continuous parameters from the Edit section. This button mirrors the bigger Randomize button available outside the Phrase Edit mode. If the Global switch on its right is on, the Randomize button shows all the phrase colors to remind you that it will affect all of them. If the Global switch is off, the Randomize button shows only the color of the selected phrase to indicate that it will affect only this phrase.
Global switch: Specifies whether your edits will apply to the seven loaded phrases (button on) or only to the selected phrase (button off). This button mirrors the Global switch available outside the Phrase Edit mode.
Close button (cross icon): Closes the Phrase Edit mode.
Note
For more information on the Randomize button and the Global switch outside the Phrase Edit mode, refer to Phrases overview.
Below, the Edit section contains three panels, which you can display by clicking the Time, Pitch, or Velocity tab at the top:
 |
The Time panel contains the following controls:
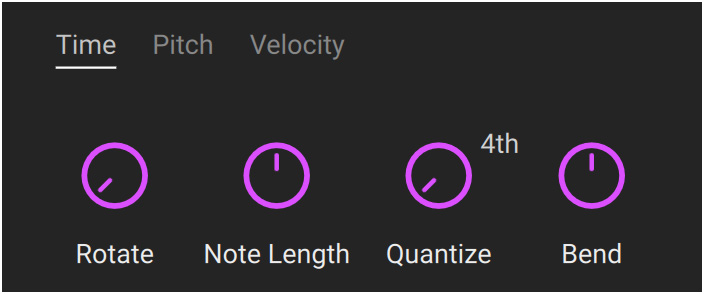 |
Rotate: Delays the entire phrase by an adjustable amount. All the notes rotate on the Phrase Wheel as you adjust the knob. This parameter is also available in the Quick Edit controls, available when the Phrase Edit mode is off.
Note Length: Shortens or extends the length of all notes by moving their end points.
Quantize: Adjusts the quantization applied to the notes. At full left (default setting), no quantization is applied. The more you turn the knob to the right, the closer the notes get from the time divisions selected in the Quantize Step menu.
Quantize Step menu: Selects the time division to which the notes can be quantized. The available values range from 1/1 (one whole note, corresponding to one full circle) to 16th (one sixteenth note).
Bend: Bends the time line toward the beginning or the end of the sequence. From the default center position (no bending), turning Bend to the left will speed up the beginning of the sequence and slow down its end, whereas turning it to the right will slow down the beginning of the sequence and speed up its end. In any case, the total duration of the sequence stays untouched.
The Pitch panel contains the following controls:
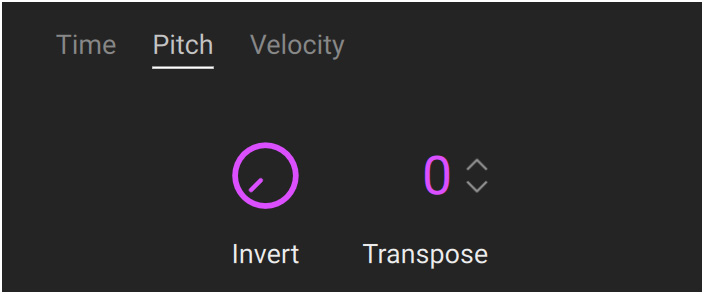 |
Invert: Switches the pitches between the notes used in the phrase. For example, the first inversion will transpose the lowest pitch to the 2nd-lowest pitch, the 2nd-lowest to the 3rd-lowest, … , the 2nd-highest pitch to the highest, and the highest pitch to the lowest. When turning the knob to the right from its default position at full left (no inversion), you will successively activate every inversion possible. The more pitches are used in the phrase, the more inversions will be available. This parameter is also available in the Quick Edit controls, available when the Phrase Edit mode is off.
Transpose: Transposes all the notes in semitones. The available values range from -12 to 12 semitones.
The Velocity panel contains the following controls:
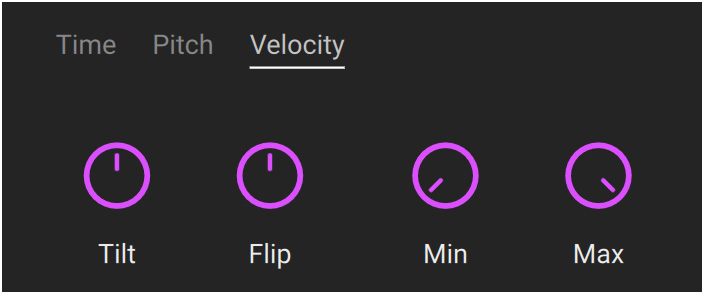 |
Tilt: Puts the velocities on a time slope centered on the current mean of all velocities. From the default center position, turning Tilt to the left uses a raising slope (early notes get softer and late notes get louder), while turning Tilt to the right uses a decreasing slope (early notes get louder and late notes get softer). The slope becomes steeper as you move the knob further away. For example, this tool is useful to create crescendos.
Flip: Modifies the gap between high and low velocities. From the default center position, turning Flip to the left accentuates the velocity differences between notes by amplifying the higher velocities and attenuating the lower velocities. The other way around, turning Flip to the right attenuates the higher velocities and amplifies the lower velocities: At first this reduces the velocity differences between notes, but turning the knob further to the right leads up to a complete velocity inversion, the soft notes being played loud and the loud notes softly.
Min: Adjusts the lowest velocity available. Increasing the Min value shrinks the range of available velocities upward. The possible values go from 0 (default value, knob at full left, no lower velocity limit) to 100 (all the notes are set to the maximum velocity).
Max: Adjusts the highest velocity available. Decreasing the Max value shrinks the range of available velocities downward. The possible values range from 100 (default value, knob at full right, no upper velocity limit) to 0 (knob at full left, all the notes are set to the minimum velocity).
Settings page
The Settings page provides global options affecting the behavior of the Tool and its response to your actions on the keyboard.
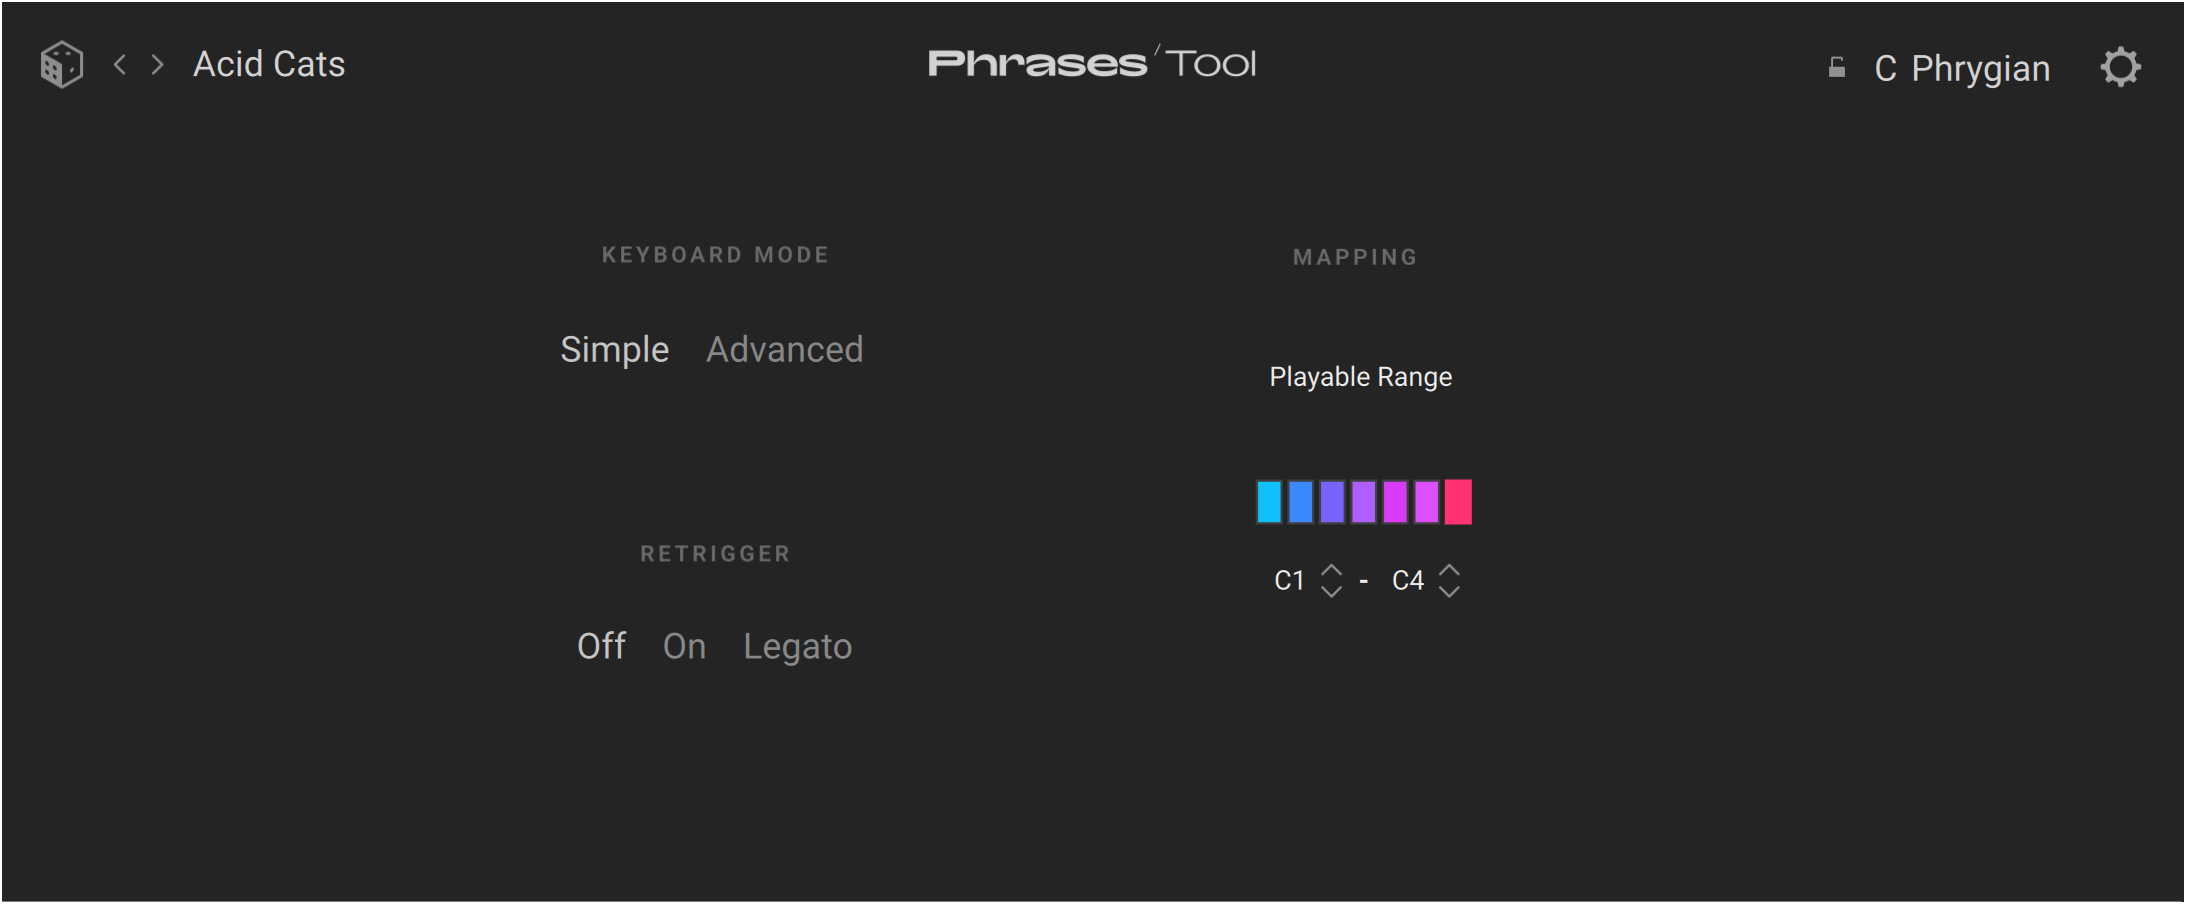
The following controls are available:
Keyboard Mode: Selects between two modes for triggering the phrases from your MIDI keyboard:
In Simple mode (default mode), within the range of playable keys, each white key triggers a different phrase from the set according to the key degree in the C scale: For example, the C keys trigger the first phrase of the set, the D keys trigger the second phrase, etc. The phrase pitch is set to the current root note (as specified in the Scale selector) in the octave of the pressed key. You can adjust the range of playable keys in the Mapping section.
In Advanced mode, distinct key ranges are used for selecting and triggering phrases. A one-octave range lets you select phrases (without triggering them) by pressing the white keys, using the same logic as in Simple mode: The degree of the pressed key in the C scale determines which phrase will be selected. A second key range lets you trigger the selected phrase at the desired pitch by pressing the corresponding black or white key. You can adjust both ranges in the Mapping section.
Mapping: Lets you adjust the range(s) used to control your phrases. The available parameters depend on the selected Keyboard Mode on the left:
In Simple mode, the Playable Range defines the keys that will trigger phrases. Keys outside this range will be inactive. You can adjust the lower or upper end of the range by clicking the corresponding note field and dragging your mouse vertically, or by clicking the little up and down arrows next to it. Above the fields, the slots mirror the colors of the triggered phrases.
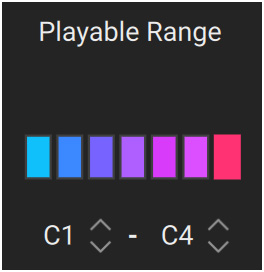
In Advanced mode, the Selection Range defines the one-octave range used for selecting the phrases (the range is defined by its base C key), and the Playable Range defines the range of keys that will trigger the selected phrase. You can adjust both ranges by clicking the note fields and dragging your mouse vertically, or by clicking the little up and down arrows next to the fields.
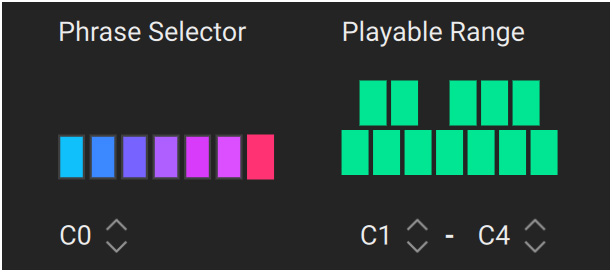
Retrigger: Specifies the transition between successive phrases. If you trigger a new phrase while the previous phrase is still playing, the following behaviors are available:
Off: The new phrase seamlessly takes over from the playback position of the previous phrase.
On: The new phrase starts from the beginning.
Legato: The new phrase takes over from the playback position of the previous phrase only if you are still pressing the previous key.
Scale Lock
Scale Lock maps the notes you play to a musical scale.
The Scale Lock Tool contains the following elements:
 |
Disable: Bypasses the Tool.
Key: Selects the root key of the scale.
Scale: Selects a scale to which all notes will be constrained to.
Incoming Note menu: Selects the behavior of incoming MIDI notes which do not fall within the selected scale.
Velocity Curve
Velocity Curve lets you fine-tune how Kontakt responds to the velocity values you play.
The Velocity Curve Tool contains the following elements:
 |
Disable: Bypasses the Tool.
Curve Types: Selects the type of basic velocity curve you want to use with your MIDI device.
Min/Max: Adjusts the minimum and maximum values for the velocities in the velocity curve.
Shape: Adjusts the convex or concave curve amounts of the velocity curve.
Panel: Displays the selected curve type along with its in and out velocity values.